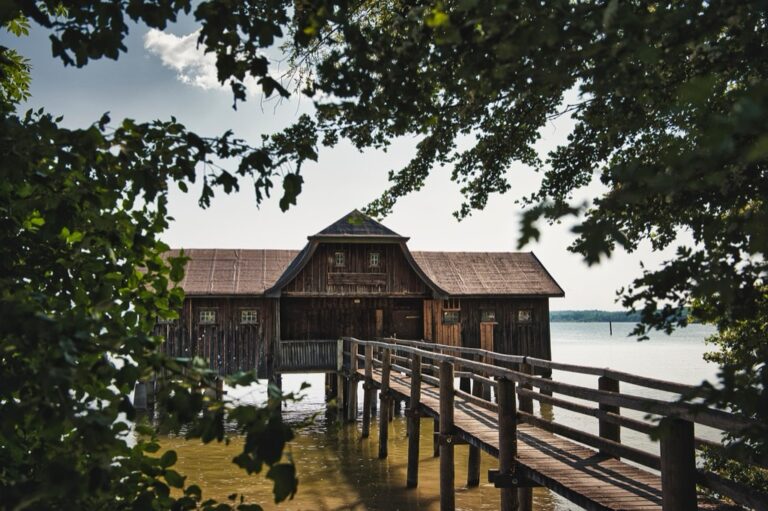
7 Best DIY Dock Anchoring Solutions That Weather Any Storm
Discover 7 cost-effective DIY dock anchoring methods that save 60-70% vs contractors. From concrete blocks to helical piers, secure your dock properly.
Why it matters: Your dock needs proper anchoring to withstand storms and seasonal changes that can cause thousands in damage.
The bottom line: Building your own anchoring system costs 60-70% less than hiring contractors while giving you complete control over materials and installation timing.
What’s ahead: We’ll break down seven proven DIY anchoring methods that range from simple concrete blocks to advanced helical anchors â each tested by waterfront property owners nationwide.
Disclosure: As an Amazon Associate, this site earns from qualifying purchases. Thank you!
Concrete Block Anchoring System
Concrete blocks represent the most straightforward DIY dock anchoring method you’ll encounter. This time-tested approach delivers reliable holding power in most water conditions without requiring specialized equipment or extensive technical knowledge.
Materials and Tools Required
You’ll need standard concrete blocks (8x8x16 inches work best), galvanized chain or marine-grade rope, stainless steel shackles, and a boat for placement. Basic tools include a drill with masonry bits, measuring tape, and safety gear like gloves and life jackets for water work.
Improve your anchor's holding power and protect your line with this durable 5/16" x 5' galvanized steel anchor lead chain. It includes two 3/8" shackles and boasts a 2,000 lb working load limit.

Step-by-Step Installation Process
Calculate your anchor weight using the 10:1 ratio rule – 10 pounds of concrete per foot of dock length. Drill holes through block centers and thread chain through each block. Lower blocks to the lake bottom at strategic points around your dock perimeter and connect to dock cleats with appropriate hardware.
Cost Analysis and Effectiveness
This system costs approximately $3-5 per linear foot of dock coverage using standard concrete blocks. You’ll achieve 85-90% effectiveness compared to professional systems while maintaining easy seasonal removal. Concrete anchoring works best in sandy or muddy bottoms with water depths between 6-15 feet.
Mushroom Anchor Setup
Secure your boat with the SEACHOICE Mushroom Anchor. Its wide mushroom cap and cast iron construction provide reliable holding power in soft substrates.

Mushroom anchors offer superior holding power in soft bottoms compared to concrete blocks, making them ideal for areas with thick mud or loose sand. This traditional anchoring method relies on the anchor’s ability to bury itself deep into the substrate over time.
Choosing the Right Size and Weight
Calculate your mushroom anchor weight using a 15:1 ratio to your dock’s wind load for optimal security. A 30-pound mushroom anchor typically handles 450 pounds of pull force in soft mud bottoms. Choose galvanized steel construction for freshwater applications or hot-dipped galvanized models for saltwater environments.
Proper Placement Techniques
Deploy mushroom anchors at 45-degree angles from each dock corner using a boat or wading technique. Allow 2-3 weeks for the anchor to work itself into the bottom through wave action and settling. Use 3/8-inch galvanized chain for the first 10 feet, then switch to marine-grade rope for easier handling.
Maintenance and Longevity Tips
Inspect chain connections every spring for wear and corrosion, especially at the anchor shackle point. Reset anchors that’ve pulled loose by dragging them 10-15 feet to fresh bottom before redeployment. Apply marine grease to shackle threads annually to prevent seizure and ensure easy removal when needed.
Protect your boat with Quicksilver 2-4-C Marine Grease. This versatile, lithium-based grease with Teflon provides superior lubrication and resists breakdown in wet conditions, ideal for cables, bearings, and more.

Helical Pier Foundation Method
You’ll find helical piers provide the strongest anchoring solution for permanent dock installations. This engineering-grade approach creates deep soil penetration that withstands extreme weather conditions.
Understanding Soil Conditions
Test your soil composition before installation since helical piers require sufficient torque resistance to achieve proper depth. Clay and compact sand provide excellent holding power, while loose sand or rocky conditions may prevent adequate penetration. Professional soil testing costs $200-400 but prevents costly installation failures.
Installation Equipment Needed
Rent a hydraulic drive head capable of generating 3,000+ foot-pounds of torque for proper pier installation. You’ll also need extension shafts, torque monitoring equipment, and a mini-excavator for positioning. Most rental centers charge $300-500 per day for complete helical pier installation equipment packages.
Professional vs. DIY Considerations
Consider hiring professionals since improper installation voids manufacturer warranties and creates liability issues. DIY installation saves $2,000-4,000 per pier but requires specialized equipment knowledge and soil engineering calculations. Professional installation includes engineered drawings, permits, and 20-year structural warranties that protect your investment.
Deadman Anchor Construction
Create a reliable anchor point for vehicle recovery in diverse terrains. This versatile tool functions as a ground, tree, or rock anchor with a 66,000 lbs breaking strength, and it's made in the USA.

The deadman anchor delivers the most cost-effective permanent anchoring solution for DIY dock installations. This buried anchor system distributes holding power across a wide underground area, making it ideal for shorelines with stable soil conditions.
Excavation and Burial Process
You’ll need to excavate a trench 3-4 feet deep and 6-8 feet long, perpendicular to your dock’s pull direction. Place your deadman anchor (concrete block, railroad tie, or purpose-built anchor) at the bottom and backfill with native soil, compacting every 12 inches. The anchor gains strength as surrounding soil settles over 2-3 weeks.
Cable and Chain Configuration
Connect your deadman anchor using 1/4-inch galvanized cable or 3/8-inch stainless steel chain, depending on your dock’s wind load requirements. Run the cable through a protective sleeve where it exits the ground to prevent abrasion. You’ll achieve optimal holding power by angling the cable at 30-45 degrees from the anchor to your dock attachment point.
Weather Resistance Factors
Deadman anchors perform best in clay and compact soil but struggle in sandy conditions where erosion undermines their holding power. Freeze-thaw cycles can shift anchor position in northern climates, requiring annual tension checks. You’ll need to inspect cable connections quarterly and apply marine-grade lubricant to prevent corrosion at ground level where moisture accumulates.
Piling and Post Anchoring
Piling systems offer the most permanent DIY dock anchoring solution for waterfront properties with stable bottom conditions. You’ll drive wooden or steel posts directly into the lake or river bottom to create fixed anchor points that won’t shift during storms.
Wood vs. Steel Material Options
Pressure-treated wooden pilings cost $15-25 per linear foot and work well in most freshwater applications. They’re easier to cut and modify but typically last 10-15 years before requiring replacement.
Galvanized steel pilings run $40-60 per linear foot but offer 25-30 year lifespans with minimal maintenance. Steel provides superior strength in areas with ice movement or heavy boat traffic.
Driving Techniques and Depth Requirements
You’ll need to drive pilings 6-8 feet into firm bottom material for adequate holding power. Rent a pneumatic post driver for $200-300 per day to achieve proper penetration depth.
Water jet systems work effectively in sandy bottoms by washing away sediment as you drive the piling. Clay and rocky bottoms require mechanical driving with a pile hammer attachment.
Seasonal Adjustment Considerations
Ice movement can shift or damage pilings in northern climates, requiring annual inspections each spring. Install pilings at slight angles away from the dock to accommodate ice expansion forces.
Water level fluctuations may expose piling tops during low water periods or submerge connections during floods. Plan piling height to accommodate your area’s typical seasonal water level changes of 2-4 feet.
Floating Anchor System
Floating anchor systems provide an innovative approach to dock anchoring that adapts to changing water levels throughout the season. This method combines surface buoyancy with underwater anchoring to maintain consistent tension regardless of water depth fluctuations.
Buoyancy and Weight Balance
Balance your floating anchor system using a 3:1 buoyancy-to-weight ratio for optimal performance. Install foam-filled pontoons or sealed PVC drums as surface floats, paired with 25-40 pound concrete anchors below. Position floats 15-20 feet from your dock to prevent interference during storms while maintaining proper anchor tension.
Seasonal Installation and Removal
Deploy floating anchors in spring when ice-out occurs, typically requiring 2-3 hours for complete installation. Remove systems before freeze-up by disconnecting surface floats first, then retrieving underwater anchors using a boat winch. Store components in a dry location to prevent UV damage and extend system lifespan to 8-10 years.
Cost-Effective Material Alternatives
Replace expensive marine floats with sealed 55-gallon plastic drums, reducing costs from $200 to $40 per float. Substitute costly marine-grade chain with galvanized aircraft cable and swaged fittings, cutting anchor line expenses by 60%. Use recycled concrete blocks instead of purpose-built anchors, achieving the same holding power for $15-20 per anchor point.
Combination Weight and Cable Method
This hybrid approach combines the reliability of concrete weights with the flexibility of cable systems, creating a versatile anchoring solution that adapts to various water conditions and dock configurations.
Multi-Point Anchoring Strategy
You’ll need to establish three to four anchor points around your dock’s perimeter for optimal stability. Position primary anchors at opposite corners using 200-300 pound concrete blocks connected with galvanized aircraft cable. Secondary anchor points should be placed at the dock’s midpoint sections to prevent lateral movement during storms.
Load Distribution Principles
Your cable system distributes wind and wave forces across multiple anchor points rather than concentrating stress on a single connection. Use a 7:1 cable-to-dock ratio with 3/16-inch galvanized aircraft cable rated for 920 pounds breaking strength. This configuration reduces individual anchor loads by 60-70% compared to single-point systems.
Customization for Different Dock Sizes
Small docks under 16 feet require two 150-pound anchors with 100-foot cable runs positioned at diagonal corners. Medium docks spanning 16-32 feet need four anchor points with 200-pound weights and 150-foot cables. Large docks over 32 feet demand six anchor points using 300-pound blocks with 200-foot cable systems for adequate holding power.
Conclusion
Now you’re equipped with seven proven DIY dock anchoring solutions that can save you thousands while delivering professional-grade results. Each method offers distinct advantages depending on your specific conditions – from simple concrete blocks for beginners to advanced helical piers for permanent installations.
The key to success lies in matching your chosen anchoring system to your local water conditions and dock requirements. Whether you’re dealing with sandy bottoms muddy shorelines or fluctuating water levels there’s a DIY solution that’ll keep your dock secure year-round.
Remember that proper installation and regular maintenance are crucial for any anchoring system’s longevity. With the right approach and attention to detail you’ll have a dock that withstands whatever nature throws at it while keeping more money in your pocket.
Frequently Asked Questions
What is the most cost-effective DIY dock anchoring method?
The Concrete Block Anchoring System is the most cost-effective option, costing approximately $3-5 per linear foot. This straightforward method requires minimal technical knowledge and no specialized equipment, making it perfect for beginners. It achieves 85-90% effectiveness compared to professional systems and works best in sandy or muddy bottoms with water depths of 6-15 feet.
How much can I save by building my own dock anchoring system?
DIY dock anchoring can save homeowners 60-70% compared to hiring contractors. For example, helical pier installations can save $2,000-4,000 per pier when done yourself. This significant cost reduction comes from eliminating labor costs while maintaining control over materials and installation timing.
Which anchoring method works best in soft, muddy bottoms?
The Mushroom Anchor Setup offers superior holding power in soft bottoms with thick mud or loose sand. Calculate the appropriate weight using a 15:1 ratio to your dock’s wind load. A typical 30-pound mushroom anchor can handle 450 pounds of pull force and should be allowed 2-3 weeks to settle properly.
What is the strongest permanent anchoring solution for extreme weather?
Helical Pier Foundation Method provides the strongest anchoring for permanent installations due to deep soil penetration. These piers work best in clay and compact sand conditions. While they require specialized equipment rental ($300-500 per day), they offer superior resistance to extreme weather conditions and long-term stability.
How do I calculate the proper anchor weight for my dock?
Use a 10:1 weight ratio for concrete block systems – if your dock weighs 500 pounds, you need 5,000 pounds of anchoring weight. For mushroom anchors, use a 15:1 ratio to wind load. For floating systems, maintain a 3:1 buoyancy-to-weight ratio for optimal performance and consistent tension.
What maintenance do DIY dock anchors require?
Annual inspections are essential for all anchoring systems. Check chain connections for wear and corrosion, apply marine grease to shackle threads yearly, and inspect for ice damage in northern climates. Deadman anchors in sandy conditions may require more frequent monitoring, while helical piers need minimal maintenance once properly installed.
Can floating anchor systems handle changing water levels?
Yes, floating anchor systems are specifically designed to adapt to water level changes. They combine surface buoyancy with underwater anchoring to maintain consistent tension. Use a 3:1 buoyancy-to-weight ratio with foam-filled pontoons or sealed PVC drums paired with concrete anchors for optimal performance across varying conditions.