5 Pool Testing Strip Techniques That Maximize Accuracy
Master 5 proven pool testing strip techniques for accurate water chemistry readings. Stop guessing and start maintaining crystal-clear water with precision methods.
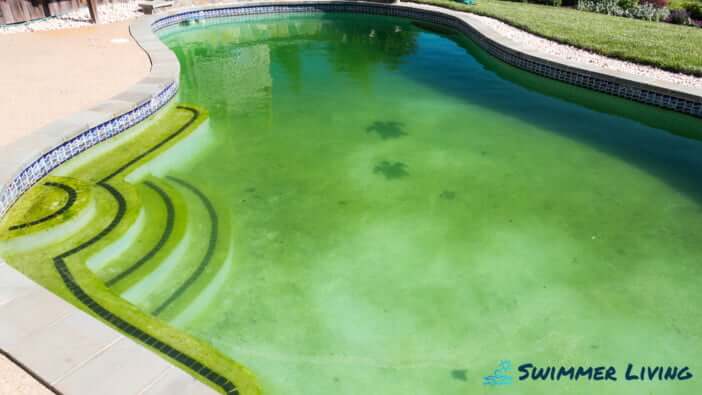
Why it matters: You’re probably testing your pool water wrong. Most pool owners dip test strips haphazardly and wonder why their readings are inconsistent or their water chemistry stays off-balance.
The big picture: Proper test strip technique makes the difference between crystal-clear water and a green swamp in your backyard. Small changes in how you collect samples test timing and strip handling can dramatically improve your results and save you money on unnecessary chemicals.
What’s next: Master these five proven techniques and you’ll get accurate readings every time â turning pool maintenance from guesswork into a science.
Disclosure: As an Amazon Associate, this site earns from qualifying purchases. Thank you!
Understanding Pool Testing Strip Basics
Before diving into advanced techniques, you need to grasp how testing strips actually work and what they’re measuring in your pool water.
What Are Pool Testing Strips
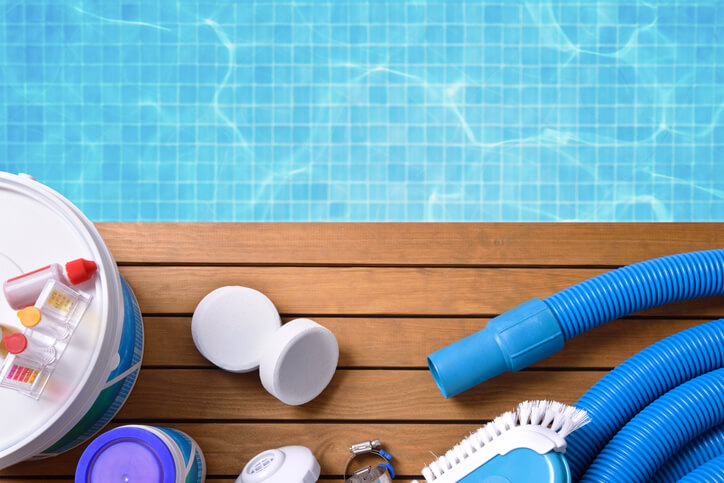
Pool testing strips are paper-based chemical indicators that change color when exposed to specific substances in your water. Each strip contains multiple reagent pads that react to different chemicals like chlorine, pH, and alkalinity.
You’ll find strips designed for basic testing with 3-4 parameters or comprehensive versions measuring up to 7 different chemicals. The quality varies significantly between brands, with professional-grade strips offering more accurate readings than budget options.
Essential Chemical Parameters to Test
The five critical parameters you should test regularly are free chlorine, pH, total alkalinity, cyanuric acid, and total hardness. Free chlorine determines sanitization effectiveness, while pH affects chemical efficiency and swimmer comfort.
Total alkalinity acts as a pH buffer, preventing wild swings in acidity. Cyanuric acid protects chlorine from UV degradation, and calcium hardness prevents equipment corrosion or scaling issues.
Reading Strip Color Charts Accurately
Proper lighting makes the difference between accurate readings and costly chemical mistakes. Always read strips in natural daylight or under bright white LED lighting within 15-30 seconds of removal from water.
Hold the strip next to the color chart rather than trying to memorize colors. The slightest variation in lighting can shift color perception, leading to over-dosing or under-dosing your pool chemicals.
The Dip and Read Technique
This foundational method forms the backbone of accurate pool testing, requiring precise execution to deliver consistent results. Master this technique first, and you’ll dramatically improve your water chemistry readings.
Proper Strip Submersion Depth
Submerge your test strip exactly 6 inches below the water surface to avoid interference from surface contaminants and debris. This depth ensures you’re sampling representative water that’s properly mixed with your pool’s circulation system. Deeper submersion won’t improve accuracy and wastes time during your testing routine.
Optimal Water Collection Points
Test at your pool’s return jets where chemically treated water enters for the most accurate chemical readings. These locations provide freshly circulated water that reflects your pool’s true chemical balance. Avoid testing near skimmers, steps, or shallow areas where readings can be skewed by stagnant water or concentrated bather waste.
Timing Your Strip Reading
Wait exactly 15 seconds after dipping before comparing colors to your chart – this timing prevents both under-developed and over-developed color reactions. Reading too early gives falsely low chemical levels, while waiting beyond 30 seconds causes colors to fade or shift. Set a timer during your first few tests until this timing becomes automatic.
The Swirl and Sample Method
The swirl technique creates active water movement that distributes chemicals evenly before testing. This method prevents false readings from stagnant water pockets that don’t represent your pool’s true chemical balance.
Creating Water Movement for Better Results
Stir the water in a figure-eight pattern for 30 seconds before collecting your sample. This movement breaks up chemical stratification that naturally occurs in pools. You’ll get readings that reflect your pool’s actual water chemistry rather than isolated pockets of imbalanced water.
Avoiding Contaminated Water Areas
Stay away from skimmer openings and pool edges where debris accumulates and chemical concentrations vary. Sample from the center area of your pool where water circulation is strongest. These contaminated zones can throw off your readings by several points on the pH scale.
Ensuring Even Chemical Distribution
Wait 5 minutes after adding any chemicals before using the swirl method to test. Recent chemical additions create uneven distribution that leads to wildly inaccurate strip readings. The swirling motion you create helps blend these chemicals throughout the water column for consistent results.
The Multiple Strip Comparison Technique
Pool testing accuracy improves dramatically when you verify your readings with multiple strips. This verification method catches inconsistencies that single-strip testing often misses.
Using Two Strips for Verification
Test with two strips simultaneously to confirm your pool’s chemical levels. Dip both strips in the same water sample within seconds of each other to ensure identical conditions.
Compare both strips against the color chart after the recommended wait time. Consistent readings between strips indicate accurate results you can trust for chemical adjustments.
Cross-Referencing Results for Accuracy
Match color readings across both test strips to validate your pool’s chemical balance. Focus on critical parameters like pH and chlorine levels where accuracy matters most for swimmer safety.
Record readings from both strips to identify patterns over multiple testing sessions. Consistent cross-references build confidence in your pool maintenance decisions and chemical dosing calculations.
Identifying Inconsistent Readings
Discard test results when strips show significant color differences on the same parameters. Temperature fluctuations or expired strips commonly cause these reading variations that lead to incorrect chemical additions.
Retest immediately with fresh strips if you notice inconsistent readings between your comparison samples. Wait 10 minutes between tests to allow any chemical interference to dissipate completely.
The Deep End Testing Strategy
Deep water testing delivers the most accurate chemical readings because it eliminates variables that skew your results. This technique focuses on sampling from your pool’s most stable water zone.
Why Deep Water Provides Better Samples
Deep water offers consistent chemical concentrations without surface interference or bottom debris contamination. You’ll find more uniform mixing at depths of 18 inches or greater where temperature variations and chemical stratification minimize. The deeper sample zone eliminates floating oils, sunscreen residue, and organic matter that concentrate near the surface.
Avoiding Surface Chemical Concentrations
Surface water contains concentrated chlorine levels from recent chemical additions and UV breakdown products that create false readings. You should avoid the top 6 inches where evaporation concentrates minerals and leaves behind chemical residues. Wind-driven surface movement also creates pockets of varying chemical density that don’t represent your pool’s true balance.
Testing Away From Return Jets and Skimmers
Return jets create turbulent mixing zones with temporarily elevated chemical levels that don’t reflect overall pool chemistry. You’ll get skewed readings within 3 feet of any return jet where fresh chemicals haven’t fully distributed. Skimmer areas concentrate debris and oils while creating suction currents that pull surface contaminants downward into your sample zone.
The Double-Check Digital Verification Method
Testing strips alone can mislead you, especially when chemical levels hover near critical thresholds. This verification method combines traditional strips with digital backup tools to eliminate costly dosing mistakes.
Combining Strips with Digital Meters
Use digital pH meters to verify strip readings when your pH colors fall between 7.2 and 7.8 on the chart. Digital chlorine testers confirm free chlorine levels when strips show borderline readings between 1-3 ppm. Match your strip timing with digital readings by testing both tools within 30 seconds of each other for accurate comparison.
When to Use Backup Testing Methods
Deploy backup testing when strips show extreme readings outside normal ranges or when colors don’t match any chart reference. Use digital verification after adding shock treatments since strips often can’t detect chlorine levels above 10 ppm accurately. Test with backup methods when opening pools or troubleshooting persistent water quality issues.
Confirming Critical Chemical Levels
Verify pH readings digitally when they approach 7.0 or 8.0 since these levels trigger major chemical adjustments that cost hundreds in corrections. Double-check free chlorine with digital meters when readings exceed 5 ppm to prevent over-chlorination and equipment damage. Confirm alkalinity levels with liquid test kits when strips indicate readings below 80 ppm or above 150 ppm.
Conclusion
These five testing techniques will transform your pool maintenance from guesswork into precision chemistry. You’ll save money on unnecessary chemicals while keeping your water perfectly balanced year-round.
Remember that consistency matters more than perfection. Pick the techniques that work best for your pool setup and stick with them. Your testing routine should become second nature within just a few weeks.
Start implementing these methods today and you’ll notice more accurate readings immediately. Your pool water will stay clearer longer and you’ll spend less time troubleshooting chemical imbalances. Master these techniques and enjoy effortless pool maintenance all season long.
Frequently Asked Questions
What are the most common mistakes when using pool test strips?
The most common mistakes include improper sample collection depth, incorrect timing when reading results, testing in contaminated areas like skimmer openings, and reading color charts in poor lighting conditions. Many pool owners also fail to wait the recommended 15 seconds after dipping before comparing colors, leading to inaccurate chemical readings and unnecessary chemical adjustments.
How deep should I dip test strips in pool water?
Test strips should be submerged exactly 6 inches below the water surface. This depth avoids surface contaminants and concentrated chemical zones while ensuring you collect a representative water sample. Avoid testing in the top 6 inches where chlorine concentrations and evaporation can skew your results.
What chemicals should I test regularly in my pool?
You should regularly test five essential parameters: free chlorine (sanitizer levels), pH (water acidity/alkalinity), total alkalinity (pH buffer), cyanuric acid (UV protection), and total hardness (mineral content). Each parameter plays a crucial role in maintaining balanced water chemistry and preventing costly equipment damage or swimmer discomfort.
How can I improve the accuracy of my pool test strip readings?
Use the “Multiple Strip Comparison Technique” by testing with two strips simultaneously in the same water sample. Compare both readings after the recommended wait time to verify results. Also, test at return jets for the most accurate readings, and use proper lighting when comparing colors to the chart.
When should I use digital testing tools instead of test strips?
Use digital pH meters when strip readings show pH levels between 7.2-7.8, and digital chlorine testers for borderline free chlorine readings between 1-3 ppm. Always deploy backup digital testing after shock treatments or when strips show extreme readings, as strips may not accurately detect high chemical concentrations.
What is the best location to collect water samples for testing?
The deep end of your pool provides the most stable water zone with consistent chemical concentrations. Avoid testing near return jets, skimmers, pool edges, or in the top 6 inches of water. These areas can have turbulent mixing zones, debris concentration, or surface interference that leads to inaccurate readings.
How long should I wait before testing after adding pool chemicals?
Wait at least 5 minutes after adding any chemicals before using test strips. This allows time for proper chemical distribution throughout the pool. For shock treatments or large chemical additions, wait longer and consider using the “Swirl and Sample Method” to ensure even chemical distribution before testing.
Why should I create water movement before testing?
The “Swirl and Sample Method” involves stirring water in a figure-eight pattern for 30 seconds to break up stagnant pockets and ensure even chemical distribution. This technique provides readings that reflect your pool’s true chemical balance rather than localized concentrations, leading to more accurate dosing decisions.