7 Ideas for Designing a Safe Pathway to the Pool That Prevent Accidents
Discover 7 essential strategies for creating safe pool pathways. From slip-resistant materials to proper lighting, learn how to design walkways that protect your family.
Your backyard pool should be a source of joy and relaxation â but getting there safely is just as important as the swimming itself. Poorly designed pathways can turn your poolside paradise into a liability nightmare with slippery surfaces wet feet and potential trip hazards creating dangerous conditions for family and guests.
Smart pathway design combines safety functionality and style to create secure routes that complement your outdoor space. From slip-resistant materials to strategic lighting solutions the right approach transforms your pool area into a safer more enjoyable environment.
These seven proven strategies will help you design pathways that protect everyone while enhancing your pool’s overall appeal and value.
Disclosure: As an Amazon Associate, this site earns from qualifying purchases. Thank you!
Create Non-Slip Surface Materials for Maximum Safety
Wet pool surfaces become dangerous slip hazards faster than you’d expect. Smart material choices prevent accidents before they happen.
Choose Textured Concrete or Stone Pavers
Create stable pathways in your garden with these durable, resin stepping stones. The 15.5" lightweight design includes large ground stakes that easily click into place for secure installation in any outdoor area.
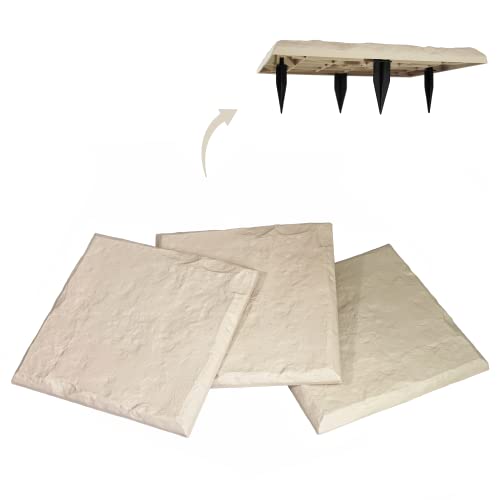
Textured concrete provides excellent grip when wet and costs less than premium alternatives. Brushed or stamped finishes create traction without feeling rough underfoot. Natural stone pavers like travertine and sandstone offer built-in texture and stay cooler than smooth concrete in summer heat.
Install Rubber Matting or Composite Decking
Create a beautiful and durable outdoor space with these FSC-certified wood-plastic composite deck tiles. The interlocking design allows for easy DIY installation, while the weather-resistant material ensures low maintenance and lasting beauty.

Rubber pool mats deliver superior slip resistance and cushioning for bare feet. They’re easy to clean and replace when worn. Composite decking materials resist moisture damage while providing consistent traction. Both options work well around spa areas where splashing creates extra wet zones.
Apply Anti-Slip Coatings to Existing Surfaces
Anti-slip additives transform smooth concrete into safe walking surfaces without full replacement. Textured paints and sealers cost significantly less than new materials. These coatings require reapplication every 2-3 years but provide immediate safety improvements to existing pathways around your pool area.
Install Proper Lighting Along the Entire Pathway
Darkness transforms even the safest pool pathway into a potential accident zone. You’ll want consistent illumination that guides every step from your house to the pool edge and back.
Add LED Strip Lights for Continuous Illumination
Control these 100ft RGB LED strip lights via Bluetooth app or remote to customize colors and brightness. Sync the lights to music for a dynamic party atmosphere and set timers for automatic on/off.

LED strips create unbroken light lines that eliminate dangerous dark spots between traditional fixtures. Install them along pathway edges or under handrails for consistent visibility that won’t leave gaps where someone could misstep. These energy-efficient lights provide decades of reliable service while consuming minimal electricity.
Position Solar-Powered Stake Lights at Regular Intervals
Enhance your outdoor space with these durable solar lights. Featuring a diamond-inspired design for brighter illumination and automatic on/off, they're easy to install and weather-resistant for long-lasting beauty.

Solar stake lights offer placement flexibility without electrical work or ongoing power costs. Space them every 6-8 feet along your pathway for optimal coverage that prevents shadowy areas. Choose models with dusk-to-dawn sensors and weather-resistant construction to ensure reliable operation through all seasons.
Include Motion-Sensor Security Lighting
Motion sensors automatically brighten your pathway when movement is detected, providing instant visibility for late-night pool visits. Position them at pathway entry points and key turns to flood areas with light before you reach them. This dual-purpose lighting enhances both safety and home security while conserving energy.
Design Clear Visual Boundaries and Marking Systems
Clear visual boundaries prevent dangerous missteps and guide traffic flow naturally around your pool area. Well-defined pathways eliminate confusion about where it’s safe to walk, especially during evening hours or when hosting gatherings.
Use Contrasting Colors Between Pathway and Landscaping
Choose pathway materials that create stark contrast with surrounding grass or plantings. Light-colored pavers against dark mulch or bright concrete against green lawn provides instant visual definition. This contrast remains visible even in low-light conditions, helping guests distinguish safe walking surfaces from landscaped areas that might conceal uneven ground or sprinkler heads.
Install Reflective Markers or Glow-in-the-Dark Elements
Improve driveway safety with these 4-foot reflective markers. Durable fiberglass poles with reflective tape enhance visibility for safer navigation and protect your lawn from damage.

Embed reflective strips along pathway edges or install small solar-powered markers every 6-8 feet for nighttime visibility. Glow-in-the-dark paint on pathway borders charges during daylight and provides subtle guidance after sunset. These elements work particularly well at pathway curves or elevation changes where accidents commonly occur.
Create Defined Edges with Border Materials
Install brick edging, metal strips, or decorative stones to create physical boundaries between pathway and landscaping. Raised borders prevent pathway materials from shifting while clearly marking safe walking zones. Choose materials that complement your existing hardscape but provide enough height difference (2-3 inches) to be tactilely noticeable underfoot.
Incorporate Strategic Handrails and Support Features
Handrails and support features transform challenging pathway sections into manageable routes for users of all ages and mobility levels. These additions provide crucial stability points that can prevent serious falls and accidents.
Install Weather-Resistant Handrails on Elevated Sections
Elevated pathways require continuous handrails on both sides to ensure maximum safety. Choose powder-coated aluminum or stainless steel materials that won’t corrode from pool chemicals and weather exposure. Install rails at 34-38 inches height with secure mounting brackets spaced every 6 feet for optimal support and code compliance.
Add Grab Bars Near Pool Entry Points
Pool entry areas need strategically placed grab bars for safe transitions from dry to wet surfaces. Mount stainless steel bars vertically near steps and ladders at heights between 42-48 inches. Position horizontal bars along pool edges where swimmers frequently exit to provide stable grip points during entry and exit movements.
Position Sturdy Benches for Rest Stops
Rest areas along longer pathways prevent fatigue-related accidents and provide recovery spots for elderly users. Install weather-resistant benches with back support every 50-75 feet on extended routes. Choose materials like teak or powder-coated metal that can withstand constant moisture exposure while providing comfortable seating for users carrying pool equipment.
Ensure Proper Drainage to Prevent Water Accumulation
Standing water transforms your carefully designed pathway into a safety hazard faster than you’d expect. Proper drainage prevents slip-and-fall accidents while protecting your pathway materials from premature deterioration.
Grade the Pathway with Appropriate Slope
Slope your pathway at a 2% grade to channel water away from high-traffic areas effectively. This translates to a 1/4-inch drop per foot of pathway length – subtle enough to avoid creating walking hazards while ensuring water flows toward designated drainage points rather than pooling on the surface.
Install French Drains or Channel Systems
French drains capture subsurface water before it reaches your pathway surface, preventing saturation and instability. Install perforated pipes wrapped in landscape fabric beneath gravel beds along pathway edges. Channel drains work better for surface water, collecting runoff through grated openings and directing it away from walking areas.
Use Permeable Materials to Reduce Pooling
Permeable pavers and porous concrete allow water to pass through the surface rather than accumulating on top. These materials reduce slip hazards by eliminating surface water while maintaining structural integrity. Consider permeable options like grass pavers or pervious concrete for areas that experience heavy foot traffic during wet conditions.
Maintain Adequate Pathway Width and Clearance
Your pathway dimensions directly impact safety and usability around your pool area. Narrow walkways create bottlenecks and force users into dangerous situations.
Design Minimum 4-Foot Wide Walkways
You’ll need at least 4 feet of width to accommodate wheelchairs, pool equipment, and emergency access. Standard 3-foot walkways force people to walk single-file and create hazards when carrying pool supplies or assisting others. This width allows two people to pass comfortably without stepping onto wet surfaces or landscaped areas.
Remove Overhanging Branches and Obstacles
You should maintain 8 feet of vertical clearance along your entire pathway to prevent head injuries and equipment damage. Low-hanging branches become especially dangerous when wet, creating slip hazards as people duck underneath them. Trim vegetation quarterly and relocate decorative elements that encroach on the walking surface.
Create Passing Areas for Multiple Users
You’ll want to install 6-foot wide sections every 20-30 feet along longer pathways for safe passing zones. These expanded areas prevent conflicts between users carrying pool equipment, parents with children, or mobility-impaired individuals who need extra maneuvering space. Position these wider sections at natural gathering points like seating areas or equipment storage locations.
Establish Emergency Access and Safety Equipment Placement
Emergency preparedness transforms a well-designed pathway into a true safety system. Your pathway design must account for quick response times when seconds matter most.
Position Life-Saving Equipment Along the Route
Life-saving equipment placement requires strategic positioning every 50 feet along your pathway. Install pool hooks and rescue rings at multiple access points, ensuring no area sits more than 20 seconds away from emergency tools. Mount first aid kits in weatherproof cabinets at pathway midpoints, keeping supplies dry while maintaining easy access for family members and guests.
Ensure Clear Sight Lines to the Pool Area
Clear sight lines eliminate dangerous blind spots that can hide emergencies from view. Trim landscaping below 3 feet height within 10 feet of the pathway, creating unobstructed views across the entire pool area. Position pathway curves and elevation changes to maintain visual contact with swimmers, avoiding design elements that block supervision from key vantage points along the route.
Install Emergency Communication Systems
Emergency communication systems provide immediate contact with professional help during critical situations. Mount weatherproof emergency phones or intercom systems at pathway endpoints, connecting directly to emergency services or designated family contacts. Install backup power sources like solar chargers to ensure communication remains functional during power outages, when pool emergencies often coincide with severe weather conditions.
Conclusion
Creating a safe pathway to your pool doesn’t mean sacrificing style or breaking your budget. By implementing these seven design strategies you’ll transform your pool area into a secure and welcoming space that serves your family for years to come.
Remember that pathway safety is an ongoing commitment. Regular maintenance of lighting systems drainage features and surface materials ensures your investment continues protecting everyone who uses your pool area.
Your pathway design choices today will directly impact the safety and enjoyment of countless pool days ahead. Take the time to plan thoughtfully and you’ll create a pool environment that’s both beautiful and brilliantly safe.
Frequently Asked Questions
What materials provide the best slip resistance for pool pathways?
Textured concrete and stone pavers offer excellent grip and stay cooler underfoot. Rubber matting and composite decking provide superior slip resistance with added cushioning. For existing surfaces, anti-slip coatings can be applied cost-effectively, though they require reapplication every 2-3 years to maintain effectiveness.
How should I light my pool pathway for maximum safety?
Install LED strip lights for continuous illumination to eliminate dark spots. Position solar-powered stake lights at regular intervals with dusk-to-dawn sensors for reliable operation. Motion-sensor security lighting automatically brightens when movement is detected, enhancing both safety and security around your pool area.
What’s the recommended width for pool pathways?
Pool pathways should be at least 4 feet wide to accommodate wheelchairs, pool equipment, and emergency access. Create 6-foot wide passing areas every 20-30 feet along longer pathways to allow safe navigation for multiple users, especially in high-traffic zones.
How can I create clear visual boundaries for my pool pathway?
Use contrasting colors between pathway materials and landscaping to create visual definition. Install reflective markers or glow-in-the-dark elements for nighttime visibility, particularly at curves or elevation changes. Create defined edges with border materials like brick or metal strips to establish physical boundaries.
What drainage considerations are important for pool pathways?
Grade pathways with a 2% slope to channel water away from high-traffic areas toward designated drainage points. Install French drains or channel systems to capture surface and subsurface water. Use permeable materials like porous concrete or permeable pavers to allow water passage while maintaining structural integrity.
Where should handrails be installed along pool pathways?
Install weather-resistant handrails on elevated sections at 34-38 inches height for optimal support. Add grab bars near pool entry points to facilitate safe transitions from dry to wet surfaces. Position sturdy, weather-resistant benches along longer pathways to provide rest stops and prevent fatigue-related accidents.
How should I prepare my pathway for emergencies?
Place life-saving equipment like pool hooks and rescue rings every 50 feet along pathways, ensuring no area is more than 20 seconds from emergency tools. Maintain clear sight lines by trimming landscaping to eliminate blind spots. Install weatherproof emergency communication systems at pathway endpoints with backup power sources.