7 Seasonal Pool Leak Prevention Checklist Steps That Save Thousands
Discover our 7-step seasonal pool leak prevention checklist that helps you avoid costly repairs. Learn how to inspect, test, and maintain your pool like the pros to ensure leak-free swimming all year round.
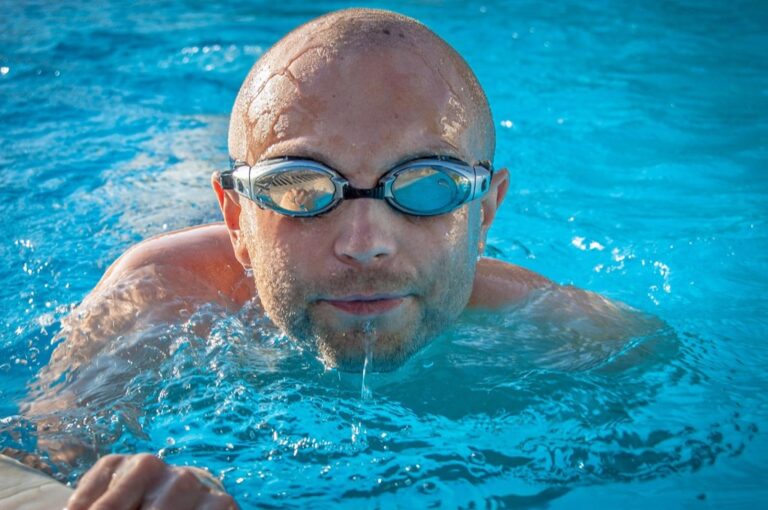
Discovering a pool leak can quickly drain your summer fun along with thousands of gallons of water and hundreds of dollars in repair costs. Regular preventative maintenance is the key to avoiding these costly issues and extending the life of your backyard oasis.
With our 7-step seasonal pool leak prevention checklist, you’ll learn the essential inspection points that professional pool technicians focus on to catch small problems before they become major headaches. These straightforward maintenance tasks can be performed during spring opening and fall closing to ensure your pool remains leak-free year-round.
Disclosure: As an Amazon Associate, this site earns from qualifying purchases. Thank you!
Step 1: Conduct a Thorough Visual Inspection
Your first line of defense against seasonal pool leaks starts with a comprehensive visual inspection. This critical step helps you identify potential problems before they escalate into costly repairs.
Checking for Cracks and Surface Damage
Carefully examine your pool’s interior surfaces for cracks, hollow spots, or deteriorating grout lines. Pay special attention to areas around steps, corners, and light fixtures where stress points commonly develop. For vinyl liners, look for tears, punctures, or wrinkles that could indicate shifting or potential leak points.
Protect your shelves and drawers with these BPA-free EVA liners. They're easy to cut, clean, and waterproof, making them ideal for keeping your kitchen and refrigerator organized and fresh.
Inspecting Pool Equipment and Connections
Examine all equipment connections including pump fittings, filter components, and heater hookups for signs of leakage or corrosion. Check valves, O-rings, and gaskets for wear or damage, as these are common failure points. Inspect your skimmer boxes carefully, ensuring they’re properly sealed and free from cracks that could allow water to escape.
Protect your air pump from backflow during outages with Pawfly check valves. These durable, quiet valves easily connect to standard 3/16" airline tubing for essential aeration setup.

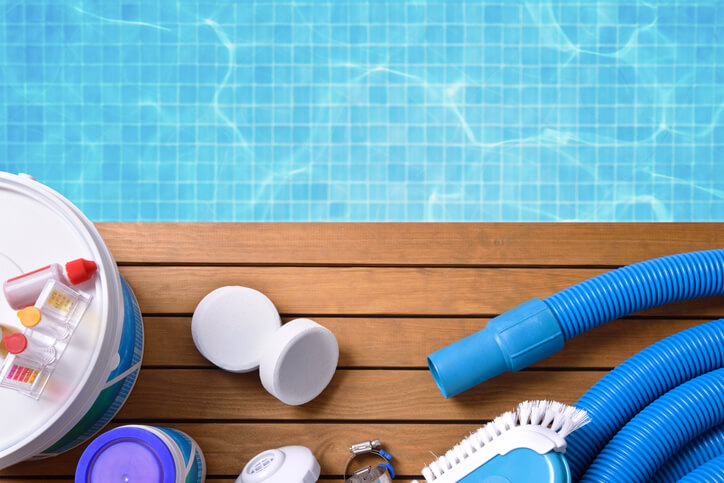
Step 2: Perform the Bucket Test to Detect Water Loss
After completing your visual inspection, it’s time to determine if your pool is actually losing water. The bucket test is a simple yet effective method to measure water loss and distinguish between evaporation and a potential leak.
Setting Up the Bucket Test Correctly
To perform the bucket test, place a 5-gallon bucket on the second step of your pool. Fill it with water to match the pool’s water level. Mark both water levels with waterproof tape or a marker. Turn off the auto-fill system and ensure the pump runs normally. Let the test run for 24 hours to get accurate results.
Interpreting Bucket Test Results
Compare the water levels after 24 hours. If the pool water level drops more than the bucket’s water level, you likely have a leak. A difference of ¼ inch or more indicates a significant leak requiring immediate attention. If both levels drop equally, the water loss is due to normal evaporation and not a cause for concern.
Step 3: Examine and Maintain the Pool Liner
This durable, standard gauge vinyl liner provides a vibrant blue finish for your 24-foot round above ground pool. Its strong, double-welded seams ensure a secure fit for 48-inch or 52-inch sidewalls.

Looking for Tears and Worn Areas
Your pool liner serves as the critical water barrier, making regular inspection essential for leak prevention. Carefully examine the entire liner surface, paying special attention to corners, steps, and areas around fixtures. Look for tears, punctures, brittleness, or discoloration that indicates UV damage. Check for wrinkles or stretching, especially at the waterline where chemical exposure is highest. Vinyl liners typically show wear after 7-10 years, so note any concerning changes.
Addressing Liner Issues Before They Worsen
Small liner tears can quickly expand into major leaks, costing thousands in water loss and repairs. For minor punctures, use a vinyl patch kit while the damaged area remains underwater. For wrinkles or loose sections, consider having a professional re-stretch the liner during your seasonal maintenance. Replace severely damaged or aged liners completely rather than applying multiple patches. Remember that proper chemical balance (pH 7.2-7.6) significantly extends liner life by preventing premature deterioration.
Step 4: Inspect and Service the Plumbing System
Checking for Leaks in Pipes and Fittings
Your pool’s plumbing system requires thorough inspection to prevent costly water loss. Examine all visible pipes and fittings for cracks, corrosion, or moisture. Pay special attention to pipe joints, unions, and connection points where leaks commonly develop. Look for telltale signs like wet spots, mineral deposits, or unusual algae growth that often indicate hidden leaks.
Testing Valves and Pressure Gauges
This 60 PSI pressure gauge provides accurate readings for water, oil, and air with a durable stainless steel case. The glycerin-filled design minimizes vibration, while the IP67 waterproof rating ensures clear visibility.

Test all valves by opening and closing them fully to ensure smooth operation without sticking. Check your pressure gauge readings against normal operating levels—significant changes may indicate blockages or leaks. Inspect diverter valves and backwash valves for proper sealing, as these components frequently develop leaks when worn. Replace any valves showing signs of corrosion or deterioration to maintain system integrity.
Step 5: Clean and Maintain the Filtration System
Get pure, healthy water with the NSF certified iSpring RCC7AK reverse osmosis system. It features a patented faucet design for easy installation and adds essential minerals for a balanced pH.

Your pool’s filtration system is its lifeline, keeping water clean while circulating chemicals properly. Regular maintenance prevents pressure buildup that can cause leaks and system failures.
Backwashing and Cleaning Filter Components
Backwash your sand or DE filter monthly during peak season to remove trapped debris. Disassemble cartridge filters for a thorough cleaning with a garden hose and specialized cleaner. Inspect filter grids for tears or damage, replacing worn components before they fail and cause water loss. Remember that clogged filters force your pump to work harder, increasing pressure throughout the system.
Checking for Leaks Around Filter Housing
Examine the filter tank for hairline cracks, especially around thread connections and pressure gauges. Look for water droplets, dampness, or mineral deposits that indicate slow leaks. Test O-rings and gaskets by applying soapy water while the system runs—bubbles forming indicate air leaks that can damage your equipment and create water loss points. Replace damaged seals immediately to maintain system integrity.
Step 6: Winterize Your Pool Properly
Proper winterization is crucial for preventing leaks during the off-season when pools are most vulnerable to freeze damage.
Lowering Water Levels Appropriately
Lower your pool water to 4-6 inches below the skimmer opening before winter sets in. This prevents water from freezing in the skimmer and causing cracks that lead to leaks. Never drain your pool completely as this can damage the liner and create pressure imbalances that may result in structural damage and future leaks.
Protecting Equipment from Freeze Damage
Drain all equipment including pumps, filters, heaters, and chlorinators completely to prevent freeze damage. Water left inside these components can expand when frozen, creating cracks and seal failures. Install freeze plugs in equipment that cannot be fully drained and use pool antifreeze in plumbing lines to provide additional protection against winter leak development.
Step 7: Schedule Professional Leak Detection Services
Even with diligent maintenance, some pool leaks require professional expertise to detect and repair. Knowing when and how to enlist professional help is the final critical step in your seasonal leak prevention strategy.
When to Call the Experts
Professional leak detection becomes necessary when your bucket test consistently shows water loss exceeding 1/4 inch daily. If you’ve inspected visible components but can’t locate the source, or if you notice persistent wet spots around your pool, it’s time to call in specialists. Experts use advanced equipment like underwater microphones, pressure testing systems, and dye testing that can pinpoint even the most elusive leaks without extensive demolition.
Choosing the Right Pool Maintenance Company
Select a pool service with specific leak detection expertise and positive customer reviews for leak-related repairs. Ask about their detection methods—reputable companies use electronic leak detection equipment and dye testing rather than just visual inspections. Request references from previous leak detection clients and verify they’re licensed, insured, and certified by organizations like the National Swimming Pool Foundation (NSPF) to ensure quality workmanship.
Conclusion: Maintaining a Leak-Free Pool Year-Round
Staying ahead of pool leaks doesn’t have to be overwhelming. By following this 7-step seasonal checklist you’ll protect your investment and avoid the headache of unexpected repairs. Remember that regular maintenance is always more cost-effective than addressing major water loss issues after they develop.
Take time each season to inspect your pool’s structure plumbing and filtration systems. Don’t forget that proper winterization is crucial for preventing freeze damage during colder months. And when in doubt reach out to professionals with specialized leak detection equipment.
Your swimming pool is meant to be enjoyed not stressed over. With these preventative measures you’ll spend more time swimming and less time troubleshooting keeping your backyard oasis leak-free throughout its lifetime.
Frequently Asked Questions
How often should I inspect my pool for potential leaks?
Inspect your pool at least twice a year—during spring opening and fall closing. This regular maintenance schedule helps identify potential problems before they become serious leaks. Additionally, perform quick visual inspections monthly during the swimming season, looking for cracks, damaged tiles, or wet spots around the pool area.
What is the bucket test and how do I perform it?
The bucket test helps distinguish between normal evaporation and an actual leak. Place a bucket on the pool steps (filled with pool water to match the pool level), mark the water level inside the bucket and the pool level outside, and wait 24 hours. If the pool loses more water than the bucket, you likely have a leak.
Can small cracks lead to significant pool leaks?
Yes, even hairline cracks can develop into significant leaks over time. Small surface cracks may indicate structural issues beneath. Address minor cracks immediately with appropriate patching compounds to prevent water infiltration that could cause further damage and eventually lead to major leaks requiring expensive repairs.
How do I check my pool’s plumbing system for leaks?
Look for wet spots around equipment, pipes, and the ground surrounding your pool. Check for air bubbles in the return lines or a drop in flow from returns. Turn off the pump and observe if water continues to drop. If you suspect underground plumbing leaks, professional pressure testing may be necessary.
Why is cleaning the filter system important for leak prevention?
A clean filtration system prevents pressure buildup that can cause components to crack or fail. Regularly backwash sand or DE filters and clean cartridge filters according to manufacturer recommendations. Inspect filter housings for cracks and check O-rings and gaskets for wear. Properly maintained filters ensure optimal water circulation and chemical distribution.
What are the signs that I need professional leak detection?
Call professionals if water loss exceeds 1/4 inch daily after the bucket test, you notice persistent wet spots around the pool, your water bill significantly increases, or chemicals need constant replenishing. Also seek help if you hear running water when the system is off or notice cracks that worsen despite repairs.
How should I winterize my pool to prevent freeze damage and leaks?
Lower water levels to 4-6 inches below the skimmer opening, but never drain completely. Thoroughly drain all equipment including pumps, filters, and heaters. Use freeze plugs in return lines and skimmers. Add pool antifreeze to plumbing (not the pool itself). Cover the pool securely with a quality winter cover to protect from debris and weather elements.
Can pool chemicals contribute to leaks?
Enjoy a clean and clear pool with this 4-in-1 shock treatment! It quickly kills bacteria and algae, reduces chlorine odor, and restores water clarity without adding CYA, making it suitable for all pool types.

Yes, improperly balanced chemicals can damage pool surfaces and components. High chlorine levels or persistent low pH can corrode metal fixtures and deteriorate grout, vinyl liners, and plaster. Maintain proper chemical balance year-round and avoid shocking your pool with very high chlorine concentrations that might damage surfaces and create leak points.