6 Kayak Cleaning Solutions For Salt Water To Prevent Rust
Protect your kayak from salt corrosion. Explore these 6 essential cleaning solutions to remove salt buildup, prevent rust, and extend your boat’s lifespan.
There is nothing quite like the feeling of paddling through a saltwater estuary as the morning sun hits the water. However, that pristine coastal environment is secretly waging a war on your gear, with salt crystals acting as tiny, abrasive catalysts for degradation. Protecting your investment requires a disciplined maintenance routine, or you will soon find yourself dealing with seized bolts and a faded, brittle hull.
Disclosure: As an Amazon Associate, this site earns from qualifying purchases. Thank you!
Saltwater Corrosion Risks for Your Kayak
Saltwater is significantly more aggressive than freshwater because it acts as an electrolyte, accelerating the electrochemical process of corrosion on any exposed metal. Even high-grade stainless steel hardware isn’t immune; if salt is left to dry on a screw or a rudder hinge, it creates a "crevice corrosion" environment that eats away at the integrity of the metal.
Beyond the hardware, saltwater residue can wreak havoc on the polymer of your hull. As the water evaporates, salt crystals form and expand, potentially causing micro-abrasions that dull the finish and weaken the structural surface over time. If you ignore these risks, you aren’t just looking at cosmetic damage—you are looking at compromised safety and a shortened lifespan for your kayak.
Fresh Water Rinsing With The Camco Hose
The absolute first line of defense after any saltwater outing is a thorough freshwater rinse. A standard garden hose is fine, but I highly recommend the Camco TastePURE or similar high-flow RV hoses, as they are designed to handle pressure consistently without kinking. You want to flush every nook, cranny, and scupper hole to ensure no salt brine remains trapped in the internal cavities.
Focus your spray on the rudder assembly, foot braces, and seat tracks, as these are the most common failure points. Don’t just spray the exterior; if your kayak has internal storage compartments, open them up and ensure they are rinsed and dried as well. This simple habit is the most effective way to prevent long-term damage, and it is non-negotiable for anyone serious about gear longevity.
Using 303 Aerospace Protectant For Hulls
Protect and restore surfaces with 303 Aerospace Protectant. This rinse-free spray offers superior UV protection, repels dust and stains, and leaves a non-greasy matte finish on rubber, plastic, vinyl, and more.

Once your kayak is clean and dry, applying 303 Aerospace Protectant is the gold standard for UV and salt protection. Think of this as sunscreen for your boat; it creates a protective barrier that prevents the sun from breaking down the plastic and stops salt from bonding to the surface. It’s essential for anyone who leaves their kayak stored outside or paddles in high-exposure areas.
You don’t need to over-apply it; a light misting and a quick wipe-down with a microfiber cloth are all it takes to restore that factory shine. I recommend this product for anyone who wants to keep their hull from becoming chalky or brittle over the years. If you want to maintain the resale value of your boat, this is the single best investment you can make.
Gear Aid Revivex For Saltwater Removal
If you are looking for a specialized solution to strip away stubborn salt deposits, Gear Aid Revivex Salt Wash is an excellent choice. Unlike standard soap, this formula is specifically engineered to neutralize and remove salt crystals from both plastic hulls and textile gear, like your PFD or spray skirt. It’s a concentrated solution, so a little goes a long way.
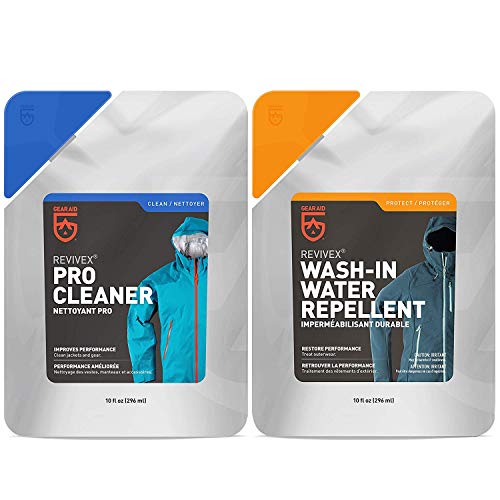
This is the perfect product for the paddler who spends long weekends at the beach and wants a deep clean without worrying about harsh chemicals damaging their equipment. It is highly effective, safe for synthetic fabrics, and rinses away cleanly. If you find that a simple freshwater rinse isn’t cutting through the buildup, Revivex is the professional-grade solution you need.
Star Brite Hull Cleaner For Salt Stains
Star Brite Hull Cleaner is a powerhouse when you are dealing with stubborn salt stains and mineral deposits that have already started to cloud the finish. It is a chemical-based cleaner that works by dissolving the contaminants rather than relying on heavy scrubbing, which helps preserve the integrity of your hull’s finish. It is particularly effective for those who have neglected their cleaning routine for a few weeks.
However, because it is a potent cleaner, you must follow the instructions carefully and rinse it off thoroughly to prevent any residue from sitting on the plastic. I recommend this for owners of older kayaks that have developed significant staining or for anyone who wants to perform a "deep clean" at the end of the season. It is a specialized tool for specific problems, not a daily maintenance spray.
CorrosionX Spray For Metal Components
For your metal hardware—specifically rudder cables, hinge pins, and seat adjustment bolts—CorrosionX is the industry leader. Unlike standard lubricants, it has a unique "polar bonding" technology that displaces moisture and leaves behind a microscopic, self-healing film that prevents rust from even starting. It is far superior to WD-40, which can actually attract dust and dry out over time.
A quick spray on your metal components after a rinse will keep your moving parts operating smoothly for years. It is a must-have for anyone with a rudder system or complex seat mechanics. If you want to avoid the headache of seized screws and stiff hinges, keep a can of CorrosionX in your kit.

Simple Green Marine Cleaner For Residue
This concentrated cleaner effectively removes dirt, grease, and stains from various surfaces. Recognized by the EPA's Safer Choice Program, it can be used full strength for tough messes or diluted for everyday cleaning.

Simple Green Marine is my go-to for general surface cleaning when the boat is covered in environmental grime, not just salt. It is biodegradable and specifically formulated to be safe for marine environments, which is a huge plus if you are washing your boat near the water’s edge. It cuts through grease, oil, and organic residue that can attract salt and dirt.
This is the best "all-purpose" cleaner for your regular maintenance routine. It’s safe, effective, and won’t strip away the protective UV coatings you’ve applied. If you want a reliable, eco-friendly cleaner that handles the bulk of your washing needs, this is the product that belongs in your garage.
Using A Soft Bristle Brush For Scrubbing
When you are washing your kayak, the choice of tool is just as important as the choice of cleaner. Never use steel wool or harsh abrasive pads, as these will scratch the plastic and create microscopic grooves where salt can hide. Instead, use a soft-bristle marine deck brush or a large microfiber mitt to gently agitate the cleaner.
The goal is to lift the salt and grime without compromising the surface of the hull. By using a soft touch, you ensure that you aren’t creating new problems while trying to solve old ones. Keep your brushes clean and dedicated to your kayak to avoid transferring grit from other projects onto your boat.
Drying Techniques To Prevent Rust Spots
Never put your kayak away wet, especially after a saltwater session. Even if you’ve rinsed it, trapped water in the scuppers or internal compartments will eventually lead to mildew or corrosion on the internal metal fasteners. Use a clean, absorbent chamois or microfiber towel to wipe down the exterior and the cockpit area.
If possible, let the boat air dry in a shaded, well-ventilated area for a few hours before covering it or putting it in storage. Direct sunlight is great for drying, but prolonged exposure can be harmful to the plastic, so keep it in the shade. Drying is the final, crucial step in the cleaning process that prevents the "damp rot" of hardware.
Proper Storage To Protect Kayak Hardware
Where you store your kayak is just as important as how you clean it. If you store your boat outdoors, keep it off the ground on padded racks and ensure it is covered with a UV-resistant tarp that allows for airflow. Storing it directly on the ground invites moisture and pests, which can accelerate the degradation of your hardware.
If you have a garage or shed, store it vertically or on its side to prevent hull deformation. Regardless of where you keep it, ensure that the seat is dry and the rudder is in the retracted position to minimize stress on the cables. Proper storage is the final piece of the puzzle that ensures your kayak is ready for the next adventure, free from the damage of the last.
Maintaining your kayak after saltwater use might seem like a chore, but it is the difference between a reliable vessel and a broken one. By integrating these cleaning steps into your post-paddle routine, you ensure that your gear stays in top shape for years to come. Treat your kayak with care, and it will continue to provide you with endless days of exploration on the water.