

6 Best Pool Heater Manifold Gaskets for Easy Repairs
Fixing pool leaks is simple with the right parts. Explore our top 6 pool heater manifold gasket picks for reliable, easy repairs and optimal system flow.
There is nothing quite like the frustration of walking out to your pool equipment pad only to find a steady drip coming from your heater manifold. A leaking gasket might seem like a minor annoyance, but it can quickly escalate into pressure loss and inefficient heating that ruins your swim season. Keeping your pool heater running at peak performance starts with knowing exactly which seal will keep your system watertight and reliable.
Disclosure: As an Amazon Associate, this site earns from qualifying purchases. Thank you!
Understanding Pool Heater Manifold Gasket Basics
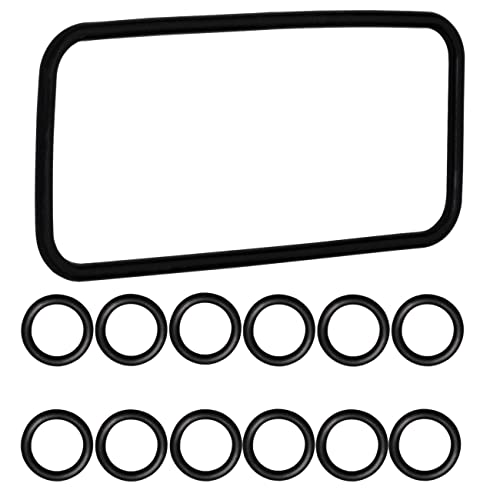
A manifold gasket acts as the essential barrier between the heater’s heat exchanger and the piping that delivers water to your pool. Over time, constant exposure to chlorinated water, high temperatures, and fluctuating pressure causes these rubber seals to dry out, crack, or compress. When they fail, you lose water, efficiency, and potentially damage the internal components of the heater itself.
Replacing a gasket is one of the most common DIY repairs for any pool owner. Understanding that these parts are specific to the make and model of your heater is the most important step in the process. Never try to "make do" with a generic O-ring or sealant; the precision fit required to withstand high-pressure water flow demands an exact manufacturer-specified replacement.
Pentair 42001-0060S Manifold Gasket Reliability

The Pentair 42001-0060S is the gold standard for owners of MasterTemp and Max-E-Therm heaters. This gasket is engineered with high-grade materials specifically designed to handle the thermal expansion and contraction that occurs every time your heater cycles on and off. It provides a robust, airtight seal that prevents the common weeping leaks often found at the manifold connection.
If you own a Pentair heater, this is the only gasket you should consider. It is perfectly molded to match the manifold grooves, which makes installation significantly easier than trying to seat an aftermarket alternative. For those who value long-term reliability and want to avoid repeating the repair process next season, this OEM part is an absolute must-have.
Jandy R0357100 Gasket for Heater Maintenance

For those running Jandy LXi or similar series heaters, the R0357100 gasket is your primary line of defense against leaks. Jandy heaters are known for their high-performance output, and this gasket is built to maintain that integrity under demanding hydraulic conditions. It is a straightforward, no-nonsense component that fits precisely, ensuring your water stays inside the exchanger where it belongs.
I recommend this gasket for owners who perform seasonal maintenance and want to ensure their system remains leak-free throughout the summer. It is durable, easy to seat, and provides a consistent seal that holds up against chemical imbalances. If you are servicing a Jandy unit, sticking with this specific part ensures that your repair is done right the first time.
Raypak 003334F Manifold O-Ring for Efficiency

Raypak heaters are renowned for their rugged durability, and the 003334F manifold O-ring is a critical piece of that puzzle. Unlike flat gaskets, this O-ring provides a circular compression seal that is excellent at absorbing vibration and minor pipe misalignment. It is the ideal choice for keeping your heater running efficiently without the risk of bypass leaks.
This Raypak 266,000 BTU digital natural gas pool heater offers efficient, convenient heating for pools and spas. Its electronic ignition and space-age materials ensure safe operation and eliminate the need for costly heat sinks.

If you have a Raypak unit and notice a small puddle forming near the base, this O-ring is almost certainly your solution. It is a cost-effective, high-impact repair that restores the hydraulic balance of your system. You can trust this part to maintain a tight seal, even in high-flow environments where other seals might fail.
Hayward HAXMAN1930 Manifold Gasket Selection
The Hayward HAXMAN1930 is designed specifically for the Universal H-Series heaters, which are staples in many backyard pools. This gasket is built to resist the corrosive nature of pool chemicals, ensuring that your manifold connections remain secure year after year. It is a vital component for maintaining the high-efficiency heat transfer that Hayward owners expect.
This gasket is the perfect choice for the DIY enthusiast who wants a hassle-free installation. Because it is an OEM part, it fits the manifold housing perfectly, eliminating the guesswork that comes with cheaper, ill-fitting alternatives. If you want to keep your Hayward heater operating at peak performance without the worry of recurring leaks, this is the part for you.
Sta-Rite 77707-0012 Manifold Gasket Features
The Sta-Rite 77707-0012 is a specialized gasket built for the demanding environment of the Max-E-Therm and similar Sta-Rite systems. It features a unique cross-section that provides superior sealing surface area, which is essential for heaters that operate at higher flow rates. This gasket is designed to withstand both high heat and the chemical stress of modern salt-chlorine systems.
This is the go-to part for Sta-Rite owners who need a reliable, long-lasting fix. It is slightly more robust than standard gaskets, making it an excellent choice if your heater is located in a high-traffic area or experiences significant vibration. If you want a "set it and forget it" repair, this gasket will provide the peace of mind you need.
Laars 5000-117 Manifold Gasket Performance

The Laars 5000-117 is a high-performance gasket tailored for the Lite2 and related series heaters. It is engineered to provide a high-pressure seal that prevents water loss, even when your pump is running at maximum RPM. For those who rely on their Laars heater to keep their pool swimmable through the cooler months, this gasket is an essential maintenance item.
I recommend this part for owners who prioritize system longevity and want to avoid the common pitfalls of inferior aftermarket seals. It is durable, easy to install, and specifically calibrated for the manifold dimensions of Laars units. If your heater is showing signs of age, replacing the manifold gasket with this specific model is a simple way to extend its service life significantly.
Essential Tools for Manifold Gasket Repairs
Before you begin, ensure you have the right tools to make the job quick and painless. You will need a set of nut drivers or a socket wrench to remove the manifold bolts, as these can often be tight or slightly corroded. A flat-head screwdriver is also helpful for carefully prying out the old, stuck gasket without damaging the manifold housing.
Don’t forget a tube of silicone-based pool lubricant. Applying a light coating to the new gasket helps it seat properly and prevents it from pinching during installation. Having a clean rag on hand to wipe away any debris or mineral buildup from the manifold surface is also crucial, as even a small piece of grit can cause a new gasket to leak.
Step-by-Step Gasket Replacement Procedures
Start by turning off the power to your heater and isolating the water flow by closing the intake and return valves. Once the pressure is relieved, remove the bolts securing the manifold to the heat exchanger and carefully pull the manifold away. Take a moment to clean the mating surfaces thoroughly, removing all remnants of the old gasket and any calcium deposits.
Place the new gasket into the groove, ensuring it sits flat and is not twisted or stretched. Carefully align the manifold back onto the heat exchanger and hand-tighten the bolts in a cross-pattern to ensure even pressure distribution. Finally, tighten the bolts firmly with your wrench, but be careful not to overtighten, as this can crack the plastic manifold housing.
Testing Your Heater After Gasket Installation
Once the manifold is secured, slowly open your valves to allow water back into the heater, keeping a close eye on the connection point. Turn on your pump and check for any immediate signs of dripping or spraying. If everything looks dry, turn on the heater and let it run for at least 15 minutes to allow the system to reach operating temperature.
Thermal expansion can sometimes cause minor leaks to appear once the unit warms up, so perform a second inspection after the heater has been running for a while. If you see a slight weep, a very small tightening of the bolts is usually all that is needed. Once you are confident there are no leaks, you can rest easy knowing your heater is ready for the season.
Maintaining your pool heater manifold is a manageable task that pays off in both energy efficiency and equipment longevity. By selecting the correct OEM gasket and following proper installation procedures, you can eliminate leaks and keep your water at the perfect temperature all year long. Stay proactive with your maintenance, and your pool will remain the relaxing oasis you intended it to be.
