7 Testing Strip Tips for Swim Safety That Every Parent Should Know
Ensure a safe swim. Our 7 tips for using testing strips help you balance pool chemicals to prevent rashes, eye irritation, and harmful bacteria.
That crystal-clear swimming pool looks inviting, but its appearance tells you almost nothing about its safety. As a parent, you know that what you can’t see is often what matters most for your child’s well-being. This is especially true for pool water, where invisible chemical imbalances can turn a day of fun into a week of itchy skin or a nasty ear infection.
Disclosure: As an Amazon Associate, this site earns from qualifying purchases. Thank you!
Why Pool Chemistry is Key to Your Child’s Health
A clear pool is not necessarily a clean or safe pool. The real measure of safety lies in the water’s chemical balance, a delicate interplay between sanitizers like chlorine and foundational levels like pH and alkalinity. When these are out of whack, the water can become a breeding ground for bacteria and algae, even if it looks fine to the naked eye.
Think of it this way: improperly balanced water is the root cause of most common swimming-related ailments. That "pool smell" people associate with chlorine? It’s actually the scent of chloramines, which form when chlorine combines with sweat and oils. These compounds are what irritate your child’s eyes and skin, not the chlorine itself.
Children are particularly vulnerable. Their skin is more sensitive, and they’re more likely to swallow water while playing. Ensuring the pool chemistry is correct isn’t just about preventing a green pool; it’s a fundamental health measure to protect them from skin rashes, swimmer’s ear, and other recreational water illnesses.
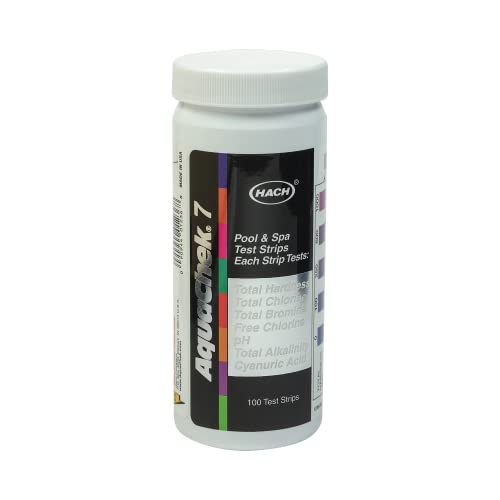
Tip 1: Master Chlorine and pH with AquaChek Strips
Chlorine and pH are the two most important metrics you’ll track. Get these right, and you’ve won half the battle. Chlorine is your sanitizer, the workhorse that kills germs and bacteria. The pH level determines how effective that chlorine is.
Imagine pH as a gatekeeper. If the pH is too high (alkaline), it locks the gate, and the chlorine can’t do its job, no matter how much you add. If it’s too low (acidic), the water becomes corrosive and irritating. The sweet spot for pH is between 7.4 and 7.6, which is comfortable for swimmers and allows chlorine to work efficiently.
When using a reliable strip like an AquaChek, pay close attention to Free Chlorine. This is the active, available chlorine ready to fight contaminants. Total Chlorine, another common reading, includes used-up chlorine (chloramines) that are no longer effective. If your Free Chlorine is low but your Total Chlorine is high, it’s a clear sign you need to shock the pool to break down those irritating chloramines.
Tip 2: Stabilize Water with JNW Direct Alkalinity Tests
Easily monitor your pool or hot tub with 100 6-in-1 test strips. Get accurate readings for chlorine, bromine, pH, hardness, and alkalinity in seconds. Includes a helpful e-book for maintaining healthy water.

If you feel like you’re constantly fighting to keep your pH in range, the real culprit is probably your Total Alkalinity (TA). Think of TA as an anchor for your pH. It’s a buffer that absorbs changes and prevents your pH level from swinging wildly every time it rains or you add chemicals.
Without proper alkalinity, your pH is like a ship in a storm—unstable and unpredictable. A little bit of acid from a rain shower can cause the pH to plummet, while adding a small amount of pH increaser can make it skyrocket. This is known as "pH bounce," and it’s frustrating for pool owners and bad for swimmers.
Strips from brands like JNW Direct often include a pad for Total Alkalinity. Before you try to fix a pH problem, always check your alkalinity first. The ideal range is typically 80-120 parts per million (ppm). By getting your TA in the correct range, you create a stable foundation that makes managing your pH significantly easier.
Tip 3: Dipping LaMotte Insta-Test Strips Correctly
Quickly and accurately test your pool or spa water with Insta-TEST 4 Plus strips. This 1-dip method measures Free Chlorine, Bromine, Alkalinity, pH, and Total Hardness, with a moisture-resistant bottle for reliable results.

How you use a test strip is just as important as which one you buy. The biggest mistake people make is swirling the strip in the water or flicking it vigorously to remove excess water. This simple error can ruin your reading by causing the chemical reagents on the different pads to bleed into one another.
The correct technique is simple but crucial. Follow the instructions on the bottle, which for most brands like LaMotte Insta-Test Strips will be something like this:
- Dip the strip elbow-deep into the water, away from skimmers or return jets.
- Remove it immediately with the pads facing up.
- Do not shake it. Hold the strip level and still for about 15 seconds.
After the waiting period, compare the strip to the color chart on the bottle. This precise, gentle method ensures each pad reacts only to the water it absorbed, giving you an accurate snapshot of your pool’s chemistry. Rushing this step or using poor technique is like trying to take a picture with a blurry lens—the result is useless.
Tip 4: Set a Testing Schedule with Taylor Test Strips
Get accurate pool and spa water analysis in seconds with these easy-to-use Taylor 7-in-1 test strips. Quickly measure Free Chlorine, pH, Alkalinity, Hardness, and more with clear, non-technical instructions.

Water chemistry changes constantly. Sunlight breaks down chlorine, swimmers introduce contaminants, and rain dilutes everything. Because of this, testing can’t be a random, once-in-a-while task. Consistency is the key to staying ahead of problems.
Create a simple, repeatable routine. During the peak swimming season, you should be testing your water frequently. A good baseline schedule is:
- Chlorine and pH: Test 2-3 times per week.
- Alkalinity, Stabilizer (Cyanuric Acid), and Calcium Hardness: Test once per week.
Using a reliable strip from a trusted brand like Taylor makes this quick and easy. The entire process takes less than a minute. By making it a regular habit—perhaps every Tuesday and Friday morning—you’ll catch imbalances before they become major issues that require expensive chemicals and a closed pool.
Tip 5: Decoding AquaChek 7-Way Strip Color Charts
Reading the color chart on the side of the bottle can feel like a pop quiz, especially if the colors don’t seem to be a perfect match. The trick is to have the right environment and a clear method. Don’t try to read it in the harsh glare of the midday sun or in deep shadow, as both can distort the colors.
For the most accurate reading, hold the strip right next to the color blocks on the bottle in natural, indirect daylight. A white piece of paper held behind the strip can also help the colors pop, making comparison easier. Work your way down the strip, matching one pad at a time.
What if a color falls between two blocks on the chart? This is common. For example, if your pH color is somewhere between the ideal 7.6 and the slightly high 7.8, it’s best to be conservative. In this case, you’d treat it as if it’s approaching 7.8 and take minor corrective action. It’s always better to make small, incremental adjustments than to overshoot the target.
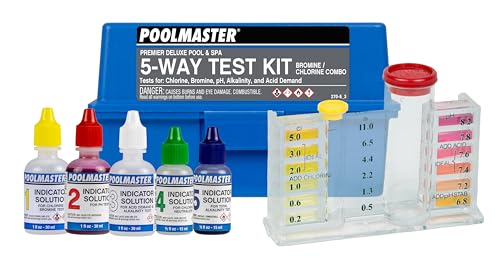
Tip 6: Check Expiration Dates on Your Poolmaster Kit
Maintain optimal pool or spa water balance with this 5-way test kit. Accurately measure Chlorine, Bromine, pH, Acid Demand, and Total Alkalinity using the included clear-view test block with integrated color chips.
Here’s a tip that gets overlooked all the time: test strips have a shelf life. The chemical reagents impregnated on the pads degrade over time, especially when exposed to heat and humidity. Using an expired test strip is worse than not testing at all because it gives you false confidence in a bad reading.
Imagine your expired strips show that your chlorine is perfect. In reality, it could be dangerously low, leaving your family swimming in unsanitized water. Or, they might show a low pH, prompting you to add chemicals that unnecessarily raise it, making the chlorine ineffective. This is why checking the date on your Poolmaster kit or any other brand is a critical first step.
Make it a habit to check the expiration date at the beginning of each pool season. Store your test strips indoors in a cool, dry place, and always make sure the cap is screwed on tightly to protect the remaining strips from moisture. If they’re past their date, replace them. The small cost is well worth the peace of mind that comes with accurate results.
Tip 7: Test Again After Rain or Heavy Pool Parties
A pool is a living ecosystem, and major events can throw its balance into chaos. Two of the biggest disruptors are heavy rain and heavy use. You cannot simply stick to your regular testing schedule and assume everything is fine after one of these events.
Rainwater is naturally acidic and contains no chlorine, so a big storm will dilute your sanitizer and lower your pool’s pH and alkalinity. A pool party, on the other hand, introduces a massive load of contaminants—sunscreen, sweat, hair products, and oils—that your chlorine has to work overtime to neutralize. Your sanitizer levels can be depleted in just a few hours.
The rule is simple: test the water after every significant event. This means checking your key levels the morning after a big party or as soon as possible after a heavy downpour. This proactive approach allows you to make immediate corrections, ensuring the water is safe and ready for the next swim, rather than waiting for it to turn cloudy or green.
Ultimately, a bottle of test strips is one of the most powerful swim safety tools a parent can own. It transforms you from a reactive problem-solver into a proactive guardian of your family’s health. By making these simple tips part of your routine, you ensure every splash is a safe one.