6 Steps For Cleaning And Storing Kayaks That Extend Its Lifespan
Proper kayak care is simple. Our 6-step guide covers cleaning and storage essentials to prevent UV damage and warping, extending your boat’s lifespan.
You’ve just paddled back to shore after a perfect day, but the work isn’t quite finished. How you handle your kayak in the next 30 minutes directly impacts its performance and longevity. A consistent cleaning and storage routine is the single best way to protect your investment and ensure it’s ready for your next adventure.
Disclosure: As an Amazon Associate, this site earns from qualifying purchases. Thank you!
Extending Your Kayak’s Life With Proper Care
A modern kayak feels indestructible, but it’s constantly battling the elements. The biggest threats are UV radiation, which degrades plastic and composites, and moisture, which fosters mold and mildew. Grit, sand, and salt act as abrasives, slowly wearing down the hull and components every time you move the boat.
Proper care is about more than just aesthetics. A well-maintained kayak is safer, as its structural integrity isn’t compromised by sun damage or corrosion. It also preserves the vessel’s value. When it’s time to upgrade, a clean, vibrant kayak will always fetch a better price than one that’s faded, stained, and brittle.
Many paddlers think a quick spray with a garden hose is sufficient. While that’s better than nothing, it leaves behind a film of grime, salt, and oils from sunscreen and bug spray. Over time, this residue can damage seals, stain surfaces, and become a breeding ground for mildew, especially inside hatches and the cockpit.
Step 1: Initial Rinse with a Gilmour Hose Nozzle
This durable zinc pistol grip nozzle offers reliable metal construction for frequent use. Easily customize your watering with the classic rear control and a flow control dial, plus attach cleaning tools with the threaded front.
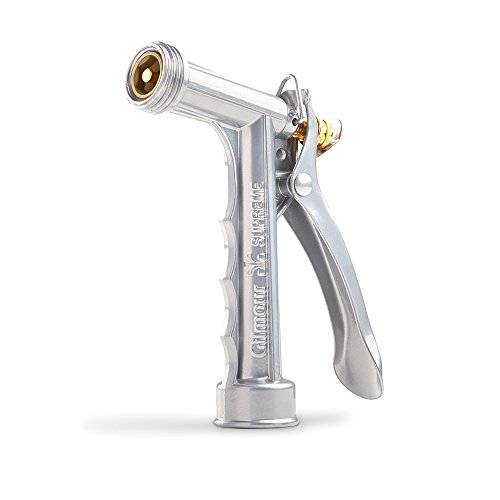
Your first action off the water should always be a thorough rinse. The goal here is to remove all the loose surface contaminants before you start scrubbing. Think sand, mud, salt crystals, and bits of aquatic vegetation.
Using a versatile sprayer like a Gilmour Hose Nozzle gives you the control you need. Use a wide, gentle "shower" setting to rinse the entire boat, inside and out. Then, switch to a more focused "jet" setting to blast sand out of scupper holes, seat tracks, and the tight spaces around foot pegs or rudder assemblies. Don’t forget to rinse your paddle and PFD, too.
This step is non-negotiable, especially after paddling in saltwater. Salt is incredibly corrosive to metal fittings and can leave a hazy, abrasive film on the hull once it dries. Rinsing immediately prevents these crystals from forming and makes the next step—a proper wash—far more effective.
Step 2: Scrub Down with Star Brite Boat Wash
Effectively clean your boat, car, or RV with this concentrated formula that removes tough stains without stripping wax or leaving streaks. Perfect for various surfaces, it delivers a sparkling finish while protecting your investment.
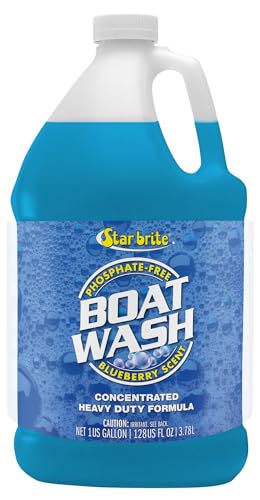
Water alone won’t cut through the grime that accumulates on a kayak. Oils, fish slime, and stubborn waterline stains require a proper cleaning agent to break them down. This is where a dedicated boat wash becomes essential.
Avoid using household detergents like dish soap. They are designed to strip grease aggressively and can remove the protective waxes and factory finishes on your kayak, leaving it vulnerable to UV damage. A product like Star Brite Boat Wash is specifically formulated to be tough on dirt but gentle on marine surfaces like gelcoat, plastic, and vinyl. It cleans effectively without dulling the finish.
Use a bucket of fresh water, add the recommended amount of boat wash, and get to work with a soft-bristle deck brush or a large microfiber wash mitt. Pay close attention to the cockpit area, where sunscreen and sweat accumulate, and the deck, where water spots and dirt settle. Scrub the hatch covers and the rims they seal against to ensure a watertight fit on your next trip.
Step 3: Dry Completely with The Rag Company Towels
Experience superior car drying with The Rag Company Gauntlet towel. Its premium 900gsm Korean microfiber and patented twist loop design absorb more moisture faster, leaving a scratch-free finish.
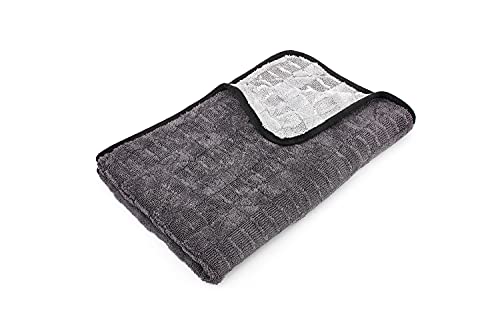
This is the step most people skip, and it’s one of the most critical for preventing long-term issues. Putting a kayak away wet is an invitation for mold and mildew, which can be difficult to remove and can permanently stain fabrics and plastics. Trapped moisture can also lead to corrosion on metal hardware.
Invest in a set of large, high-quality microfiber towels. The Rag Company makes exceptionally absorbent drying towels that can pull a surprising amount of water off a surface with a single pass. Unlike old bath towels, they won’t leave behind lint and can be wrung out easily.
Wipe down the entire exterior of the hull and deck. Then, focus on the interior. Use a smaller towel to dry the cockpit, seat, and inside any storage hatches. Prop the hatches open and pull the drain plug to allow air to circulate and evaporate any remaining moisture. A bone-dry boat is a happy boat.
Step 4: Apply 303 Aerospace Protectant Spray
Protect and restore surfaces with 303 Aerospace Protectant. This rinse-free spray offers superior UV protection, repels dust and stains, and leaves a non-greasy matte finish on rubber, plastic, vinyl, and more.

Think of this step as applying sunscreen to your kayak. The sun’s ultraviolet rays are the primary cause of color fading, brittleness, and cracking in polyethylene and composite kayaks. A quality UV protectant is your best defense against long-term sun damage.
303 Aerospace Protectant Spray is a gold standard for a reason. It provides powerful UV blockers that help maintain your kayak’s original color and finish. It also repels dust and stains, making future cleanups easier. It leaves a dry, matte finish, not a greasy or slick one.
After your kayak is completely clean and dry, apply the protectant. For best results, spray it onto a clean microfiber applicator or cloth, not directly onto the kayak. Wipe it evenly over the entire surface—hull, deck, seat, and hatch covers. Let it sit for a moment, then use a second, clean towel to buff off any excess. Applying this two to three times per paddling season will dramatically extend the life and look of your vessel.
Step 5: Choose a Shaded, Low-Humidity Location
Where you store your kayak is just as important as how you clean it. All your hard work can be undone by a poor storage choice. The two main enemies in storage are the same as on the water: direct sunlight and moisture.
The ideal storage spot is indoors, in a place like a garage, basement, or shed. This protects the kayak from UV rays, rain, and extreme temperature swings. If you don’t have indoor space, a covered carport or the shady side of your house under a deep eave is the next best thing. The key is minimizing direct sun exposure.
If outdoor storage is your only option, a high-quality, UV-resistant kayak cover is a must. However, be cautious. A non-breathable tarp can trap moisture underneath, creating a perfect environment for mildew. Ensure your kayak is completely dry before covering it, and look for a cover made from a breathable marine-grade fabric.
Step 6: Use Suspenz Kayak Racks for Support
Safely store two kayaks, canoes, or SUPs with this durable steel rack. Features protective foam padding, reinforced safety straps, and adjustable leveling feet for secure indoor or outdoor use. Holds up to 175 lbs total.

How your kayak is supported during storage can have a major impact on its shape. Plastic (polyethylene) kayaks, in particular, are susceptible to warping or denting if stored improperly, especially in warm climates. Storing a kayak flat on the floor or on a pair of narrow sawhorses creates pressure points that can deform the hull over time.
A dedicated storage system is a worthwhile investment. Suspenz Kayak Racks, which use wide webbing straps, are an excellent choice because they conform to the shape of your hull. This distributes the weight evenly and eliminates pressure points, preventing a condition known as "oil canning" or denting.
The best orientation for storing most kayaks is on their side, resting on the gunwales, which are structurally the strongest part of the boat. Storing it upside down on padded crossbars is another good option. Wall-mounted cradle or strap systems are fantastic because they provide excellent support while also saving valuable floor space.
Long-Term Storage and Seasonal Considerations
Prepping your kayak for a few months of winter storage requires a bit more diligence than your typical post-paddle routine. This is your last chance to address any issues before they have a whole season to get worse. Any lingering moisture, dirt, or salt will have plenty of time to cause mold, stains, or corrosion.
Before putting it away for the season, perform an especially thorough cleaning, drying, and UV protection treatment. This is also a great time to inspect all your lines, bungees, and hardware for wear and tear. To prevent the rubber seals on your hatches from compressing and losing their shape, either loosen the hatch covers or store them separately nearby.
Different materials have different needs. A polyethylene kayak stored outside in the cold is fine, but it can become brittle, so avoid impacts. A fiberglass or composite kayak is more vulnerable to cracking from impacts in freezing temperatures and must be handled with care. Regardless of the material, ensure the storage location is shielded from the weight of snow and ice, which can crush a boat.
Your kayak is a significant investment in your time on the water. By integrating these cleaning and storage steps into your routine, you’re not just performing maintenance; you’re actively preserving the performance, safety, and value of your vessel for years of adventure to come.