6 Vinegar vs. Bleach Tips for Water Toys That Every Parent Should Know
Keep water toys safe and clean. Our guide compares vinegar for daily cleaning vs. a bleach solution for deep disinfecting. Learn 6 essential tips.
Every parent knows the feeling of pulling the bin of pool toys out of the shed for the first swim of the season. You’re met with either the faint, musty smell of mildew or a slimy film on that favorite inflatable unicorn. The immediate question is always the same: how do you get these things clean and, more importantly, safe for your kids? This is where the great debate begins—gentle vinegar or powerful bleach.
Disclosure: As an Amazon Associate, this site earns from qualifying purchases. Thank you!
Preventing Mold on Your Intex Pool Floats
The best way to deal with mold and mildew on your Intex floats is to never let it start. Prevention is purely a game of moisture management. After every use, give your floats a quick rinse with a hose to wash off pool chemicals and lake water residue, which can degrade the vinyl over time.
The most critical step is drying them completely before storing them. Don’t just toss them, still damp, into a deck box or a dark shed. That’s a perfect breeding ground for mildew. Let them air dry in the sun for an hour or two, flipping them over to get both sides. Just be mindful that excessive, long-term sun exposure can fade colors and make the plastic brittle.
Using Heinz Vinegar for Gentle, Safe Cleaning
Think of white vinegar, like the common Heinz brand, as your first line of defense for routine cleaning. It’s fantastic for cutting through that general grimy buildup and hard water spots without using harsh chemicals. Because it’s acidic, it does a great job of breaking down the slimy film that develops on toys left in the water.
This is your go-to solution for a mid-season refresh or for cleaning toys that aren’t visibly moldy. It’s non-toxic, inexpensive, and won’t degrade the plastics or vinyl on your toys nearly as much as harsher chemicals might. For bath toys, especially the kind that squirt water, a vinegar soak is perfect for cleaning out the gunk you can’t see inside.
Clorox Bleach for Heavy-Duty Disinfection
When you see actual black or green spots of mildew, vinegar isn’t going to cut it. That’s when you need to bring in a disinfectant like Clorox Bleach. Bleach doesn’t just clean the surface; it actively kills the mold and mildew spores, which is crucial for preventing them from coming right back.
However, bleach is a powerful tool that demands respect. It can damage and discolor vinyl and plastics over time, so it should only be used when necessary, not for routine washing. Always work in a well-ventilated area, preferably outdoors, and wear gloves to protect your skin from the corrosive solution. This is for serious disinfection, not everyday grime.
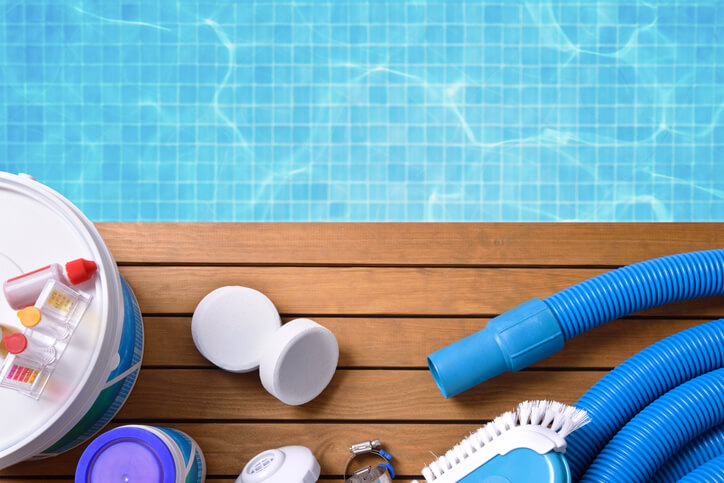
Your Step-by-Step Vinegar Soaking Method
For a safe and effective clean, the vinegar soak is your best friend. It’s incredibly simple and works on everything from small diving rings to inflatable rafts. You just need a large tub, bucket, or even a clean kiddie pool.
Follow these simple steps:
- Create the solution: Mix a solution of one part white vinegar to one part water. You don’t need to be exact, a 50/50 mix is a great starting point.
- Soak the toys: Submerge the toys completely in the solution. For hollow toys like rubber ducks, squeeze them to fill them with the vinegar water. Let them soak for at least an hour.
- Scrub and detail: After soaking, use a soft brush or cloth to scrub away any remaining grime. An old toothbrush is perfect for getting into small crevices.
- Rinse thoroughly: This step is crucial and we’ll cover it more later. Rinse every toy with clean, fresh water.
The Proper Dilution for a Bleach Solution
Using bleach safely and effectively is all about the right dilution. Never, ever use bleach straight from the bottle on your water toys. It’s far too corrosive and can quickly damage the material, not to mention being a significant safety hazard.
The Centers for Disease Control and Prevention (CDC) provides a standard guideline for a sanitizing solution that works perfectly here. The correct ratio is 1/3 cup of regular household bleach per 1 gallon of water. Mix this solution in a bucket or tub before adding the toys. Let the toys soak for 5-10 minutes—that’s all it takes to kill the mildew spores. Any longer and you risk damaging the toy.
Vinegar for Grime vs. Bleach for Mildew
Here’s the simplest way to decide which cleaner to use. Look at the toy. Is it just slimy, dirty, or covered in water spots? That’s a job for vinegar. Vinegar’s acidity is perfect for dissolving mineral deposits and breaking down that slick biofilm.
Do you see distinct, speckled black, green, or pink spots? That is visible mildew or mold, and it requires a true disinfectant. Bleach is the right tool for killing the organism. Using vinegar on established mildew might remove the surface stain, but it often won’t kill the underlying spores, meaning it will just grow back in a few days.
- Use Vinegar for: General slime, hard water stains, dirt, and routine cleaning.
- Use Bleach for: Visible mold and mildew spots that need to be killed.
Think of it this way: vinegar is for cleaning, and bleach is for sterilizing. Don’t use a sledgehammer when a simple hammer will do the job. Start with vinegar, and only escalate to a properly diluted bleach solution when you confirm you’re dealing with mildew.
The Critical Final Rinse for All Water Toys
This might be the most overlooked, yet most important, step in the entire process. Whether you use a gentle vinegar solution or a powerful bleach mixture, you must rinse the toys thoroughly with clean, fresh water when you’re done. There are no exceptions to this rule.
Leaving any residue behind is a bad idea. Bleach residue can irritate a child’s skin and continue to degrade the toy’s material long after you’ve put it away. Even vinegar, while non-toxic, can leave a smell and its acidic nature isn’t great for long-term contact with the plastic. A comprehensive rinse ensures the toy is truly clean and, most importantly, completely safe for handling.
Proper Drying and Storage to Prevent Regrowth
You can do a perfect job of cleaning and disinfecting, but all that work will be for nothing if you store the toys improperly. Moisture is the fuel for mold and mildew. Your final mission is to eliminate it completely before the toys go into storage for the week or for the winter.
After the final rinse, shake out any excess water. Squeeze all the water out of any squirting toys until they are empty. Then, lay everything out on a clean towel or surface in a sunny, well-ventilated spot to air dry completely. Ensure every nook and cranny is bone dry before you pack them away. Storing them in a ventilated mesh bag or a bin with loose-fitting lid is far better than sealing them in an airtight container where any trace of moisture will be trapped.
Ultimately, keeping your family’s water toys in great shape isn’t about finding one magic cleaning solution. It’s about understanding the right tool for the job—gentle vinegar for routine grime and diluted bleach for stubborn mildew. By cleaning smart, rinsing well, and drying completely, you’ll ensure your gear is safe, fun, and ready for the next perfect day on the water.