
7 Techniques for Setting Up a Beach Tent That Withstand Any Wind
Master beach tent setup with 7 proven techniques! Learn proper anchoring, wind-resistant positioning, and weatherproofing for a stable seaside shelter.
Why it matters: You’ve packed your beach gear and picked the perfect spot on the sand â but struggling with a flapping tent in ocean winds can turn your relaxing day into a frustrating battle.
The big picture: Setting up a beach tent properly protects you from harsh UV rays and creates a comfortable base camp for your seaside adventures.
What’s next: These seven proven techniques will help you secure your beach tent quickly and effectively so you can focus on enjoying the waves instead of wrestling with stubborn poles and stakes.
Disclosure: As an Amazon Associate, this site earns from qualifying purchases. Thank you!
Choose the Right Location for Your Beach Tent
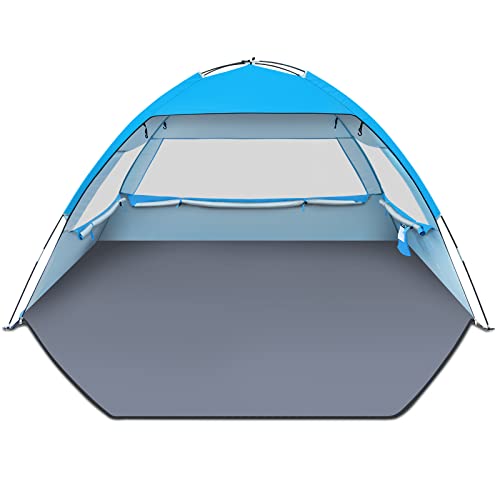
Enjoy sun protection and spacious comfort with this lightweight beach tent. It features UPF 50+ UV protection, easy setup, and a portable design for 3-4 people.

Location makes or breaks your beach tent setup. After wrestling with countless tents in brutal wind and watching the tide swallow poorly placed shelters, I’ve learned that spending two minutes on location beats spending twenty minutes fighting the elements.
Check Wind Direction and Speed
Wind direction changes throughout the day, and you’ll want to position your tent accordingly. Face the tent’s narrow end into the prevailing wind to reduce surface area and resistance.
Check the wind speed before committing to a spot. Sustained winds over 15 mph make most beach tents nearly impossible to secure properly, regardless of your anchoring technique.
Enjoy sun protection and comfortable space for 3-4 people with this lightweight beach tent. It features easy setup, UPF 50+ fabric, and a compact carrying bag for convenient portability.
Avoid High Tide Areas
High tide zones are marked by debris lines, wet sand, and seaweed clusters. Set up at least 50 feet inland from these markers to avoid unexpected water surges.
Beach slopes can be deceiving during low tide. What looks like a perfect spot can become a soggy mess when the tide turns, leaving you scrambling to relocate your entire setup.
Look for Natural Windbreaks
Enjoy beach days more with this windscreen! It blocks blowing sand and chilly breezes, creating a comfortable space. Includes a convenient carry bag.

Dunes, rocks, and vegetation provide excellent wind protection without compromising your beach experience. Position your tent 10-15 feet away from these features to capture the wind shadow while maintaining good airflow.
Avoid setting up directly against windbreaks, as this creates turbulent air currents that can actually make your tent less stable than an open location.
Prepare Your Beach Tent Setup Area
Setting up your beach tent properly starts with preparing the ground beneath it. You’ll create a stable foundation that prevents damage to your tent and ensures maximum comfort during your beach day.
Clear Sand and Debris
Remove all shells, rocks, and seaweed from your marked tent area before setup. Sharp objects can puncture your tent floor or create uncomfortable pressure points when you’re sitting inside.
Rake through the sand with your hands to catch smaller debris you might’ve missed on first glance.
Level the Ground Surface
Smooth out any dips or mounds in the sand using your feet or a small shovel. Uneven ground creates stress points on your tent fabric and makes sleeping or lounging uncomfortable.
Pack down loose sand by walking over the entire area several times before placing your tent.
Mark Your Tent Footprint
Outline your tent’s base dimensions in the sand using a stick or your finger. This prevents you from accidentally setting up crooked or too close to obstacles.
Double-check that your marked area provides enough clearance for guy lines and stakes before proceeding with setup.
Secure Your Beach Tent with Proper Anchoring
Proper anchoring transforms a flapping tent into a stable shelter that’ll withstand coastal winds. Your tent’s security depends on using the right combination of anchoring methods for beach conditions.
Use Sand Anchors Effectively
Secure your boat with this durable 17" stainless steel sand anchor. Its screw-in design and propeller tip provide superior grip in sand, while the included T-handle ensures easy installation for various boat types.

Sand anchors work best when you twist them deep into packed sand below the surface layer. Drive them at least 8-12 inches down where the sand stays firm and moist. Attach guy lines with tension adjusters to maintain steady pressure as sand shifts throughout the day.
Drive Stakes at 45-Degree Angles
Stakes driven at 45-degree angles away from your tent provide maximum holding power in loose sand. Angle them toward the tent’s center to create opposing forces that resist wind uplift. Use 10-12 inch stakes for better penetration into the stable sand layer beneath.
Add Extra Weight with Sand Bags
Secure your equipment with these durable Aimosen sandbags. Made from wear-resistant oxford fabric with dual zippers and included PE bags, they provide reliable weight for light stands, tripods, canopies, and more.

Sand bags create additional downward force when wind conditions exceed your stakes’ holding capacity. Fill mesh bags or stuff sacks with 15-20 pounds of sand and attach them to corner tie-outs. Position them inside the tent’s footprint to prevent tripping hazards while maintaining anchoring effectiveness.
Set Up Your Beach Tent Frame Structure
Your tent frame determines everything about your beach shelter’s performance. Getting this foundation right prevents collapsed corners and fabric tears that’ll ruin your beach day.
Assemble Poles in Correct Order
Start with corner poles first, then work your way to center support poles. Most beach tents use color-coded or numbered pole sections that match specific connection points on your tent’s fabric sleeves. Connect the thickest diameter poles first since they’ll carry the primary structural load, then attach smaller support poles that maintain your tent’s shape and stability.
Connect Corner Joints Properly
Push pole sections together until you hear a definitive click or feel them lock into place. Loose connections create weak points that’ll fail when coastal winds pick up, leaving your tent frame twisted and your fabric flapping wildly. Test each joint by gently pulling the connected sections apart – properly assembled joints won’t budge under normal handling pressure.
Ensure Even Tension Distribution
Pull your tent fabric taut across all four corners simultaneously rather than securing one side completely before moving to the next. Uneven tension creates stress points that can tear fabric or bend your frame poles when wind loads hit your shelter. Your tent should have a drum-tight appearance without any sagging sections or overly stretched areas that indicate poor weight distribution.
Attach and Adjust Your Beach Tent Fabric
Getting your beach tent fabric properly secured and adjusted makes the difference between a shelter that serves you well and one that frustrates you all day.
Clip Fabric to Frame Securely
Clip fabric attachments starting from corners and working inward. This prevents uneven stress distribution that can tear fabric or bend poles. Most beach tents use plastic clips or Velcro strips – ensure each connection point engages fully before moving to the next. Double-check corner attachments receive extra tension since they bear the most wind load.
Tighten Guy Lines Evenly
Secure your tent or tarp with these durable 4mm guy lines. The reflective cords increase visibility at night, and the included aluminum adjusters make setup quick and easy.

Tighten guy lines in opposing pairs to maintain balanced tension. Start with minimal tension and gradually increase, checking that your tent maintains its intended shape. Uneven guy line tension creates stress points that can cause pole failure or fabric tears. Use tension adjusters to fine-tune throughout the day as wind conditions change.
Check for Proper Ventilation
Ensure ventilation panels remain unobstructed after fabric attachment. Many beach tents include mesh windows or vents that can get blocked during setup. Proper airflow prevents dangerous heat buildup and reduces internal pressure that can stress your tent structure. Position guy lines and stakes to avoid covering these critical ventilation areas.
Weatherproof Your Beach Tent Installation
Once your tent’s frame and fabric are secure, you’ll need to weatherproof the entire setup to handle unpredictable coastal conditions. This final step transforms a basic tent into a reliable shelter that won’t fail when conditions change.
Secure All Loose Ends
Double-check that all zippers, flaps, and ventilation panels are properly fastened or positioned. Loose fabric creates drag points that’ll stress your tent structure in gusty winds.
Tuck excess guy line length under sand bags or tie them to stakes. These dangling lines become trip hazards and create annoying slapping sounds that’ll drive you crazy.
Test Stability Against Wind
Gently shake your tent’s corner poles to identify any weak points before the wind does it for you. A properly secured tent should feel rock-solid with minimal movement.
Walk around your setup and give each guy line a firm tug. If any stakes pull loose or lines feel slack, re-anchor them immediately rather than hoping they’ll hold.
Adjust for Changing Conditions
Check your tent every 30-45 minutes during your beach day as sand shifts and wind patterns change. Tighten guy lines that’ve loosened and add more sand to bags if needed.
Reposition your tent’s orientation if wind direction shifts significantly. It’s easier to make small adjustments throughout the day than to completely re-setup your shelter.
Maintain Your Beach Tent Throughout the Day
Beach conditions change rapidly throughout the day. Your tent needs constant attention to stay secure and functional.
Monitor Anchor Points Regularly
Check your sand anchors every 30 minutes for shifting or loosening. Wind and foot traffic can gradually work stakes loose from their original positions.
Inspect guy line attachment points for stress or fraying. Sand movement around buried anchors often creates weak spots that fail without warning.
Retighten Connections as Needed
Tighten guy lines when they start sagging from wind stretch or temperature changes. Fabric expands and contracts throughout the day, affecting overall tension.
Adjust opposing corner lines simultaneously to maintain balanced stress distribution. Uneven tension creates failure points that can collapse your entire setup.
Prepare for Quick Takedown
Pack non-essential items early to streamline departure when weather deteriorates. Keep takedown tools accessible and sand-free for emergency situations.
Loosen stakes gradually during final hours to prevent them from setting too deep. This saves valuable time when you need to pack up quickly.
Conclusion
These seven beach tent techniques will transform your coastal experience from frustrating setup struggles to effortless relaxation. When you master proper location selection anchoring methods and fabric tension you’ll create a stable shelter that withstands ocean winds.
Your beach tent becomes a reliable retreat when you follow these proven strategies. Remember that ongoing maintenance throughout the day ensures your shelter stays secure while weather conditions change.
With these skills in your toolkit you’ll spend less time wrestling with tent poles and more time enjoying the sand surf and sunshine. Your beach days just became infinitely more comfortable and stress-free.
Frequently Asked Questions
How do I choose the best location for my beach tent?
Select a spot at least 50 feet from the high tide line and debris. Position the tent’s narrow end facing the prevailing wind to reduce resistance. Look for natural windbreaks like dunes or rocks, but maintain some distance to avoid turbulent air currents. Check wind direction and speed before setup.
What should I do to prepare the ground before setting up my beach tent?
Clear the area of shells, rocks, and debris that could damage the tent fabric. Level the ground surface and pack down loose sand for better stability. Mark your tent’s footprint in the sand to ensure proper placement and adequate clearance for guy lines and stakes.
What are the most effective anchoring techniques for beach tents?
Use sand anchors twisted deep into packed sand, and drive stakes at 45-degree angles away from the tent for maximum holding power. Use 10-12 inch stakes for better penetration in loose sand. Add 15-20 pound sandbags inside the tent’s footprint for extra stability and weight.
How do I properly assemble the beach tent frame?
Start by assembling corner poles first, then add center support poles. Ensure all pole sections connect properly to avoid weak points. Lock corner joints securely to prevent collapse. Pull all four corners taut simultaneously to distribute tension evenly across the fabric and prevent stress points.
What’s the correct way to attach and adjust the tent fabric?
Begin with corner clips and work inward to prevent uneven stress. Tighten guy lines in opposing pairs to maintain balanced tension. Ensure ventilation panels remain unobstructed for proper airflow. Check that all attachment points are secure and the fabric is evenly distributed without wrinkles or stress points.
How can I weatherproof my beach tent installation?
Secure all loose ends like zippers and flaps to prevent wind drag. Test stability by shaking corner poles and tugging guy lines. Check your setup every 30-45 minutes throughout the day, adjusting for changing wind conditions and retightening connections as needed to maintain structural integrity.
What maintenance should I perform on my beach tent during the day?
Monitor anchor points and guy line attachments regularly for signs of loosening. Retighten connections to maintain balanced tension as wind and foot traffic affect stability. Prepare for takedown by packing non-essential items early and gradually loosening stakes when ready to leave the beach.