7 DIY Salt Water Pool Conversion Tips That Save Thousands
Transform your pool into a saltwater oasis! Discover 7 expert DIY conversion tips to save money, reduce maintenance, and enjoy softer, gentler swimming water.
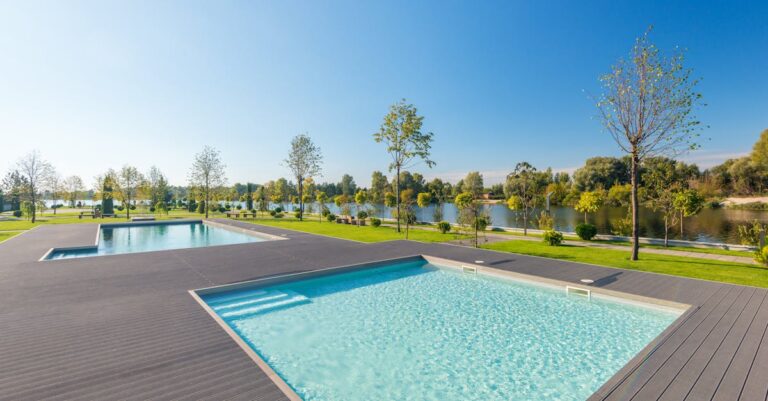
Converting your traditional chlorine pool to a saltwater system can save you thousands of dollars in maintenance costs while creating a more comfortable swimming experience. The bottom line: With the right tools and knowledge you can transform your pool into a luxurious saltwater oasis without hiring expensive contractors. Here’s everything you need to know about making the switch yourself.
Disclosure: As an Amazon Associate, this site earns from qualifying purchases. Thank you!
Assess Your Current Pool System and Equipment Compatibility
Before diving into your saltwater conversion, you’ll need to evaluate whether your existing setup can handle the change. This assessment determines what stays and what needs upgrading.
Check Your Pool’s Plumbing and Filtration System
Your plumbing connections must handle saltwater’s corrosive nature without developing leaks or deterioration. Inspect all PVC joints and fittings for cracks since salt accelerates wear on compromised seals. Ensure your filter system can accommodate the additional equipment load that saltwater generators require for optimal water circulation.
Evaluate Existing Equipment for Salt Water Compatibility
Most modern pool pumps work fine with saltwater systems, but older metal components like ladder bolts and light fixtures need replacement with stainless steel alternatives. Check your heater’s heat exchanger material since copper and bronze elements corrode rapidly in saltwater environments. Replace any galvanized or standard steel hardware before starting your conversion.
Calculate Pool Volume for Proper Salt Cell Sizing
Measure your pool’s length, width, and average depth to determine total gallons using the formula: length × width × average depth × 7.5. Match this volume to manufacturer specifications since undersized salt cells work overtime and fail prematurely. Most residential pools between 15,000-30,000 gallons need medium-capacity generators, while larger pools require commercial-grade units.
Choose the Right Salt Water Chlorination System
Your salt chlorination system is the heart of your conversion, and selecting the wrong one can lead to costly repairs and poor water quality. The key is matching your system’s capacity to your pool’s specific needs while considering your long-term maintenance preferences.
Compare Different Types of Salt Chlorine Generators
Basic models handle chlorine production efficiently but require manual monitoring and adjustment. Mid-range units offer programmable timers and output controls for consistent chlorination. Premium systems include advanced diagnostics, smartphone connectivity, and automated water balancing features that significantly reduce your maintenance workload.
Select Appropriate Cell Size Based on Pool Volume
Undersized cells work overtime and fail within 2-3 years instead of the typical 5-7 year lifespan. Properly sized cells should produce 1.5 times your pool’s daily chlorine demand to account for peak usage periods. Oversized cells cost more upfront but run at lower power levels, extending their operational life significantly.
Consider Additional Features Like Self-Cleaning and Digital Controls
Self-cleaning cells reverse polarity automatically to prevent calcium buildup, reducing your manual cleaning from monthly to quarterly. Digital displays show real-time salt levels, cell life remaining, and system status at a glance. Flow sensors protect your investment by shutting down the system when water flow drops below safe operating levels.
Prepare Your Pool Water Chemistry Before Installation
Getting your water chemistry dialed in before installing your salt chlorine generator sets the foundation for smooth operation and prevents equipment damage from day one.
Test and Balance pH Levels Between 7.2-7.6
Your pH level directly affects how efficiently your salt cell produces chlorine. Test your water using reliable test strips or a digital meter to get accurate readings.
If your pH runs high like most pools you’ll need muriatic acid to bring it down. Add acid gradually in small doses allowing 4-6 hours between treatments to avoid overshooting your target range.
Adjust Total Alkalinity to Optimal Range
Total alkalinity acts as your pH buffer preventing wild swings that damage salt cells. Your target range should sit between 80-120 ppm for stable water chemistry.
Use sodium bicarbonate to raise low alkalinity or muriatic acid to lower high readings. Make alkalinity adjustments before fine-tuning pH since alkalinity changes affect pH levels directly.
Remove Any Existing Chlorine from the Water
High chlorine levels can interfere with your salt system’s startup process and damage sensitive electronic components. Test your current chlorine levels using DPD test reagents for accuracy.
If chlorine measures above 3 ppm stop adding chemicals and let natural dissipation occur over 24-48 hours. You can speed the process using sodium thiosulfate but avoid shocking the system right before installation.
Install Your Salt Water Chlorinator System Properly
Proper installation of your saltwater chlorinator system determines whether you’ll enjoy years of trouble-free operation or face constant repairs and replacements. Each component must be positioned and connected correctly to ensure optimal performance and safety.
Mount the Control Unit in a Safe, Accessible Location
Mount your control unit on a wall at least 10 feet away from the pool’s edge to prevent water damage from splashing. Choose a location that’s easily accessible for maintenance but protected from direct sunlight and rain. Ensure there’s adequate ventilation around the unit and maintain at least 12 inches of clearance on all sides for proper airflow.
Connect the Salt Cell to Your Pool’s Plumbing System
Install the salt cell after your pool’s filter and heater in the return line to ensure clean water flows through the system. Use union fittings on both ends of the cell to allow easy removal for cleaning and maintenance. Position the cell with proper water flow direction as indicated by the manufacturer’s arrows to maximize chlorine production efficiency.
Wire the Electrical Components According to Manufacturer Guidelines
Connect all electrical components using GFCI-protected circuits to prevent dangerous electrical faults near water. Follow the manufacturer’s wiring diagram exactly and use waterproof wire nuts for all connections exposed to moisture. Have a licensed electrician verify your installation meets local electrical codes before energizing the system to ensure safety and compliance.
Add Pool Salt and Achieve Proper Salinity Levels
You’ll need to add the right amount of pool salt to achieve optimal chlorine production from your saltwater system. Getting the salinity levels correct from the start prevents equipment damage and ensures efficient operation.
Calculate the Correct Amount of Pool Salt Needed
You’ll need 250-300 pounds of pool salt for every 10,000 gallons to reach the target 3,200 ppm salinity level. Use your pool’s exact volume calculation to determine precise salt requirements, as adding too much salt requires expensive water dilution. Most residential pools between 20,000-30,000 gallons need 500-900 pounds of salt for initial conversion.
Distribute Salt Evenly Throughout the Pool
You should pour salt directly into the deep end while your pool pump runs to ensure proper mixing throughout the system. Add salt in 40-50 pound increments across different areas of the pool rather than dumping it all in one spot. This prevents localized high-concentration areas that can damage pool surfaces and equipment.
Allow Time for Complete Salt Dissolution and Circulation
You’ll need to run your pool pump continuously for 24-48 hours to fully dissolve and circulate the salt throughout your system. Test salinity levels after this circulation period using digital test strips or a salinity meter before starting your salt chlorine generator. Undissolved salt crystals can damage your salt cell and create uneven chlorine production across your pool.
Test and Fine-Tune Your New Salt Water System
Your salt water system needs careful monitoring during its first few weeks of operation to ensure optimal performance and prevent equipment damage.
Monitor Chlorine Production and Output Settings
Check your chlorine levels daily for the first two weeks using test strips or a digital tester. Start with your generator’s output setting at 50% and adjust gradually based on chlorine readings. Most systems need 2-4 ppm free chlorine, so increase output if levels drop below 1 ppm or decrease if they exceed 5 ppm to prevent swimmer irritation.
Verify Proper Salt Level Using Test Strips or Digital Tester
Test salt levels weekly using digital salt testers for accurate readings, as test strips can be unreliable for salinity measurements. Your system requires 3,200-3,400 ppm salt concentration for efficient chlorine production. Add 10 pounds of pool salt per 1,000 gallons to raise levels by 400 ppm if readings fall below the target range.
Adjust System Settings for Optimal Performance
Fine-tune your generator’s run time based on pool usage and weather conditions. Increase daily operation hours during heavy bather loads or hot weather when chlorine demand peaks. Most residential pools need 8-12 hours of daily generation, but you’ll dial this in based on consistent chlorine readings and water clarity over several weeks.
Maintain Your DIY Salt Water Pool Conversion Long-Term
Your saltwater pool conversion success depends on consistent maintenance practices that prevent costly repairs and equipment failures. Proper long-term care protects your investment while ensuring optimal water quality year-round.
Establish a Regular Testing and Cleaning Schedule
Test your saltwater pool chemistry twice weekly during swimming season and weekly during off-season periods. Check pH levels, chlorine output, and salt concentration using digital test strips or electronic meters for accurate readings.
Clean your pool’s skimmer baskets and pump strainer weekly to maintain proper water circulation. Schedule monthly deep cleaning sessions that include brushing walls, vacuuming debris, and backwashing your filter system to prevent buildup.
Inspect Salt Cell for Calcium Buildup and Scaling
Examine your salt cell monthly for white calcium deposits that reduce chlorine production efficiency. Remove the cell from its housing and inspect the metal plates for scaling or corrosion damage.
Clean calcium buildup using a 10:1 water-to-muriatic acid solution, soaking the cell for 10-15 minutes maximum. Rinse thoroughly with fresh water and reinstall, ensuring proper electrical connections to maintain optimal performance.
Keep Detailed Records of Chemical Levels and Adjustments
Document your pool’s chemical readings in a logbook or smartphone app to identify patterns and prevent problems before they escalate. Record pH levels, chlorine output, salt concentration, and any adjustments you make weekly.
Track seasonal trends in your pool’s chemical demands to anticipate future needs. Note weather conditions, bather loads, and equipment performance alongside chemical data to create a comprehensive maintenance history for troubleshooting.
Conclusion
Your DIY saltwater pool conversion journey doesn’t have to be overwhelming when you follow these essential steps. With proper planning and attention to detail you’ll transform your traditional chlorine pool into a more enjoyable swimming experience.
Remember that success lies in taking your time with each phase – from initial assessment to ongoing maintenance. The investment in quality equipment and careful installation will pay dividends through years of crystal-clear water and reduced chemical costs.
Your new saltwater system will reward you with softer-feeling water and fewer harsh chemical odors. Stay consistent with your monitoring schedule during those first few weeks and you’ll quickly master your pool’s unique needs for optimal performance year-round.
Frequently Asked Questions
Can I convert my traditional chlorine pool to saltwater myself?
Yes, you can successfully convert your pool to saltwater with the right tools and knowledge. The process involves assessing your current equipment, installing a salt chlorine generator, balancing water chemistry, and adding pool salt. While it requires careful planning and attention to detail, most pool owners can complete this conversion without hiring contractors.
How do I know if my pool equipment is compatible with saltwater?
Inspect your plumbing for PVC joints and cracks, ensure your filtration system can handle the additional load, and verify pump compatibility. Most modern pool pumps work with saltwater, but older metal components should be replaced with stainless steel alternatives. Check that your equipment can handle the corrosive nature of saltwater before proceeding.
What size salt chlorine generator do I need for my pool?
Generator size depends on your pool volume. Most residential pools between 15,000-30,000 gallons require medium-capacity generators, while larger pools need commercial-grade units. Calculate your exact pool volume to ensure proper salt cell sizing, as undersized cells can lead to premature failure and costly repairs.
How much salt do I need to add to my pool?
You’ll need 250-300 pounds of pool salt for every 10,000 gallons of water to reach the target salinity level of 3,200 ppm. Calculate the exact requirements based on your pool’s volume to avoid over-salting, which would require costly water dilution to correct.
What should my pool’s water chemistry be before installing the salt system?
Before installation, balance your pH levels between 7.2-7.6 and adjust total alkalinity to 80-120 ppm. Remove all existing chlorine from the water, as high chlorine levels can interfere with the salt system’s startup and damage sensitive components. Test thoroughly and allow natural chlorine dissipation before proceeding.
How long does it take for the salt to dissolve completely?
Run your pool pump continuously for 24-48 hours after adding salt to ensure complete dissolution and circulation. Add salt gradually while the pump runs to prevent localized high concentrations that could damage pool surfaces and equipment. Test salinity levels before starting the generator.
How often should I test my saltwater pool’s chemistry?
Test pool chemistry twice weekly during swimming season and weekly during off-season. Check chlorine levels daily when first starting the system, and verify salt levels weekly using reliable digital testers. Maintain chlorine levels between 2-4 ppm and salt concentration at 3,200-3,400 ppm for optimal performance.
What maintenance does a saltwater pool system require?
Clean skimmer baskets and pump strainers regularly, perform monthly deep cleaning sessions, and inspect the salt cell for calcium buildup monthly. Keep detailed records of chemical levels and adjustments to identify patterns and prevent issues. Regular maintenance protects your investment and ensures optimal water quality year-round.