7 Ways How to Anchor a Floating Dock in Strong Currents That Pros Use
Master proven techniques to anchor floating docks securely in strong currents. Learn about heavy-duty anchors, multi-point systems, and maintenance tips.
Why it matters: Strong currents can turn your floating dock into a dangerous liability if it’s not properly anchored. Most dock failures happen because owners underestimate the force of moving water and choose inadequate anchoring systems.
The bottom line: You’ll need the right combination of anchor type, weight, and positioning to keep your dock stable and secure. The key is understanding how water flow affects your specific dock design and choosing anchoring methods that can handle both steady currents and sudden surges.
What’s ahead: We’ll walk you through proven anchoring techniques that work in challenging conditions and help you avoid costly mistakes that could damage your dock or neighboring property.
Disclosure: As an Amazon Associate, this site earns from qualifying purchases. Thank you!
Understanding Strong Current Challenges for Floating Docks
Water’s relentless force can turn your peaceful floating dock into a twisted wreck faster than you’d imagine. Understanding current dynamics separates successful dock installations from expensive failures that end up wrapped around bridge pilings or washed downstream.
Identifying Current Velocity and Direction
Measure your current speed using a simple float test during different tidal conditions. Drop a weighted bottle into the water and time how long it takes to travel 50 feet. Currents exceeding 2 mph require heavy-duty anchoring systems with multiple connection points to prevent your dock from breaking free during peak flow periods.
Assessing Seasonal Current Variations
Spring runoff and storm seasons dramatically alter current patterns that affect your dock’s stability year-round. Monitor water levels and flow rates during your area’s peak seasons – many docks fail when owners anchor based on calm summer conditions. Document the strongest currents you observe to size your anchoring system for worst-case scenarios.
Recognizing Signs of Inadequate Anchoring
Your dock shouldn’t move more than 2-3 feet in any direction during normal current conditions. Watch for excessive swaying, anchor lines going slack then snapping tight, or gradual downstream drift that indicates your system’s failing. Groaning sounds from cleats or visible stress on connection hardware means you’re already pushing your anchoring system beyond its safe limits.
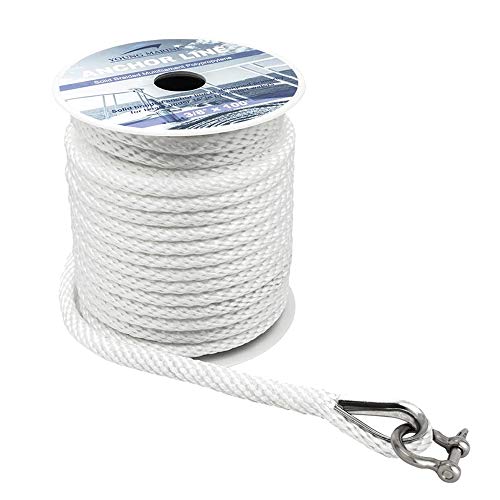
Secure your boat with this durable 3/8" x 100' white anchor line. Made with lightweight, floatable MFP and a stainless steel thimble for lasting performance, it has a 1565 lbs breaking load, ideal for boats under 16'.
Choosing the Right Anchor System for High Current Areas
High-current environments demand anchoring systems that can withstand sustained water pressure without compromising your dock’s stability. You’ll need to match your anchor selection to both current velocity and your dock’s specific load requirements.
Heavy-Duty Anchor Types for Strong Currents
Mushroom anchors work best in muddy or sandy bottoms where they can dig deep and create maximum holding power. Grapnel anchors excel in rocky bottoms by hooking into crevices and irregular surfaces. Fluke anchors provide excellent penetration in sand but struggle in rocky conditions where they can’t set properly.
Secure your boat with the SEACHOICE Mushroom Anchor. Its wide mushroom cap and cast iron construction provide reliable holding power in soft substrates.

Multi-Point Anchoring Systems
Three-point systems distribute load across multiple anchors positioned at 120-degree angles around your dock perimeter. Four-point configurations offer maximum stability by creating opposing forces that counteract current from any direction. Upstream-downstream pairs work effectively in predictable current patterns where flow direction remains consistent throughout the season.
Anchor Weight and Size Calculations
Current velocity determines minimum anchor weight – you’ll need 15-20 pounds per foot of dock length in moderate currents exceeding 2 mph. Double anchor weight for currents above 4 mph or when dealing with large dock systems over 20 feet. Factor in wind load by adding 25% additional weight capacity during storm season planning.
Installing Concrete Deadweight Anchors
Securely mount fixtures on concrete, brick, and tile with this 180-piece anchor and screw kit. It includes assorted sizes and drill bits for easy installation and reliable holding power up to 75lbs.

Concrete deadweight anchors offer the most reliable holding power for floating docks in strong currents. They’re the go-to choice when you need maximum stability without the complexity of driven piles or helical anchors.
Calculating Required Deadweight Mass
You’ll need approximately 500-750 pounds of concrete deadweight per anchor point for currents up to 3 mph. Double this weight for currents exceeding 4 mph or when your dock faces both current and wind loads.
Calculate total mass by multiplying your dock’s square footage by 15-20 pounds per square foot in high-current areas. Add 25% extra weight if your dock will carry heavy loads like boats or equipment.
Proper Placement and Spacing Techniques
Position deadweight anchors at 45-degree angles upstream from each dock corner to maximize holding efficiency. Space anchors 15-20 feet apart along the dock’s perimeter for optimal load distribution.
Set anchors 20-30 feet away from the dock structure to prevent swinging into shallow water during low-tide conditions. Use this distance formula: anchor depth plus 10 feet equals minimum placement distance.
Using Reinforced Concrete Blocks
Reinforced concrete blocks with embedded steel rebar provide superior durability compared to plain concrete deadweights. Choose blocks with 3,000 PSI minimum concrete strength and #4 rebar grid reinforcement.
Pre-cast blocks weighing 750-1,200 pounds each offer consistent performance and professional installation ease. Attach galvanized eye bolts during the concrete pour to create secure connection points for your anchor lines.
Setting Up Helical Screw Anchors
Secure outdoor structures with these heavy-duty 14.4-inch ground anchors. Made from durable tungsten steel with helical blades, they provide superior wind resistance and easy installation with removable eye hooks.

Helical screw anchors provide exceptional holding power in strong currents by literally screwing into the substrate. They’re my go-to choice when concrete deadweights aren’t feasible or when you need precise positioning.
Determining Soil Conditions and Penetration Depth
Test your bottom substrate before installation using a probe rod or soil auger. Sandy clay and firm mud provide the best holding power for helical anchors.
Drive anchors 6-8 feet deep in soft sediment or 4-5 feet in compact soil. You’ll need deeper penetration in loose sand or silt to achieve adequate holding capacity.
Installation Equipment and Techniques
Use a hydraulic drive unit or high-torque drill to install helical anchors properly. Hand installation rarely achieves the torque needed for strong current applications.
Install anchors at 45-degree angles upstream from your dock corners. This positioning maximizes resistance against current flow while preventing anchor interference during installation.
Load Testing and Adjustment Methods
Perform pullout tests immediately after installation using a come-along or winch. Apply 150% of your calculated load for 10 minutes to verify holding capacity.
Adjust anchor depth if you experience movement during testing. Add secondary helical plates or increase penetration depth rather than relying on undersized anchors in challenging conditions.
Implementing Chain and Cable Systems
Chain and cable systems form the critical connection between your anchors and floating dock, transferring the immense forces generated by strong currents. You’ll need to select components that can handle sustained loads while maintaining flexibility for tidal changes.
Selecting Marine-Grade Chain Specifications
This durable 5/16" stainless steel anchor chain resists corrosion in marine environments. It includes two 3/8" bow shackles for secure connections and boasts a 7450lbs break load for reliable anchoring.

Choose stainless steel 316 or galvanized Grade 70 chain for maximum corrosion resistance in saltwater environments. Your chain diameter should match current velocity – use 3/8-inch minimum for currents up to 2 mph, and 1/2-inch for stronger flows.
Test each chain’s working load limit against your calculated forces, ensuring it exceeds requirements by 200%.
Proper Chain Length and Catenary Calculations
Calculate chain length using a 5:1 scope ratio for strong current conditions – five feet of chain for every foot of water depth. This creates proper catenary curve that absorbs shock loads naturally.
Add 20% extra length for tidal variations and anchor dragging adjustments in your specific location.
Cable vs Chain Performance in Strong Currents
Chain outperforms cable in high-current situations due to its weight creating beneficial catenary sag that dampens shock loads. Cable systems require additional hardware like shock absorbers to match chain’s natural dampening properties.
However, galvanized aircraft cable offers easier handling and 50% cost savings when paired with quality thimbles and clamps.
Creating Multi-Point Anchoring Configurations
Multi-point systems distribute dock loads across multiple anchor points rather than relying on single-point failures. You’ll need different configurations based on your current strength and dock size.
Four-Point Diamond Pattern Setup
Position anchors in a diamond shape with your dock at the center point. Place upstream anchors 45 degrees off your dock’s centerline and downstream anchors at matching angles. This configuration handles moderate currents up to 2.5 mph effectively while providing excellent stability during wind shifts.
Six-Point Star Configuration Benefits
Star configurations add two additional side anchors for maximum stability in currents exceeding 3 mph. You’ll gain 40% more holding power compared to four-point systems while reducing individual anchor stress. This setup prevents dock rotation during complex current patterns and provides redundancy if one anchor point fails.
Adjusting Anchor Angles for Current Direction
Angle your upstream anchors 30-45 degrees into the current flow for optimal resistance. Downstream anchors should mirror this angle to prevent dock swing during current reversals. Adjust angles seasonally as current direction changes with water levels and weather patterns throughout the year.
Adding Shock Absorbers and Dampening Systems
Improve your vehicle's towing and hauling capabilities with Gabriel Load Carrier shock absorbers. These shocks provide superior ride quality and added support for heavy-duty use in trucks, SUVs, and vans.

Strong currents create constant stress on your dock’s anchoring system, making shock absorbers essential for preventing anchor failure and structural damage.
Installing Spring-Loaded Shock Absorbers
Position marine-grade spring absorbers between your anchor chain and dock cleats to handle sudden load spikes from current surges. Install 316 stainless steel units rated for 2,000+ pounds at each anchor point. Mount absorbers with proper backing plates to distribute forces across your dock’s framework effectively.
Using Rubber Snubbers for Wave Action
Rubber snubbers excel at absorbing the constant motion created by wave action in strong currents. Install 3/4-inch diameter snubbers every 10 feet along your anchor lines for optimal dampening. Replace snubbers annually since UV exposure and saltwater degrade rubber compounds, reducing their shock-absorbing capacity over time.
Dampening System Maintenance Requirements
Inspect shock absorbers monthly for corrosion, worn springs, and loose mounting hardware that compromise performance. Lubricate pivot points with marine grease and check rubber components for cracking or hardening. Replace any dampening components showing 25% wear before they fail, as system failure typically occurs during peak stress conditions.
Monitoring and Maintaining Your Anchor System
Your anchor system’s performance degrades over time through constant exposure to water movement and environmental factors. Regular maintenance prevents costly failures that could damage your dock or create safety hazards.
Regular Inspection Schedules
Schedule monthly inspections during peak season and quarterly checks during winter months. Examine anchor points above and below water when possible, checking for shifted positions or loose connections. Document any changes in dock movement patterns, as increased swaying often indicates developing anchor problems before visible damage occurs.
Identifying Wear and Corrosion Issues
Look for rust stains, pitting, or white corrosion deposits on metal components during each inspection. Chain links showing wear patterns or stretched connections require immediate replacement to prevent sudden failures. Check cable fittings for fraying strands and examine concrete anchors for cracks or exposed rebar that compromise structural integrity.
Seasonal Adjustment and Reinforcement
Adjust anchor configurations before spring runoff and storm seasons when current velocities increase significantly. Tighten connections that have loosened through freeze-thaw cycles and add supplementary anchors if seasonal patterns have changed. Replace shock absorbers and rubber snubbers annually, as UV exposure and constant flexing reduce their effectiveness over 12-month periods.
Troubleshooting Common Anchoring Problems
Even the best-planned anchor systems face challenges in strong current conditions. Quick identification and resolution of these issues prevents minor problems from becoming major dock failures.
Addressing Anchor Dragging Issues
Check your anchor’s bite immediately when you notice consistent downstream movement. Dragging typically indicates insufficient weight or poor bottom contact in your specific substrate conditions.
Reset dragging anchors by lifting them completely and repositioning 10-15 feet upstream from their original location. Add 200-300 pounds of additional deadweight if dragging continues after proper repositioning.
Fixing Excessive Dock Movement
Tighten your chain scope to 3:1 ratio when dock sway exceeds 6 feet during normal current conditions. Excessive movement usually stems from too much chain length allowing lateral drift.
Install additional shock absorbers rated for 3,000+ pounds at problem connection points. Replace worn rubber snubbers every six months since deteriorated dampening components amplify dock oscillation significantly.
Replacing Failed Anchor Components
Inspect all hardware monthly for stress cracks in shackles, worn clevis pins, and corroded chain links. Component failure typically occurs at connection points experiencing the highest load concentrations.
Replace entire chain sections showing 20% diameter reduction from corrosion rather than individual links. Upgrade failed components to the next weight class – if 5/8″ chain failed, install 3/4″ replacement for improved long-term performance.
Conclusion
Anchoring your floating dock in strong currents doesn’t have to be a gamble with expensive equipment and safety. You now have the knowledge and techniques to create a robust anchoring system that’ll withstand nature’s forces while protecting your investment.
Remember that successful dock anchoring requires ongoing attention – not just initial installation. Regular monitoring and seasonal adjustments will keep your system performing optimally as conditions change throughout the year.
Your dock’s stability depends on choosing the right combination of anchor types deadweight calculations proper spacing and quality materials. Don’t cut corners on components that face constant stress from moving water.
Take action on these proven strategies before strong currents test your current setup. The time you invest in proper anchoring today will save you from costly repairs emergency retrievals and potential liability issues down the road.
Frequently Asked Questions
What current speed requires heavy-duty anchoring systems for floating docks?
Currents exceeding 2 mph require heavy-duty anchoring systems. At this speed, standard anchoring methods become inadequate due to the sustained water pressure. For currents between 2-3 mph, you’ll need anchors weighing 500-750 pounds per point. Stronger currents above 3 mph require doubling the anchor weight and implementing multi-point configurations for maximum stability.
How do I calculate the right anchor weight for strong currents?
Current velocity determines minimum anchor weight requirements. For currents up to 2 mph, use 300-500 pounds per anchor point. For 2-3 mph currents, increase to 500-750 pounds. Above 3 mph, double the weight to 1,000-1,500 pounds per point. Add 20% extra weight during storm seasons to account for wind load and increased water turbulence.
What’s the best anchor type for rocky lake bottoms in strong currents?
Grapnel anchors work best for rocky surfaces as their multiple tines grip into crevices and irregular surfaces. For rocky bottoms in strong currents, choose heavy-duty grapnel anchors weighing at least 500 pounds. Helical screw anchors also perform well when they can penetrate past the rock layer into stable soil beneath.
How far apart should I space multiple anchor points?
Space anchor points 15-20 feet apart for optimal load distribution. For four-point diamond configurations, position anchors at 45-degree angles upstream. Six-point star patterns require anchors spaced every 60 degrees around the dock perimeter. Proper spacing prevents anchor lines from interfering with each other while maximizing holding power across the entire dock structure.
What chain size do I need for high-current anchoring?
Chain diameter depends on current velocity and dock size. For currents up to 2 mph, use 3/8-inch chain. Increase to 1/2-inch chain for 2-3 mph currents. Above 3 mph, use 5/8-inch or larger chain. Always choose stainless steel 316 or galvanized Grade 70 chain for maximum corrosion resistance in marine environments.
How do I calculate proper chain length for my anchoring system?
Use a 5:1 scope ratio to calculate chain length. Multiply the maximum water depth by 5 to determine minimum chain length needed. For example, in 10-foot deep water, use at least 50 feet of chain per anchor point. In strong currents, consider increasing to 7:1 scope for additional holding power and reduced anchor stress.
When should I inspect my dock anchoring system?
Inspect monthly during peak seasons (spring through fall) and quarterly in winter. Check for anchor line wear, corrosion, and dock movement patterns. Perform immediate inspections after severe storms or when you notice excessive dock swaying. Replace shock absorbers annually and document any changes in dock behavior to catch problems early.
What are signs that my anchoring system is failing?
Watch for excessive dock swaying, anchor lines going slack, or the dock drifting from its original position. Other warning signs include frayed or corroded anchor lines, damaged hardware, and unusual dock movement patterns. If your dock moves more than 3 feet from its anchored position, immediately inspect and upgrade your anchoring system.
How do shock absorbers help in strong current situations?
Marine-grade shock absorbers absorb sudden load spikes from current surges and wave action, preventing anchor system failure. Install spring-loaded shock absorbers rated for over 2,000 pounds at each anchor point. They reduce stress on anchor lines and hardware while maintaining dock stability. Pair with rubber snubbers for maximum dampening effectiveness.
Can I use the same anchoring system year-round?
Seasonal adjustments are essential for optimal performance. Spring runoff and storms significantly impact current patterns and dock stability. Adjust anchor configurations before seasonal changes, increase anchor weight during storm seasons, and modify anchor angles based on changing current directions. Regular seasonal maintenance prevents costly failures during peak stress periods.