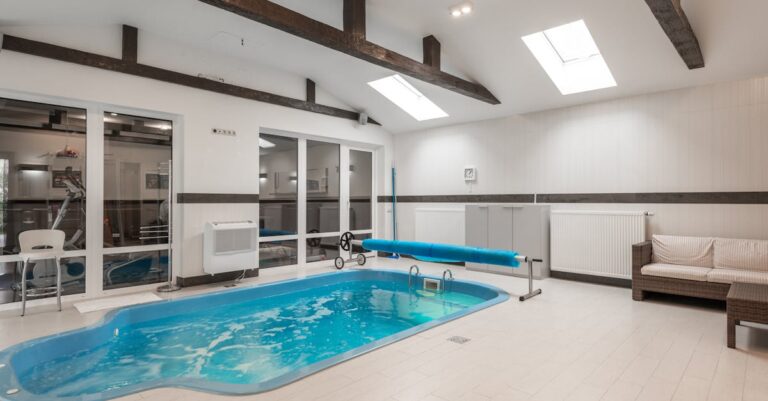
7 Ways How to drain your above ground pool effectively That Protect Your Investment
Learn to drain your above ground pool safely and effectively. Discover essential tools, step-by-step techniques, and safety tips to protect your pool investment and avoid costly damage.
Why it matters: Draining your above ground pool properly prevents damage to your equipment and ensures you’re ready for maintenance or winter storage.
The big picture: Whether you’re dealing with algae blooms, chemical imbalances, or preparing for off-season storage, knowing the right drainage techniques saves you time and money while protecting your investment.
What’s next: You’ll need the right tools and a step-by-step approach to avoid common mistakes that could damage your pool liner or flooding your yard.
Disclosure: As an Amazon Associate, this site earns from qualifying purchases. Thank you!
Determine When Your Above Ground Pool Needs Draining
Recognizing the right time to drain your above ground pool prevents costly equipment damage and ensures safer swimming conditions. You’ll need to assess several key factors that indicate when complete drainage becomes necessary rather than just regular maintenance.
Signs of Water Quality Issues
Persistent cloudiness or green discoloration signals major contamination that chemical treatments can’t resolve. You’ll notice these issues when algae blooms overwhelm your filtration system or when organic matter accumulates beyond your pool’s cleaning capacity.
Foul odors emanating from the water indicate bacterial growth that requires complete water replacement. Strong chemical smells or musty odors mean your current water chemistry has failed.
Seasonal Maintenance Requirements
End-of-season winterization demands complete drainage in regions with freezing temperatures to prevent liner damage and equipment failure. You’ll typically drain between late September and early November depending on your climate zone.
Spring reopening often requires fresh water when winter covers allowed excessive debris accumulation or when stored water developed off-season contamination issues.
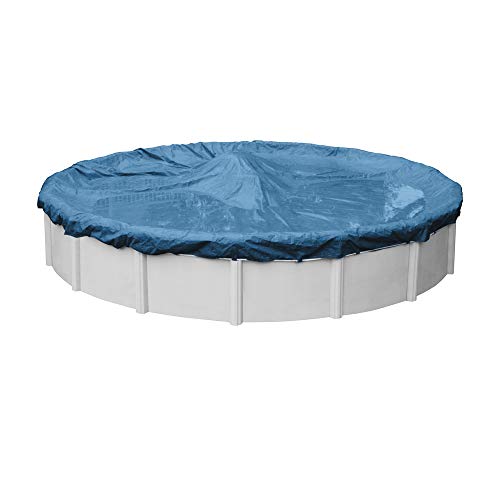
Protect your 24ft above-ground pool this winter with the Robelle 3524-4 cover. Its mesh design allows water drainage, while the included winch and cable ensure a secure fit.
Chemical Imbalance Indicators
Total dissolved solids (TDS) readings above 2,500 ppm require drainage because your water can no longer hold proper chemical balance. High TDS levels make sanitizers ineffective and create scaling problems.
Calcium hardness exceeding 400 ppm causes equipment damage and creates stubborn white deposits on your pool surfaces that resist normal cleaning methods.
Gather Essential Equipment for Pool Draining
You’ll need the right tools to drain your above ground pool safely and efficiently. Having proper equipment prevents damage to your pool liner and surrounding landscape.
Submersible Pump Options
The Aquastrong 1 HP Sump Pump quickly removes water from flooded areas, draining up to 4500 GPH. Its portable design filters debris and pumps water down to 1/5 inch, while the thermoplastic casing ensures durability.

Electric submersible pumps handle most above ground pools effectively, moving 1,500-3,000 gallons per hour. Choose pumps with automatic shut-off features to prevent dry running damage. Battery-powered models work well for pools without nearby electrical outlets, though they’re slower at 400-800 gallons per hour.
Garden Hose and Adapter Requirements
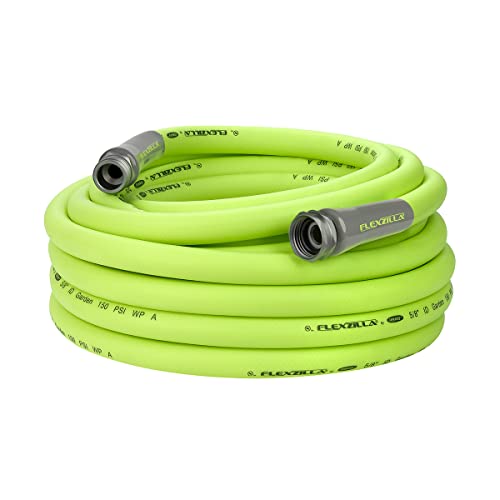
The Flexzilla garden hose offers extreme flexibility and durability for easy yard work. Its lightweight design coils easily, lays flat, and features abrasion-resistant construction with leak-free connections.
Heavy-duty garden hoses measuring 50-100 feet ensure proper water flow away from your pool area. You’ll need threaded adapters to connect your pump discharge to standard garden hose fittings. Consider multiple hoses for faster drainage when directing water to different discharge points around your property.
Safety Gear and Tools
GFCI-protected extension cords prevent electrical hazards when using submersible pumps near water. Wear non-slip footwear and keep electrical connections elevated above ground level. Have a pool skimmer net ready to remove debris before pumping, and use a flashlight for evening drainage sessions.
Prepare Your Pool Area Before Starting the Drainage Process
Setting up your drainage area properly prevents costly mistakes and ensures smooth water removal. You’ll avoid flooding your yard and protect your pool’s structural integrity with proper preparation.
Clear Surrounding Debris and Obstacles
Remove all pool equipment, toys, and furniture from around your pool’s perimeter. Clear leaves, branches, and debris that could clog your pump’s intake or create tripping hazards. You’ll need at least 3 feet of clearance around your pool for safe pump operation and hose routing.
Check Local Drainage Regulations
Contact your local water authority before draining large volumes of pool water into storm drains or sewers. Many municipalities require permits for discharging chlorinated water or restrict drainage during specific hours. You’ll face fines if you violate local water disposal ordinances without proper authorization.
Plan Your Water Disposal Route
Map out where your drainage water will flow before connecting any hoses. Direct water away from your home’s foundation, neighboring properties, and septic systems. You’ll need to ensure your chosen route can handle 10,000-20,000 gallons without creating erosion or flooding issues.
Turn Off All Pool Equipment and Electrical Components
Shutting down all electrical systems is your first and most critical safety step before draining begins. Water and electricity create deadly combinations that can cause electrocution or equipment damage.
Shut Down Filter Systems
Get pure, healthy water with the NSF certified iSpring RCC7AK reverse osmosis system. It features a patented faucet design for easy installation and adds essential minerals for a balanced pH.

Turn off your filter pump at the circuit breaker rather than just the power switch. Circuit breakers provide complete electrical isolation that prevents accidental startup during the draining process.
Remove the pump basket and clean out any debris that could clog your drainage system later. Close all skimmer and return valves to prevent water from flowing back through the filtration lines.
Disconnect Pool Heaters
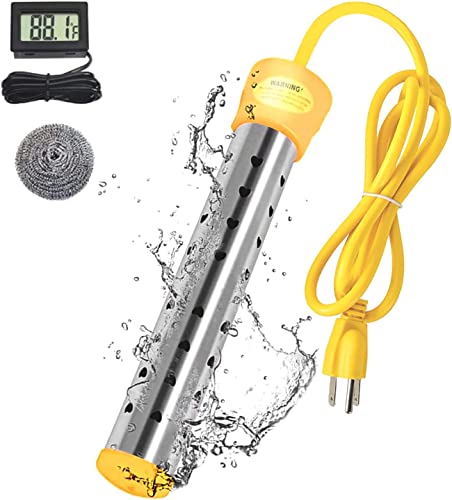
Heat 5 gallons of water in minutes with this 1500W immersion heater. It features a stainless steel cover for safety and intelligent temperature control with automatic shut-off at 165°F.
Switch off gas heaters at both the unit and the gas supply valve for complete safety. Electric heaters require shutdown at their dedicated circuit breaker to prevent damage from running dry.
Allow heaters to cool completely before proceeding with drainage. Disconnect any electrical connections and cap gas lines according to manufacturer specifications to prevent contamination during the draining process.
Remove Pool Accessories
Take out ladders, skimmers, and floating accessories that could interfere with pump placement or water flow. These items can create obstacles that slow drainage or damage your equipment.
Store removable fittings like return jets and skimmer baskets in a clean, dry location. Drain and disconnect any attached cleaning systems like automatic pool cleaners to prevent water damage to their internal components.
Remove Pool Chemicals and Test Water pH Levels
Maintain balanced pool water effortlessly with ARM & HAMMER Clear Balance tablets. These convenient tablets, formulated with baking soda, optimize chlorine performance and protect pool surfaces.

You’ll need to neutralize your pool’s chemical levels before draining to protect your lawn and local water systems. Testing water chemistry ensures safe disposal and prevents environmental damage from concentrated chemicals.
Neutralize Chlorine Content
Stop adding chlorine to your pool 3-5 days before draining to allow natural dissipation. Use sodium thiosulfate (chlorine neutralizer) if you need faster results – add 1 ounce per 1,000 gallons of water. Test with chlorine strips until readings show 0 ppm before proceeding with drainage.
Balance Water Chemistry
Test your water’s pH using digital meters or test strips for accurate readings. Add sodium bisulfate to lower pH levels above 7.5, or sodium carbonate to raise levels below 7.0. Aim for a neutral pH between 7.0-7.4 to minimize soil and plant damage during disposal.
Wait for Safe Drainage Levels
Allow 24-48 hours after chemical adjustments before testing water again for stability. Retest chlorine and pH levels to confirm they’ve reached safe ranges for environmental discharge. Document your test results – some municipalities require proof of proper chemical neutralization before pool water disposal.
Set Up Your Drainage System Using a Submersible Pump
Now that you’ve prepared your pool area and neutralized chemicals, it’s time to set up your submersible pump for efficient water removal.
Position the Pump Correctly
Place your submersible pump at the deepest point of your pool. This spot typically sits opposite from your pool’s return jets where water naturally settles. Keep the pump’s intake screen at least 2 inches from the pool floor to prevent clogging with debris while maintaining maximum suction efficiency.
Connect Hoses and Check Connections
Attach your discharge hose to the pump’s outlet fitting using threaded adapters. Ensure all connections are hand-tight to prevent leaks during operation. Run the hose away from your pool area with a gradual downward slope, securing it every 10 feet to prevent kinking or disconnection during the draining process.
Test Pump Operation
Prime your pump by submerging it completely before plugging into your GFCI-protected outlet. Watch for steady water flow within 30 seconds of startup. If you notice sputtering or no flow, unplug immediately and check for air leaks in connections or debris blocking the intake screen before restarting.
Monitor the Draining Process and Water Flow
Once your drainage system is operational, you’ll need to track the process carefully to prevent costly damage. I’ve seen too many pool owners walk away only to return to a cracked liner or flooded yard.
Maintain Steady Drainage Rate
Check your pump’s flow rate every 30 minutes during the first hour. A 2,000-gallon pool should drain at roughly 500-750 gallons per hour with a quality submersible pump. If the rate suddenly drops, your intake screen may be clogged with debris.
Prevent Pool Structure Damage
Never drain your pool completely in one session if you have soft or clay soil. Stop when water reaches the shallow end to prevent liner collapse or structural shifting. Vinyl liners can wrinkle permanently if drained too quickly on hot days.
Redirect Water Flow as Needed
Move your discharge hose every 2-3 hours to prevent erosion and standing water. I’ve learned to create multiple drainage points around my property rather than flooding one area. Watch for water backing up toward your foundation or pooling near neighboring properties.
Clean Pool Walls and Bottom During Partial Drainage
Partial drainage creates your best window for thorough pool cleaning that’s impossible when water levels are high. You’ll expose areas that haven’t seen proper cleaning all season, revealing the true condition of your pool’s surfaces.
Scrub Algae and Buildup
Use a stiff-bristled pool brush to attack stubborn algae patches on exposed walls, working from top to bottom in overlapping strokes. Focus extra attention on corners and step areas where algae typically accumulates heaviest. Apply algaecide directly to persistent spots and let it work for 10 minutes before scrubbing again for maximum effectiveness.
Remove Debris and Sediment
Vacuum accumulated sediment from the shallow end using a manual pool vacuum, as automatic cleaners can’t handle the low water levels effectively. Scoop out leaves, insects, and floating debris with a skimmer net before they settle to the bottom. Pay special attention to areas around ladder bases and pool steps where debris naturally collects.
Inspect for Damage or Wear
Check exposed liner sections for tears, wrinkles, or discoloration that indicate UV damage or chemical imbalance effects. Look for loose pool wall bolts or bent uprights that could compromise structural integrity during refilling. Document any issues with photos now, as repairs are much easier to complete while water levels remain low.
Complete the Final Drainage Steps Safely
You’re approaching the most critical phase of above ground pool drainage where small mistakes can cause significant damage. These final steps require precision and patience to protect your pool investment.
Remove Remaining Water Manually
Switching to manual removal becomes essential when your pump can’t handle the last few inches of water. Use a wet/dry vacuum or large buckets to extract water from corners and low spots where pumps lose suction. Pool squeegees help push remaining water toward collection points, while absorbent towels handle the final moisture cleanup.
Protect Pool Liner from Damage
Liner protection requires immediate attention as water levels drop below the shallow end. Never allow the liner to stretch or pull away from pool walls, which causes permanent creasing and tears. Support sagging areas with pool noodles or inflatable pillows, and avoid walking on exposed liner sections that lack water support underneath.
Ensure Proper Pool Structure Support
Structural integrity depends on maintaining wall stability throughout the complete drainage process. Install temporary bracing on pool walls if you notice any inward movement or buckling during drainage. Check that the pool’s bottom track remains level and secure, as uneven settling can cause permanent frame damage requiring costly repairs.
Perform Post-Drainage Maintenance and Inspection
Your pool’s completely drained, but the work isn’t over yet. This critical phase determines whether your drainage effort protects your investment or creates expensive problems down the road.
Examine Pool Components
Inspect your pool liner thoroughly for tears, stretching, or separation from the wall track. Look for wrinkles that could trap water and debris when you refill.
Check the bottom track for level positioning and secure attachment to prevent future structural issues. Examine all fittings, gaskets, and seals around skimmers and return jets for cracks or deterioration that could cause leaks.
Clean and Store Equipment
Remove and clean all removable pool equipment including ladders, handrails, and cleaning tools with mild soap and water. Dry everything completely before storing in a protected area.
Drain your pool pump, filter, and heater according to manufacturer instructions to prevent freeze damage. Store chemicals in a cool, dry location away from direct sunlight and temperature extremes.
Document Maintenance Records
Record the drainage date, water test results, and any equipment issues you discovered during inspection. Note the condition of your liner, fittings, and structural components.
Take photos of any damage or wear patterns for insurance purposes and future reference. Keep receipts for any replacement parts or professional services you used during the process.
Conclusion
Successfully draining your above ground pool doesn’t have to be overwhelming when you follow the right approach. By taking proper safety precautions neutralizing chemicals and using the correct equipment you’ll protect both your pool and surrounding property.
Remember that patience during the process pays off in the long run. Rushing through drainage or skipping critical steps like monitoring water levels can lead to costly liner damage or structural issues that are far more expensive to fix than doing it right the first time.
Your pool represents a significant investment and proper drainage techniques help preserve that investment for years to come. Whether you’re preparing for winter storage or addressing water quality issues these methods will serve you well throughout your pool ownership journey.
Frequently Asked Questions
When should I drain my above ground pool?
Drain your pool when you notice persistent water quality issues like cloudiness, foul odors, or high total dissolved solids (TDS). Complete drainage is also necessary for winterization in freezing climates and spring reopening. Signs of chemical imbalances, such as high calcium hardness levels, also indicate it’s time to drain and refill with fresh water.
What equipment do I need to drain my above ground pool effectively?
You’ll need an electric submersible pump (capable of moving 1,500-3,000 gallons per hour), heavy-duty garden hoses, threaded adapters, and safety gear including GFCI-protected extension cords. Choose pumps with automatic shut-off features to prevent dry running damage. Battery-powered pumps work for pools without electrical outlets but drain more slowly.
How do I prepare the pool area before draining?
Clear all debris and obstacles around the pool, ensuring at least 3 feet of clearance for safe pump operation. Check local drainage regulations to avoid fines, and plan a water disposal route that directs water away from your home’s foundation and neighboring properties to prevent erosion or flooding.
What safety steps should I take before starting the drainage process?
Turn off all pool equipment and electrical components at the circuit breaker to prevent electrocution and equipment damage. Clean debris from the pump basket, close skimmer and return valves, disconnect pool heaters safely, and remove any pool accessories that could obstruct the drainage process.
Do I need to neutralize pool chemicals before draining?
Yes, neutralizing pool chemicals is crucial to protect your lawn and local water systems. Stop adding chlorine 3-5 days before draining, test and balance pH levels, and use sodium thiosulfate for faster neutralization if needed. Wait 24-48 hours after chemical adjustments before retesting water to ensure safe drainage levels.
How do I set up the submersible pump correctly?
Position the pump at the deepest point of your pool with the intake screen at least 2 inches from the floor to prevent clogging. Connect hoses securely to prevent leaks, ensure proper electrical connections with GFCI protection, and test the pump operation before beginning the full drainage process.
What should I monitor during the draining process?
Check the pump’s flow rate every 30 minutes and stop draining when water reaches the shallow end to prevent liner collapse. Redirect the discharge hose regularly to prevent erosion, create multiple drainage points to avoid flooding, and watch for water backing up toward foundations or neighboring properties.
Should I completely drain my pool or do a partial drainage?
Partial drainage is often sufficient for cleaning and maintenance, allowing access to typically submerged areas for scrubbing algae, vacuuming sediment, and inspecting the liner. Complete drainage is necessary for winterization, major repairs, or when water quality issues cannot be resolved through chemical treatment alone.
How do I handle the final inches of water safely?
Use manual removal methods like wet/dry vacuums or buckets for the last few inches to protect the pool liner. Provide temporary bracing for pool walls if you notice inward movement, and ensure the bottom track remains level. This careful approach prevents structural damage and costly repairs.
What maintenance should I perform after draining?
Thoroughly inspect the pool liner for tears, check that the bottom track is level, and clean all removable equipment before proper storage. Drain all pool components to prevent freeze damage, document your inspection findings and any necessary repairs, and maintain detailed maintenance records for future reference.