
5 DIY Methods for Pool Leak Repair That Save Thousands
Save money on pool repairs! Learn 5 simple DIY methods to fix leaks in vinyl liners, skimmers, concrete cracks, and underground plumbing without costly professional help.
Your pool’s losing water faster than you can fill it. Pool leaks cost homeowners thousands in wasted water and potential structural damage â but you don’t always need to call an expensive repair service.
The bottom line: Most common pool leaks can be fixed with simple DIY methods using tools you likely already have at home.
Disclosure: As an Amazon Associate, this site earns from qualifying purchases. Thank you!
Identify the Source of Your Pool Leak Before Starting Repairs
Finding the exact leak location saves you time and prevents unnecessary repairs. You’ll need to systematically test different areas to pinpoint where water escapes from your pool system.
Perform the Bucket Test to Confirm Water Loss
Place a bucket filled with pool water on your pool step and mark both water levels. After 24 hours, compare the water loss between your pool and bucket. If your pool loses more water than the bucket, you’ve confirmed an actual leak rather than normal evaporation.
Use Food Coloring to Trace Leak Locations
Achieve vibrant, custom colors for all your creations with this 12-color food coloring set. The highly concentrated, food-grade liquid is tasteless and easy to use, perfect for baking, decorating, and crafting.
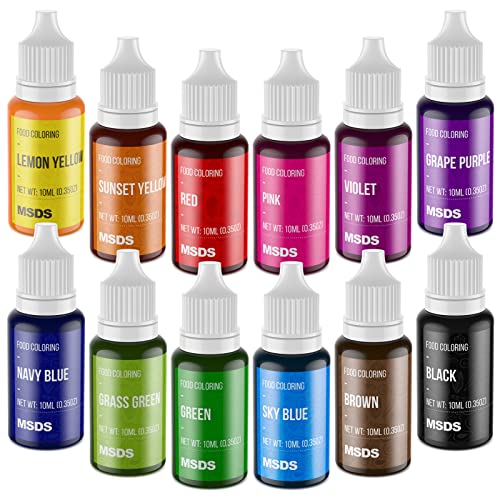
Add several drops of food coloring near suspected leak areas while your pool equipment is off. The dye will flow toward active leaks, creating visible streams that reveal exact locations. Focus on areas where you notice unusual water movement or bubbling.
Check Common Problem Areas Like Skimmers and Returns
Inspect your skimmer boxes, return jets, and main drain connections first since these account for 80% of pool leaks. Look for loose fittings, cracked housings, or deteriorated seals around these high-pressure areas. Check the area behind your pool light fixtures and any plumbing penetrations through the pool wall.
Repair Small Vinyl Liner Tears With Underwater Patch Kits
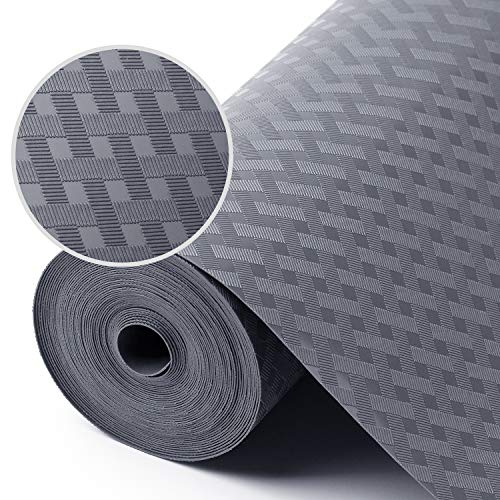
Protect your shelves and drawers with these BPA-free EVA liners. They're easy to cut, clean, and waterproof, making them ideal for keeping your kitchen and refrigerator organized and fresh.
Small tears in vinyl pool liners don’t require draining your entire pool. Underwater patch kits offer a permanent solution that works while your pool stays filled.
Gather Essential Materials for Vinyl Liner Repair
You’ll need an underwater vinyl patch kit containing adhesive patches and waterproof glue. Most kits include scissors for cutting patches to size and a plastic spreader tool for smooth application. Purchase patches that match your liner’s thickness for best results.
Apply Underwater Patches Following Manufacturer Instructions
Cut your patch 2 inches larger than the tear on all sides for proper coverage. Apply adhesive generously to both the patch and cleaned liner surface underwater. Press firmly from the center outward to eliminate air bubbles and ensure complete contact with the vinyl.
Allow Proper Curing Time for Maximum Adhesion
Wait 24-48 hours before swimming to let the adhesive fully cure underwater. Most patches reach initial bond strength within 2 hours but need extended time for maximum durability. Avoid disturbing the patch area during this critical curing period for long-lasting repairs.
Fix Pool Skimmer Leaks Using Silicone Sealant and Gasket Replacement

Pool skimmer leaks account for roughly 40% of common pool leak issues and typically occur around gasket connections where the skimmer meets your pool wall. You’ll need marine-grade silicone sealant, replacement gaskets, and basic hand tools to complete this repair effectively.
Remove Old Gaskets and Clean Skimmer Surfaces
Turn off your pool pump and remove the skimmer basket to access the damaged gasket areas. Carefully peel away deteriorated gaskets using a plastic scraper, then clean all surfaces with degreasing solution to remove algae buildup and old sealant residue. Dry the area completely before proceeding.
Apply Marine-Grade Silicone Sealant to Problem Areas
Squeeze a continuous bead of marine-grade silicone around the skimmer opening, focusing on areas where water previously leaked through gaps. Use your finger to smooth the sealant into crevices and create an even surface that’ll bond properly with new gaskets. Allow 30 minutes for initial curing.
Install New Gaskets and Test for Proper Seal
Press new gaskets firmly into position over the fresh sealant, ensuring complete contact around the entire perimeter without gaps or air bubbles. Reinstall the skimmer components and run your pump for 24 hours to test the repair under normal operating pressure before resuming regular pool use.
Seal Concrete Pool Cracks With Hydraulic Cement
DAP Hydraulic Cement quickly plugs and seals leaks in concrete and masonry. This fast-setting formula expands as it dries, creating a watertight seal in just minutes.

Concrete pool cracks require immediate attention since they’ll worsen over time and allow significant water loss. Hydraulic cement provides the strongest permanent repair for structural concrete cracks.
Prepare the Crack Area by Cleaning and Widening
Clean all loose debris from the crack using a wire brush and vacuum. Widen hairline cracks to at least 1/4 inch using a chisel and hammer – this creates proper surface area for adhesion. Remove all dust and debris with compressed air or water rinse before mixing cement.
Mix and Apply Hydraulic Cement According to Package Directions
Mix small batches since hydraulic cement sets rapidly within 3-5 minutes. Add water gradually until you achieve a putty-like consistency that holds its shape. Press the mixture firmly into the crack using a putty knife, filling completely from bottom to top.
Smooth the Surface and Allow Full Curing Time
Level the repair flush with surrounding concrete using a trowel while the cement remains workable. Keep the area damp for 24 hours by misting lightly with water every few hours. Allow 48-72 hours of full curing before refilling your pool.
Stop Plumbing Line Leaks With Pipe Repair Clamps and Epoxy
Underground plumbing leaks in pool systems often require immediate attention to prevent extensive water loss and potential foundation damage. These repair methods can save you hundreds of dollars in professional service calls.
Locate Underground Plumbing Leaks Using Pressure Testing
Connect a pressure gauge to your pool’s plumbing system at the pump or filter housing. Pressurize the lines to 15-20 PSI and monitor for pressure drops over 30 minutes. Mark any areas where water bubbles appear at ground level or where the pressure gauge shows significant decreases, indicating leak locations in buried pipes.
Install Pipe Repair Clamps for Quick Temporary Fixes
Position stainless steel repair clamps directly over the damaged pipe section after cleaning the area thoroughly. Tighten the clamp bolts evenly using a wrench until the rubber gasket compresses against the pipe. These clamps typically hold for 6-12 months and work best on pipes with small cracks or pinhole leaks up to 2 inches long.
Use Two-Part Epoxy for Permanent Pipe Joint Repairs
Get a strong, clear bond with Gorilla 2 Part Epoxy. The easy-to-use syringe dispenses resin and hardener for a 5-minute set, perfect for household repairs and gap filling.

Mix equal parts of underwater epoxy putty until you achieve a uniform color throughout the compound. Apply the mixed epoxy generously around loose pipe joints or small cracks while the surface remains slightly damp. Allow 4-6 hours for initial curing before testing water pressure, ensuring a watertight seal that’ll last several years.
Conclusion
These five DIY pool leak repair methods can save you hundreds or even thousands of dollars in professional repair costs. With basic tools and materials you likely already have at home you can tackle most common pool leaks effectively.
Remember that timing is crucial when dealing with pool leaks. The sooner you address the problem the less damage you’ll face and the easier the repair becomes. Most of these methods require minimal technical skill but do demand patience during the curing process.
While these DIY solutions work well for common leak issues don’t hesitate to call a professional if you encounter complex structural problems or if your initial repairs don’t hold. Your pool is a significant investment and sometimes expert intervention ensures long-term success.
Frequently Asked Questions
How can I tell if my pool has a leak?
Use the Bucket Test to confirm water loss. Fill a bucket with pool water and place it on a pool step. Mark water levels in both the bucket and pool. After 24 hours, if the pool level drops more than the bucket level, you have a leak. You can also use food coloring near suspected areas to trace where water flows out.
What are the most common places where pool leaks occur?
The most common leak locations are skimmers (40% of leaks), return jets, and main drain connections. These areas are prone to loose fittings, cracked seals, and deteriorated gaskets. Check these spots first when searching for leaks, as they account for the majority of pool leak issues.
Can I repair a vinyl pool liner tear myself?
Yes, small vinyl liner tears can be repaired using underwater patch kits without draining the pool. Cut the patch larger than the tear, apply waterproof adhesive generously, and press firmly to eliminate air bubbles. Allow 24-48 hours for the adhesive to cure completely before swimming.
How do I fix a skimmer leak?
Turn off the pool pump, remove the skimmer basket, and clean the gasket area. Apply marine-grade silicone sealant around the skimmer opening and install new gaskets. Run the pump for 24 hours to test the seal. Skimmer leaks are very common and usually occur at gasket connections.
What’s the best way to repair concrete pool cracks?
Use hydraulic cement for permanent concrete crack repairs. Clean and widen the crack, mix the cement according to package directions, and apply firmly. Smooth the surface flush with surrounding concrete and keep damp for 24 hours. Allow 48-72 hours for full curing before refilling the pool.
How can I locate underground plumbing leaks?
Use pressure testing by connecting a pressure gauge to your pool’s plumbing system and monitoring for pressure drops. This helps pinpoint leak locations in underground pipes. For temporary fixes, install stainless steel pipe repair clamps. For permanent repairs, use two-part underwater epoxy on joints and small cracks.
Do I need to drain my pool to fix most leaks?
No, most common pool leaks can be repaired without draining the pool. Vinyl liner patches, skimmer repairs, and many plumbing fixes can be done with water in the pool. Only major structural repairs typically require draining, making DIY repairs more convenient and cost-effective.
How long do DIY pool leak repairs typically last?
Repair longevity varies by method: underwater patches last 2-5 years, skimmer gasket repairs last 3-7 years, hydraulic cement repairs are permanent when done correctly, and pipe clamps provide temporary fixes for 6-12 months. Two-part epoxy repairs can last several years with proper application.
