7 Solutions for Dealing with Pool Surface Cracks That Save Thousands
Discover 7 proven solutions for fixing pool surface cracks, from DIY hydraulic cement repairs to professional resurfacing. Learn when to call experts and prevent future damage.
Pool surface cracks can turn your backyard oasis into a costly headache if you don’t address them quickly. Whether you’re dealing with hairline fractures or more serious structural damage, understanding your repair options will save you thousands in potential pool damage.
From simple DIY fixes to professional resurfacing solutions, there are proven methods to restore your pool’s surface and prevent future cracking. The key is identifying the right approach based on your crack’s severity and your pool’s construction type.
Disclosure: As an Amazon Associate, this site earns from qualifying purchases. Thank you!
Identify the Type and Severity of Pool Surface Cracks
Understanding crack patterns helps you choose the right repair approach and avoid wasting money on temporary fixes.
Hairline Cracks vs. Structural Cracks
Hairline cracks appear as thin lines less than 1/16 inch wide and typically affect only the surface coating. Structural cracks are wider than 1/8 inch and often run deeper into the pool shell itself. You can usually repair hairline cracks with simple patching compounds, while structural cracks require professional assessment and potentially major reconstruction work.
Surface-Only Damage vs. Deep Foundation Issues
Surface damage affects only the plaster or tile finish without compromising the underlying structure. Foundation problems extend through multiple layers and may indicate shifting soil or deteriorating concrete. Surface issues cause cosmetic concerns and minor leaks, but foundation damage threatens your pool’s structural integrity and surrounding deck stability.
When to Call a Professional for Assessment
Call immediately if cracks exceed 1/4 inch width, appear in multiple locations, or show signs of active movement. You’ll also need professional evaluation when cracks coincide with water loss exceeding normal evaporation rates or when surrounding concrete shows displacement. Don’t delay assessment if you notice rust stains, as these indicate potential rebar corrosion requiring urgent attention.
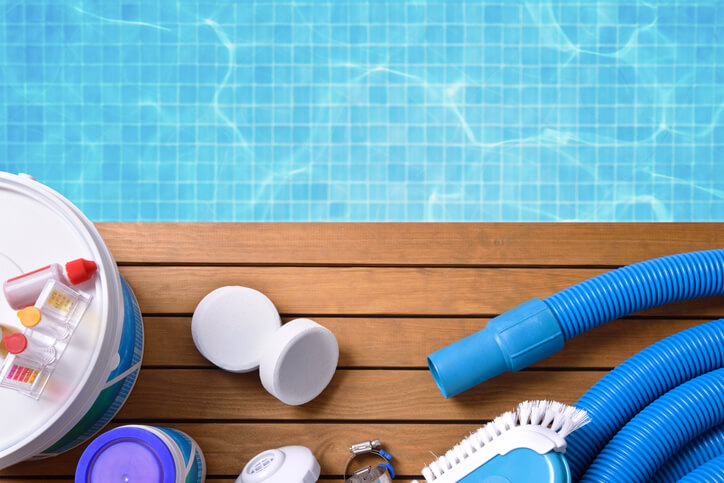
Clean and Prepare the Cracked Pool Surface
Proper preparation determines whether your pool crack repair will last one season or ten years. You’ll need to create a clean, stable surface that allows new materials to bond effectively with the existing pool structure.
Draining the Pool Safely
You’ll need to drain your pool completely before starting any crack repair work. Lower the water level gradually over 24-48 hours to prevent ground pressure changes that could worsen existing cracks. Never drain during hot weather or drought conditions, as this can cause your pool to literally pop out of the ground due to hydrostatic pressure.
Removing Debris and Loose Material
Start by removing all loose plaster, paint chips, and debris from the crack using a wire brush or putty knife. You’ll need to create clean edges by widening the crack slightly with a chisel or grinder. This step is crucial because any loose material left behind will prevent proper adhesion and cause your repair to fail within months.
Surface Preparation Tools and Techniques
Use a pressure washer or shop vacuum to remove all dust and small particles from the prepared crack. Apply a concrete etching solution to rough up smooth surfaces and improve bonding. For deeper cracks, you’ll need to use a diamond blade grinder to create a V-shaped groove that’s wider at the bottom than the top.
Apply Hydraulic Cement for Minor Concrete Cracks
Hydraulic cement offers you a fast-setting solution for minor pool concrete cracks that don’t require extensive preparation or professional intervention.
Understanding Hydraulic Cement Properties
Hydraulic cement sets underwater and expands as it cures, creating a watertight seal that’s perfect for pool repairs. This rapid-setting material hardens in 3-5 minutes and reaches full strength within 30 minutes, making it ideal for cracks up to 1/8 inch wide.
Step-by-Step Application Process
Mix small batches of hydraulic cement with water according to package directions, typically a 4:1 ratio. Press the mixture firmly into the crack using a putty knife, overfilling slightly to account for shrinkage. Smooth the surface immediately since you’ll have only 2-3 minutes of working time before it sets.
Curing Time and Weather Considerations
Allow hydraulic cement to cure for 24 hours before refilling your pool, though initial set occurs within minutes. Avoid application during freezing temperatures or direct sunlight above 90°F, as extreme conditions can compromise the bond strength and cause premature cracking of the repair.
Use Pool Putty for Small Surface Imperfections
Pool putty offers a versatile solution for hairline cracks and minor surface blemishes that don’t penetrate deep into your pool’s structure. This moldable repair compound works particularly well for cosmetic fixes on plaster and concrete surfaces.
Choosing the Right Pool Putty Product
Epoxy-based pool putties provide the strongest bond for underwater repairs and resist chemical degradation from chlorine. Acrylic putties work better for above-waterline cracks but require complete drying before water contact.
Choose putties specifically formulated for pool environments rather than general construction products. Pool-grade compounds contain UV stabilizers and chemical resistance that standard putties lack.
Mixing and Application Techniques
Mix only small batches you can use within 10-15 minutes to prevent premature hardening. Work the putty into cracks using firm pressure with a putty knife or your fingers.
Apply putty slightly above the surface level to account for settling and shrinkage during curing. Press material deep into narrow cracks to eliminate air pockets that could cause failure.
Finishing and Smoothing Methods
Sand the cured putty flush with surrounding surface using 120-grit sandpaper for initial shaping. Follow with 220-grit paper for final smoothing to match existing texture.
Clean sanding dust thoroughly before applying primer or pool paint. Most putty repairs require 24-48 hours curing time before exposure to pool chemicals or water pressure.
Install Fiberglass Patches for Larger Crack Repairs
Fiberglass patches provide permanent reinforcement for cracks wider than 1/4 inch that extend beyond surface-level damage. You’ll achieve professional-grade durability when you properly layer fiberglass material with marine-grade resin.
Measuring and Cutting Fiberglass Material
Measure your crack length and add 2 inches on each side for proper overlap coverage. Cut fiberglass cloth using sharp scissors in a rectangular shape that extends beyond the crack perimeter. You’ll need multiple layers for cracks deeper than 1/8 inch to ensure adequate structural reinforcement.
Resin Application and Layering Process
Apply marine-grade epoxy resin to the prepared crack using a brush in thin, even coats. Place your first fiberglass layer over wet resin and saturate completely before adding subsequent layers. You’ll eliminate air bubbles by rolling with a plastic roller between each application for maximum bond strength.
Sanding and Refinishing Steps
Sand the cured patch with 120-grit sandpaper to create a smooth transition with the existing surface. Progress to 220-grit for final finishing before applying primer and pool paint that matches your surface color. You’ll achieve invisible repairs when you feather the edges properly during the sanding process.
Resurface the Entire Pool for Extensive Damage
When multiple cracks cover more than 30% of your pool’s surface or existing repairs keep failing, full resurfacing becomes your most cost-effective long-term solution.
Evaluating When Full Resurfacing Is Necessary
Consider full resurfacing when cracks exceed 25% surface coverage or when you’ve attempted multiple patch repairs that continue failing within 12-18 months. Widespread cracking, surface delamination across large areas, or structural damage affecting the pool’s waterproofing integrity all signal the need for complete surface renewal. Age-related deterioration in pools over 15 years old often makes resurfacing more economical than ongoing spot repairs.
Popular Resurfacing Material Options
Plaster remains the most affordable resurfacing option at $3-5 per square foot, lasting 7-10 years with proper maintenance. Pebble finishes cost $6-9 per square foot but provide superior durability and slip resistance for 12-15 years. Quartz aggregates offer mid-range pricing at $5-7 per square foot with excellent stain resistance, while glass bead finishes deliver premium aesthetics at $8-12 per square foot with 15-20 year lifespans.
Professional vs. DIY Resurfacing Considerations
Professional resurfacing ensures proper surface preparation and material application that DIY approaches can’t match, especially for structural repairs requiring specialized equipment. Surface grinding, bond coat application, and finish timing require years of experience to execute correctly. While DIY kits cost 40-50% less initially, improper installation often leads to premature failure, making professional installation the smarter investment for pools requiring extensive damage repair.
Implement Preventive Maintenance to Avoid Future Cracks
Preventing pool surface cracks requires consistent maintenance practices that address the root causes before damage occurs. You’ll save thousands in repair costs by implementing these proven strategies.
Regular Water Chemistry Monitoring
Balance your water chemistry weekly to prevent surface deterioration that leads to cracking. Keep pH between 7.2-7.6 and total alkalinity at 80-120 ppm to avoid acid damage.
Test chlorine levels twice weekly during swimming season. High chlorine concentrations above 5 ppm can weaken pool surfaces over time, creating stress points where cracks develop.
Seasonal Pool Care Practices
Winterize your pool properly to prevent freeze-thaw damage that causes 60% of structural cracks. Lower water levels below skimmer lines and add antifreeze to plumbing lines.
Schedule professional inspections each spring before opening. Early detection of hairline cracks prevents them from expanding into costly structural repairs during the swimming season.
Ground Movement and Foundation Protection
Monitor your pool deck for settling signs like uneven surfaces or gaps between coping stones. Ground movement transfers stress directly to pool walls, creating crack patterns.
Install proper drainage around your pool area to prevent water accumulation. Saturated soil creates hydrostatic pressure that can shift your pool’s foundation and crack surfaces within 2-3 seasons.
Conclusion
Taking swift action on pool surface cracks protects your investment and prevents minor issues from becoming major headaches. Whether you’re dealing with simple hairline fractures or considering full resurfacing you now have the knowledge to make informed decisions about your pool’s care.
Remember that proper preparation and choosing the right repair method for your specific situation will determine the longevity of your fix. Don’t hesitate to consult professionals when cracks exceed your comfort zone or when structural integrity might be compromised.
Your pool’s surface tells a story and regular maintenance combined with prompt crack repairs keeps that story from becoming a costly disaster. Start implementing these solutions today to enjoy crystal-clear swimming for years to come.
Frequently Asked Questions
What are the different types of pool surface cracks?
Pool surface cracks fall into two main categories: hairline cracks (less than 1/16 inch wide) that affect only the surface coating, and structural cracks (wider than 1/8 inch) that may require professional assessment. Hairline cracks are typically cosmetic and can be repaired with simple patching compounds, while structural cracks may indicate foundation problems requiring significant reconstruction.
When should I call a professional for pool crack repair?
Call a professional if cracks exceed 1/4 inch in width, appear in multiple locations, or show signs of active movement or water loss. Also seek professional help if you notice rust stains, which indicate potential rebar corrosion requiring urgent attention. These conditions suggest structural damage beyond DIY repair capabilities.
How do I prepare a cracked pool surface for repair?
Start by safely draining the pool over 24-48 hours to avoid hydrostatic pressure issues. Remove debris and loose material from cracks using a wire brush or putty knife. Create clean edges with a chisel or grinder, then pressure wash and apply concrete etching solutions. For deeper cracks, use a diamond blade grinder to ensure proper bonding.
What is hydraulic cement and when should I use it?
Hydraulic cement is a fast-setting solution ideal for minor concrete cracks. It sets underwater and expands as it cures, creating a watertight seal. Mix small batches with water, press into cracks, and smooth before setting. Avoid application during freezing temperatures or direct sunlight above 90°F to ensure proper bond strength.
How do I choose the right pool putty for crack repair?
Choose epoxy-based putties for underwater repairs due to their strong bond and chlorine resistance. Acrylic putties work better for above-waterline cracks. Mix only small batches to prevent hardening, apply slightly above surface level to account for settling, and sand the cured putty to match existing surface texture.
When do I need fiberglass patches for pool cracks?
Use fiberglass patches for cracks wider than 1/4 inch. Cut fiberglass material to size, apply marine-grade epoxy resin, and layer for maximum durability. Eliminate air bubbles during application, then sand and refinish to create a smooth transition. Apply primer and matching pool paint for an invisible repair.
How do I know if my pool needs complete resurfacing?
Consider full resurfacing when cracks cover more than 30% of the pool’s surface or when previous repairs have failed within 12-18 months. Multiple crack locations exceeding 25% surface coverage also indicate the need for complete resurfacing rather than individual crack repairs.
What are the best resurfacing material options?
Popular resurfacing materials include plaster (most affordable), pebble finishes (highly durable), quartz aggregates (stain-resistant), and glass bead finishes (smooth texture). Each option varies in cost, durability, and maintenance requirements. Professional installation is recommended for best results despite higher initial costs.
How can I prevent future pool surface cracks?
Maintain proper water chemistry by balancing pH and alkalinity and testing chlorine levels regularly. Implement seasonal care practices including proper winterization and professional inspections. Monitor ground movement and install proper drainage to prevent hydrostatic pressure that can cause structural damage.