7 Engaging Beach Crafts Ideas for Kids That Create Lasting Memories
Discover 7 fun beach crafts for kids using shells, rocks, and driftwood. Turn beach treasures into keepsakes while boosting creativity and fine motor skills.
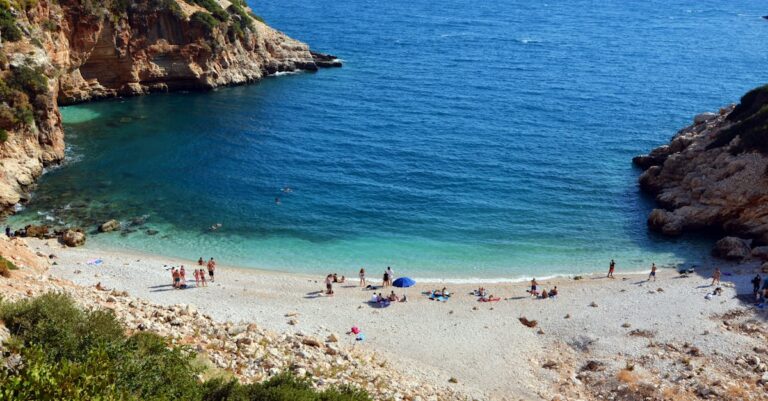
The big picture: Beach days with kids don’t have to end when you leave the sand. You can transform those collected seashells treasures and sandy memories into creative projects that’ll keep your little ones engaged long after the sunscreen wears off.
Get powerful sun protection with Neutrogena Ultra Sheer SPF 70. This lightweight, non-greasy formula absorbs quickly, leaving a clean, matte finish while shielding skin from UVA/UVB rays.

Why it matters: These seven craft ideas turn ordinary beach finds into extraordinary keepsakes while boosting your child’s creativity and fine motor skills. Your kids will love creating something special from their beach adventure discoveries.
Disclosure: As an Amazon Associate, this site earns from qualifying purchases. Thank you!
Sand Sculptures With Natural Beach Materials
Enjoy the outdoors with this lightweight, sand-proof, and waterproof beach blanket. It includes anchor stakes and sand pockets to keep it secure, plus a convenient carry bag for easy transport.

Building with sand becomes infinitely more engaging when you incorporate the natural treasures scattered along the shoreline. You’ll transform simple sand structures into intricate artworks that capture the essence of your beach experience.
Collecting Shells, Seaweed, and Driftwood for Decoration
You’ll find the best decorating materials during low tide when the beach reveals its hidden treasures. Focus on collecting smooth shells like scallops and clamshells for walls, twisted pieces of driftwood for structural elements, and dried seaweed for texture details. Gather materials in a beach bucket as you walk, keeping larger pieces separate from delicate shells to prevent crushing.
Building Techniques for Sturdy Sand Structures
You’ll create the strongest sand sculptures by mixing three parts sand with one part water near the shoreline where the sand naturally holds together. Pack sand firmly into molds or shape it with your hands, then smooth surfaces with a flat shell or piece of driftwood. Build from the bottom up, allowing each level to set for a few minutes before adding the next layer.
Creative Design Ideas for Beach-Themed Sculptures
You can craft elaborate sand castles using shells as decorative windows and driftwood pieces as drawbridges or flag poles. Create underwater scenes by sculpting fish shapes and embedding colorful shells as scales, or build lighthouse sculptures using long pieces of driftwood as the tower structure. Design mermaid tails by shaping curved sand forms and pressing shells in overlapping patterns to mimic scales.
Seashell Picture Frames and Memory Keepers
Display your photos beautifully with this durable 11x14 picture frame. It fits 8x10 photos with the included mat or 11x14 photos without, and easily mounts on the wall, either horizontally or vertically.

Transform those collected treasures into lasting keepsakes that capture your beach adventure. Seashell picture frames let kids create personalized displays for their favorite vacation photos while preserving memories from sand to shelf.
Selecting the Perfect Shells for Crafting
Choose flat shells like scallops and clams that’ll lay smoothly against frame surfaces. Look for shells with interesting textures, colors, and patterns that complement each other without overwhelming the photo inside.
Avoid shells with sharp edges or deep ridges that might make gluing difficult. Small periwinkles, smooth beach glass pieces, and tiny spiral shells work perfectly as accent pieces around larger focal shells.
Simple Gluing Techniques for Small Hands
Use washable school glue or glue dots instead of hot glue guns for safer crafting sessions. Apply glue to the shell’s flattest surface first, then press firmly against the frame for 10-15 seconds.
Start with corner shells as anchor points, then fill in spaces with smaller pieces. Let each section dry completely before moving to the next area to prevent sliding and messy results.
Displaying Beach Vacation Memories
Create themed displays by grouping frames with photos from the same beach trip together. Mix different frame sizes and shell arrangements to add visual interest to bedroom walls or vacation memory corners.
Include small cards with the beach location and date near each frame. This transforms simple craft projects into storytelling pieces that’ll spark conversations about your family’s coastal adventures for years to come.
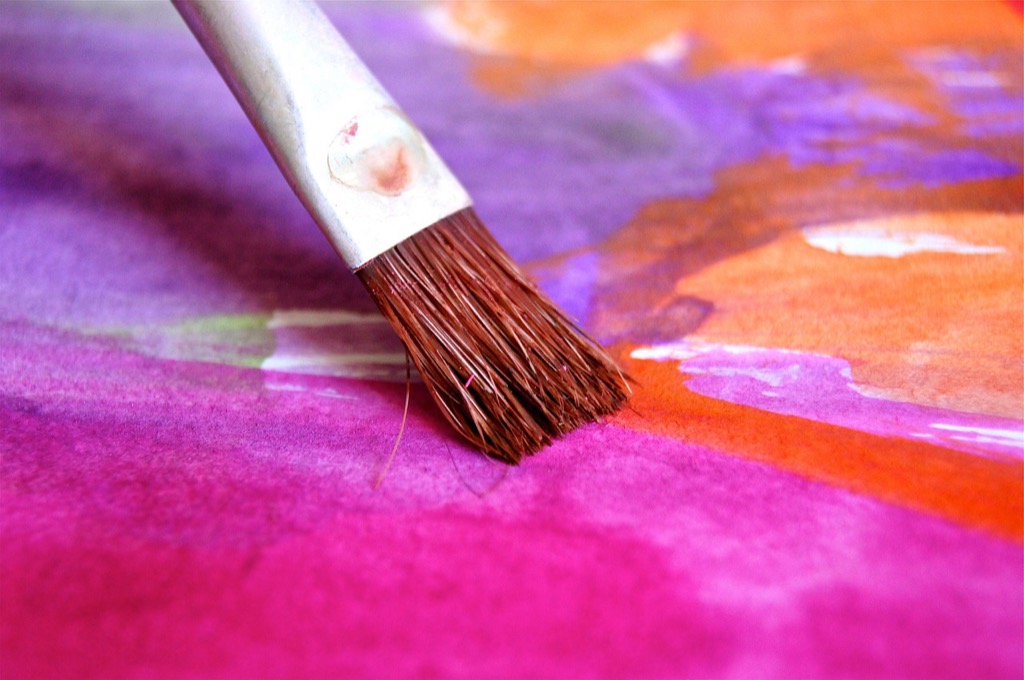
Painted Rock Beach Animals and Characters
Rock painting transforms simple beach stones into colorful companions that’ll remind your kids of their seaside adventures long after the sand’s been washed away. This craft combines the treasure hunt excitement of finding the perfect stone with the creative satisfaction of bringing it to life.
Choosing Smooth Rocks for Easy Painting
You’ll want to hunt for rocks that feel smooth under your fingertips and have relatively flat surfaces. Skip the jagged or porous stones – they’ll eat up paint and make brushwork frustrating for little hands. Look for palm-sized rocks with minimal cracks since these natural lines can interfere with your designs.
Child-Safe Paint Options for Outdoor Use
Acrylic paints work best for beach rocks since they’re non-toxic and dry quickly in coastal humidity. Water-based tempera paints are another safe choice that washes off hands easily with soap and water. Always pack a small brush set and paper towels – you’ll need them for cleanup between colors.
Simple Animal Designs That Kids Can Master
Start with basic shapes like ladybugs using red paint and black dots or create simple fish with scales painted as overlapping circles. Crabs are perfect beginner projects – just paint the rock orange and add googly eyes plus thin lines for legs. Encourage your kids to let each color dry completely before adding details.
Driftwood Wind Chimes and Mobiles
Enjoy soothing melodies with this 37" aluminum wind chime. Its professionally tuned tubes create a deep, relaxing tone, perfect for enhancing your outdoor or indoor space.
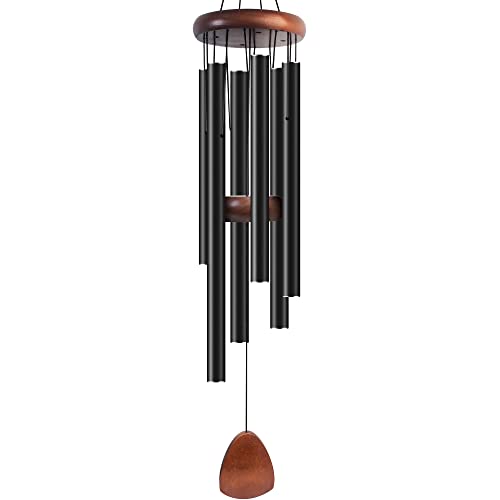
Transform your collected driftwood into musical beach memories that’ll bring ocean sounds to your home year-round. These natural instruments create gentle melodies while showcasing your kids’ artistic vision.
Finding and Preparing Driftwood Pieces
You’ll find the best driftwood pieces along the high tide line where waves deposit smooth, weathered wood. Look for pieces with interesting shapes and natural holes that’ll make stringing easier later.
Clean your driftwood thoroughly with fresh water to remove salt and sand. Let pieces dry completely in the sun for several hours before crafting to prevent cracking.
Safe Drilling and Assembly Methods
Use a hand drill with a small bit to create holes in thicker driftwood pieces, always having an adult handle this step. Position holes near the top and bottom of each piece for balanced hanging.
Thread strong fishing line or thin rope through the holes, leaving different lengths for varied musical tones. Tie secure knots and test each connection before adding decorative elements.
Adding Shells and Beads for Musical Sounds
String small shells between driftwood pieces to create gentle clicking sounds when the wind moves your chime. Choose shells with natural holes or carefully drill holes in larger ones.
Add colorful wooden beads or sea glass for visual appeal and varied tones. Space these elements strategically so they’ll touch and create music when your chime sways in the breeze.
Beach Glass Sun Catchers and Jewelry
Add vibrant color to any space with this 6-piece crystal suncatcher set. Crafted from premium crystal, these pendants create beautiful reflections and rainbows when sunlight shines through.

Transform your collected sea glass into luminous sun catchers and sparkling jewelry that captures the ocean’s beauty. These translucent treasures create stunning light displays while teaching kids basic jewelry-making skills.
Hunting for Sea Glass Safely With Children
You’ll find the best sea glass during low tide along rocky shorelines where waves naturally tumble glass fragments. Look for frosted, smooth pieces without sharp edges that feel comfortable in small hands.
Stay within designated safe areas and teach children to never reach into dark crevices or under large rocks where crabs might hide.
Wire Wrapping Techniques for Beginners
Protect your wires with this durable, 1/4-inch split wire loom. The 25-foot tubing is easy to install and shields against abrasion, chemicals, and temperatures from -94°F to 257°F.

Start with 20-gauge craft wire that’s soft enough for young fingers to bend but strong enough to hold sea glass securely. Show kids how to create simple loops by wrapping wire around a pencil twice.
Practice the basic wrap-around technique on larger pieces first before attempting delicate jewelry settings with smaller glass fragments.
Creating Wearable Beach Treasures
String wrapped sea glass onto leather cord or colorful yarn to make necklaces that showcase each piece’s natural beauty. Add small shells or wooden beads between glass pieces for extra coastal charm.
Create matching bracelets using elastic cord that stretches easily over children’s hands while keeping their beach glass secure during active play.
Sand Dollar Art Projects and Decorations
Sand dollars transform into stunning decorative pieces when you discover the right techniques for collecting and crafting with these ocean treasures. Your beach exploration becomes more meaningful when you know how to turn these delicate finds into lasting artwork.
Proper Sand Dollar Collection and Cleaning
Look for sand dollars during low tide when they’re most visible on sandy beaches. Choose only bleached white specimens that feel lightweight – these are empty shells perfect for crafting. Rinse your collection in fresh water and let them air dry completely for 24-48 hours before decorating to prevent cracking.
Painting and Decorating Techniques
Use water-based acrylic paints that won’t damage the delicate calcium structure of your sand dollars. Apply thin coats with soft brushes to avoid breaking the surface patterns. Try metallic gold or silver accents around the natural star design, or create colorful mandalas using the five-petal pattern as your guide.
Turning Sand Dollars Into Home Decor
Mount painted sand dollars on driftwood pieces using craft glue for rustic wall displays. Create elegant table centerpieces by arranging different-sized specimens with tea lights and beach glass. String smaller sand dollars together with fishing line to make window hangings that catch ocean breezes beautifully.
Nature Collage Art Using Beach Treasures
Transform your beach finds into stunning artwork that captures the essence of your seaside adventures.
Organizing Found Materials by Color and Size
Sort your beach treasures systematically to create the most striking collages. Group shells by their dominant colors – whites, browns, and pinks – while separating larger specimens from tiny fragments.
Arrange materials in small containers or muffin tins, keeping similar textures together. This organization method helps kids visualize color patterns and makes the crafting process smoother and more intentional.
Creating Themed Collages on Canvas or Paper
Design underwater scenes using blue construction paper as your ocean backdrop. Layer larger shells as focal points, then fill spaces with smaller pieces like broken shell fragments and sea glass.
Create beach landscapes by gluing sand along the bottom edge of your canvas. Add driftwood pieces as “logs” and position shells to represent marine life swimming through your artistic ocean world.
Preserving Beach Memories Through Art
Seal your finished collages with clear acrylic spray to protect delicate materials from dust and handling. Write the beach location and date directly on the back before the final coating.
Display these memory pieces in shadow boxes or frames with UV-resistant glass. Your nature collages become conversation starters that transport viewers back to those perfect beach days years later.
Conclusion
These beach craft ideas transform your family’s seaside adventures into lasting memories that extend far beyond your vacation. You’ll discover that the treasures your kids collect become more valuable when turned into personalized artwork and keepsakes.
Each project builds your child’s confidence while developing essential skills like creativity and problem-solving. The beauty of these crafts lies in their simplicity â you don’t need expensive supplies or complicated techniques to create something truly special.
Your beach memories will come alive every time you see these handmade treasures displayed in your home. Start planning your next beach trip and watch as your kids become excited treasure hunters ready to create their next masterpiece.
Frequently Asked Questions
What materials do I need to collect for beach crafts with kids?
Look for seashells, driftwood pieces, smooth rocks, sea glass, and sand dollars during your beach visit. Collect these treasures during low tide when more items are exposed. Choose flat shells without sharp edges, palm-sized smooth rocks for painting, and bleached white sand dollars. Always supervise children while collecting and avoid dark crevices or areas with sharp debris.
What type of paint is safe for kids to use on beach rocks?
Use child-safe paint options like water-based acrylics and tempera paints for decorating beach rocks. These paints are non-toxic and easy to clean up. Allow each color to dry completely before adding details or additional layers. This ensures vibrant colors and prevents smudging while kids create their animal characters and designs.
How do I prepare driftwood for making wind chimes?
Clean collected driftwood pieces thoroughly and let them dry completely before crafting. Remove any sand, salt, or debris by rinsing with fresh water. For drilling holes safely, use appropriate tools with adult supervision. The preparation process ensures the driftwood is ready for assembly and will last longer in your finished wind chime project.
What’s the best way to preserve seashell picture frames?
Use safe gluing techniques suitable for small hands when assembling seashell frames. Avoid shells with sharp edges and ensure all pieces are securely attached. Display finished frames in themed arrangements and include details about the beach location and date. This turns simple crafts into storytelling pieces that preserve family memories for years.
How can I help kids organize beach treasures for collage art?
Encourage children to sort found materials by color and size in small containers. Group shells by their dominant colors and separate different types of beach treasures. This organization makes it easier to create striking themed collages like underwater scenes or beach landscapes, helping kids visualize their artistic designs before gluing pieces down.
What techniques work best for wire wrapping sea glass?
Start with beginner wire wrapping techniques on larger sea glass pieces before moving to smaller fragments. Practice securing the glass safely without sharp edges exposed. Use appropriate gauge wire that’s easy for kids to manipulate with supervision. This skill helps transform collected sea glass into beautiful jewelry and sun catchers.
How do I clean and prepare sand dollars for crafting?
Look for naturally bleached white sand dollars during low tide, as these are already cleaned by the ocean. Gently rinse with fresh water if needed and let dry completely. Use water-based acrylic paints for decorating, and consider mounting finished pieces on driftwood or creating table centerpieces for lasting beach-themed home decor.