7 How to Enhance Pool Pump Performance with Regular Cleaning Tips That Maximize Equipment Life
Boost your pool pump’s efficiency by up to 40% with simple weekly cleaning routines. Learn essential maintenance tips to reduce energy costs and extend equipment life.
Your pool pump works overtime to keep your water crystal clear but neglecting regular maintenance can slash its efficiency by up to 40%. A clogged pump basket or dirty filter forces your system to work harder while driving up energy costs and shortening equipment lifespan.
The bottom line: Simple cleaning routines can restore peak performance and save you hundreds in repairs and electricity bills.
Disclosure: As an Amazon Associate, this site earns from qualifying purchases. Thank you!
Understanding Pool Pump Function and Performance Indicators
Your pool pump acts as the heart of your circulation system, moving thousands of gallons daily to keep water clean and safe. Recognizing early warning signs of decreased performance prevents costly repairs and maintains optimal water quality.
Signs of Reduced Pump Efficiency
Decreased water flow through your return jets is the most obvious indicator of pump problems. You’ll notice weaker circulation patterns and longer filtration cycles to achieve the same results.
Unusual noises like grinding, squealing, or excessive vibration signal internal component stress. Higher electricity bills without increased usage also indicate your pump is working harder than necessary to maintain circulation.
Impact of Debris on Pump Components
Clogged pump baskets force your impeller to work against restricted water flow, creating excessive strain on the motor. Leaves, hair, and small debris accumulate quickly, reducing suction by up to 50%.
Dirty filters create back-pressure that makes your pump work harder while delivering less effective filtration. This combination increases energy consumption and accelerates wear on seals, bearings, and other critical components.
Establishing a Regular Cleaning Schedule for Optimal Performance
Creating a consistent cleaning routine transforms your pump’s efficiency from struggling to thriving. You’ll prevent the 40% performance loss that comes from neglected maintenance while extending your equipment’s lifespan significantly.
Weekly Maintenance Tasks
Empty your pump basket every seven days to prevent debris buildup that restricts water flow. Check the basket for cracks or damage that could allow debris into your pump’s impeller. Rinse the basket thoroughly with your garden hose to remove stuck leaves and particles before reinstalling it securely.
Monthly Deep Cleaning Requirements
Disassemble your pump basket housing and clean all interior surfaces with a soft brush to remove algae and calcium deposits. Inspect the pump lid O-ring for wear and lubricate it with pool-grade silicone to maintain proper sealing. Remove your filter cartridge and soak it in filter cleaner solution or backwash your sand filter according to manufacturer specifications.
Seasonal Inspection Protocols
Examine your pump motor housing for signs of corrosion or unusual wear patterns that indicate potential problems. Test your pump’s priming ability by turning it off and restarting to ensure it regains suction quickly. Check all connection points and seals for leaks that reduce efficiency and schedule professional service if you notice decreased performance despite regular cleaning.
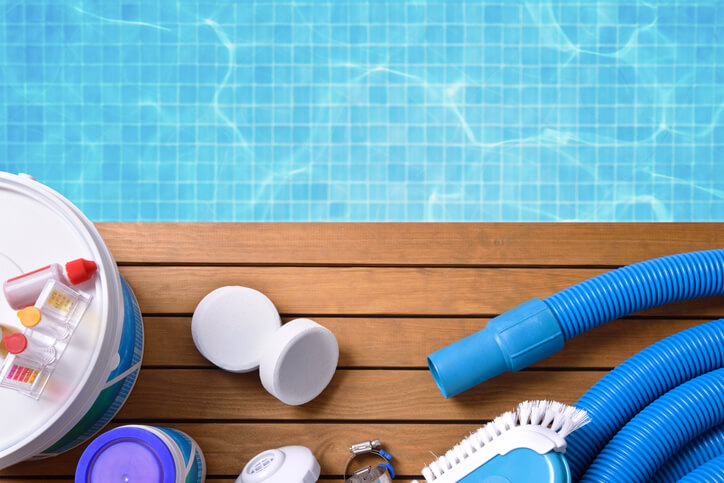
Cleaning the Pool Pump Strainer Basket Effectively
Regular strainer basket cleaning keeps your pump running smoothly and prevents costly repairs from debris buildup.
Tools and Materials Needed
You’ll need basic supplies for effective basket cleaning. Gather a garden hose, soft-bristled brush, mild dish soap, and clean towels. Keep rubber gloves handy to protect your hands from debris and algae buildup during the cleaning process.
Step-by-Step Basket Removal Process
Turn off your pump and close the skimmer valves before starting. Remove the pump lid by turning counterclockwise, then lift the basket straight up using the handle. Check the basket for cracks or damage while removing debris by hand before washing.
Proper Cleaning Techniques
Rinse the basket thoroughly with your garden hose to remove loose debris and algae. Scrub stubborn buildup with a soft brush and mild soap, paying attention to the basket’s bottom and corners. Rinse again until water runs clear, then inspect for damage before reinstalling.
Maintaining the Pool Pump Filter System
Your pool filter works hand-in-hand with the pump to trap contaminants and keep water crystal clear. Proper filter maintenance directly impacts pump performance and extends equipment life.
Types of Pool Filters and Their Cleaning Needs
Sand filters require backwashing every 2-4 weeks when pressure gauges show 8-10 PSI above normal operating levels. Cartridge filters need weekly rinsing and thorough cleaning every 2-3 weeks with filter cleaner solution. DE filters demand backwashing monthly plus adding fresh diatomaceous earth after each cleaning cycle.
Filter Cleaning Frequency Guidelines
Weekly maintenance includes checking pressure gauges and skimming debris from filter housing areas. Bi-weekly deep cleaning involves removing cartridges for thorough washing or backwashing sand and DE systems. Monthly inspections should include examining filter media condition and testing water flow rates through return jets.
Replacement Indicators
Cartridge filters need replacement when pleats won’t come clean despite proper washing or fabric appears frayed and worn. Sand filter media requires changing every 3-5 years when backwashing becomes ineffective. DE powder needs complete replacement if it clumps persistently or develops a grayish color that won’t rinse away.
Inspecting and Cleaning Pool Pump Impeller Components
Your pool pump impeller sits at the heart of your circulation system, and debris buildup here can reduce flow rates by 30-50%. Regular impeller maintenance prevents costly repairs and keeps your pump running at peak efficiency.
Accessing the Impeller Housing
Turn off power at the breaker and remove the pump motor from the wet end housing. You’ll need to disconnect the motor bolts and carefully separate the two halves of the pump assembly. Most impellers are located directly behind the pump basket area and require removing the diffuser or volute casing to access properly.
Removing Debris and Buildup
Remove hair, leaves, and calcium deposits from impeller vanes using needle-nose pliers and a soft brush. Soak stubborn mineral buildup in white vinegar for 15-20 minutes before scrubbing. Check that impeller vanes move freely without binding or catching on debris that could damage the motor bearings.
Safety Precautions During Impeller Maintenance
Always verify power is completely off before starting any impeller work. Wear safety glasses and gloves when handling the impeller assembly, as sharp edges can cause cuts. Never force stuck components apart – use penetrating oil and gentle pressure to avoid cracking the housing or damaging seals.
Checking Pool Pump Motor Ventilation and Housing
Your pool pump motor needs proper airflow to prevent overheating and maintain efficient operation. Motor housing issues often develop gradually but can lead to sudden failures during peak swimming season.
Clearing Ventilation Openings
Check your motor’s cooling fins and vents monthly for accumulated debris like leaves, grass clippings, and spider webs. Use compressed air or a soft brush to remove blockages from ventilation slots. Blocked vents can cause motor temperatures to rise 20-30 degrees above normal operating range, significantly reducing motor lifespan.
Removing External Debris and Vegetation
Clear a 2-foot radius around your pump motor housing to ensure adequate airflow circulation. Trim back overgrown bushes, remove fallen leaves, and relocate mulch that’s crept too close to the unit. Dense vegetation restricts air movement and creates moisture pockets that promote corrosion and electrical issues.
Motor Housing Inspection Points
Examine the motor housing for cracks, rust spots, and loose mounting bolts during your monthly maintenance routine. Check electrical connections for corrosion or water intrusion signs. Look for oil leaks around shaft seals and verify the motor sits level on its mounting pad to prevent vibration damage.
Monitoring Pool Water Chemistry for Pump Protection
Your pool’s water chemistry directly affects pump performance and component longevity. Chemical imbalances can cause corrosion, scaling, and premature equipment failure.
pH Level Impact on Pump Components
pH levels outside the 7.2-7.6 range create serious problems for your pump system. Low pH below 7.0 causes acidic conditions that corrode metal pump components, seals, and fittings within weeks. High pH above 7.8 promotes calcium scaling that clogs impeller vanes and reduces flow rates by 25-40%.
Chlorine and Chemical Balance Effects
Excessive chlorine levels above 5 ppm accelerate rubber seal deterioration and plastic component degradation. You’ll notice cracked O-rings, brittle pump baskets, and warped impeller housings when chemical levels stay unbalanced. Proper chlorine levels between 1-3 ppm protect equipment while maintaining sanitation effectiveness.
Water Testing and Adjustment Procedures
Test your pool water chemistry twice weekly using digital test strips or liquid test kits. Check pH, chlorine, alkalinity, and calcium hardness levels each Tuesday and Friday for consistent monitoring. Add pH increaser or decreaser in small doses, then run your pump for 4 hours to circulate chemicals before retesting.
Troubleshooting Common Pool Pump Performance Issues
Even with regular cleaning, you’ll encounter performance issues that require targeted solutions. Identifying these problems early prevents costly repairs and extends your pump’s lifespan.
Low Water Flow Problems
Clogged impeller is the most common cause of reduced water flow in pool pumps. Check for debris wrapped around the impeller blades or lodged in the housing after removing the pump basket.
Blocked return jets indicate restricted circulation throughout your system. Clear any visible obstructions and verify your skimmer baskets aren’t overflowing with leaves or debris.
Unusual Noise Identification
Grinding sounds typically mean debris is caught in the impeller or bearings are failing. Stop the pump immediately and inspect for foreign objects before checking motor bearings.
Cavitation noise sounds like marbles rattling and indicates air entering the system. Check pump lid seals, suction lines, and water levels to eliminate air pockets.
Priming and Air Lock Solutions
Prime your pump by filling the pump basket housing with water before starting. This creates the initial suction needed for proper operation and prevents dry running damage.
Air locks occur when trapped air prevents water circulation. Loosen the pump lid slightly while running to release air, then retighten once water flows consistently through the system.
Professional Maintenance vs. DIY Pool Pump Care
Making the right choice between professional service and DIY maintenance depends on your skill level and the complexity of your pump issues.
When to Call a Pool Service Professional
You’ll need professional help when electrical issues arise or when your pump requires motor replacement. Call a technician immediately if you hear grinding sounds from the motor housing or notice water leaking from electrical connections.
Complex repairs like impeller replacement or seal damage exceed typical DIY capabilities. Most homeowners can handle basket cleaning and basic troubleshooting, but motor problems require specialized tools and electrical expertise.
Cost-Benefit Analysis of Regular Cleaning
Weekly DIY cleaning costs you 30 minutes but saves $150-300 annually on professional service calls. Regular maintenance prevents 80% of common pump failures that lead to expensive emergency repairs.
Professional quarterly inspections cost $75-125 but catch problems early before they become major breakdowns. The investment pays for itself when you avoid a $800-1,200 pump replacement due to neglected maintenance.
Long-Term Equipment Protection Strategies
Combining monthly DIY cleaning with annual professional inspections creates the most cost-effective protection plan. This hybrid approach extends pump life by 3-5 years while keeping maintenance costs reasonable.
Document your cleaning schedule and any issues you notice to help professionals diagnose problems faster. Consistent DIY care reduces the frequency of professional visits while ensuring complex issues get expert attention when needed.
Conclusion
Your pool pump’s performance depends entirely on your commitment to regular maintenance. By implementing the weekly monthly and seasonal cleaning routines outlined above you’ll keep your circulation system running at peak efficiency while avoiding costly repairs.
Remember that a well-maintained pump uses less energy operates more quietly and lasts significantly longer than a neglected one. The time you invest in cleaning your pump basket maintaining your filter and monitoring water chemistry will pay dividends through lower electricity bills and fewer equipment failures.
Start with the basics: check your pump basket weekly clean your filter regularly and keep your motor housing clear of debris. These simple steps will transform your pool’s performance and save you money in the long run.
Frequently Asked Questions
How often should I clean my pool pump basket?
You should clean your pool pump basket weekly to prevent debris buildup and maintain optimal performance. Regular weekly cleaning prevents clogs that can reduce pump efficiency by up to 40% and helps avoid costly repairs while keeping energy costs low.
What are the early warning signs of reduced pool pump efficiency?
Early warning signs include decreased water flow through return jets, unusual noises from the pump motor, higher electricity bills, and poor water circulation. These symptoms indicate your pump is working harder than necessary due to clogs or maintenance issues.
How do I properly clean my pool pump strainer basket?
Turn off the pump, remove the pump lid, and lift out the basket. Rinse thoroughly with a garden hose, scrub with a soft-bristled brush and mild dish soap to remove debris and algae, then reinstall once completely clean and damage-free.
What’s the difference between sand, cartridge, and DE filter maintenance?
Sand filters need backwashing every 2-4 weeks, cartridge filters require weekly rinsing and deep cleaning every 2-3 weeks, while DE filters need monthly backwashing with fresh diatomaceous earth added. Each type has specific maintenance schedules for optimal performance.
How does debris buildup affect my pool pump’s performance?
Debris buildup on the impeller can reduce flow rates by 30-50%, while clogged baskets and dirty filters strain the pump motor, increase energy consumption, and lead to premature equipment failure. Regular cleaning prevents these efficiency losses.
When should I seek professional help for pool pump maintenance?
Seek professional help for electrical issues, motor replacements, complex repairs, or if you’re uncomfortable with DIY maintenance. A hybrid approach of monthly DIY cleaning with annual professional inspections provides optimal equipment protection while managing costs.
How does water chemistry affect my pool pump’s performance?
Imbalanced pH levels can cause corrosion or scaling in pump components, reducing efficiency and lifespan. Maintaining proper water chemistry prevents chemical damage to the pump motor, housing, and internal components, ensuring optimal performance.
What tools do I need for basic pool pump maintenance?
Essential tools include a garden hose, soft-bristled brush, mild dish soap, rubber gloves, and basic hand tools for removing pump components. These simple tools allow you to perform most routine maintenance tasks safely and effectively.
How much money can regular pump maintenance save me?
Regular weekly DIY maintenance can save hundreds of dollars annually on professional service calls and prevent costly pump replacements. Proper maintenance extends equipment life significantly while reducing energy consumption and repair costs.
What should I check during monthly pump motor inspections?
Check cooling fins and vents for debris, ensure a 2-foot clearance around the motor housing, inspect for cracks or rust, verify electrical connections are secure, and confirm proper ventilation to prevent overheating and maintain optimal performance.