7 How to Maintain a Saltwater Pool Filter Steps That Maximize Performance
Keep your saltwater pool crystal clear! Learn 7 essential filter maintenance steps to prevent costly repairs, remove salt buildup, and extend filter life for optimal performance.
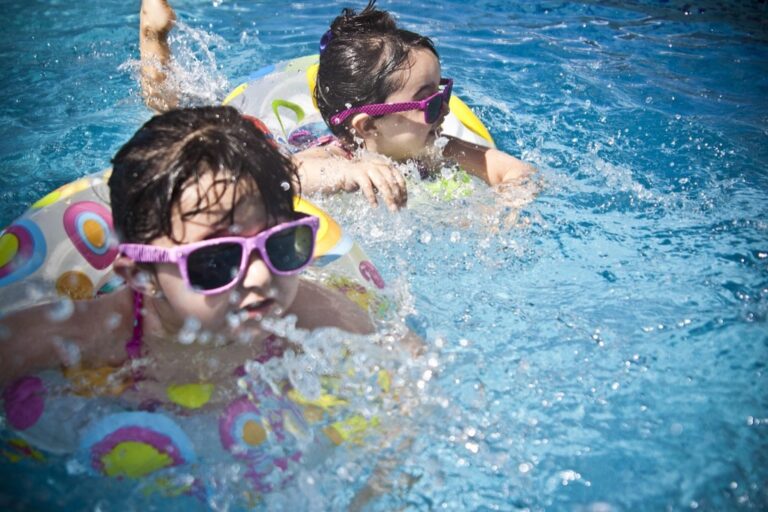
Your saltwater pool’s filter works harder than you might think â it’s constantly battling salt buildup and mineral deposits that can destroy its efficiency. The bottom line: A clogged or damaged filter turns your relaxing pool into a maintenance nightmare and a costly repair bill.
Most pool owners make critical mistakes when cleaning their saltwater filters, leading to premature replacement and poor water quality. What you need to know: Proper filter maintenance requires specific techniques that differ dramatically from traditional chlorine pool care.
The smart approach: Follow these seven essential steps to keep your saltwater pool filter running smoothly and extend its lifespan by years, not months.
Disclosure: As an Amazon Associate, this site earns from qualifying purchases. Thank you!
Step 1: Turn Off Your Pool System and Prepare for Maintenance
Proper shutdown and preparation set the foundation for safe, effective saltwater filter maintenance. Taking time to prepare prevents equipment damage and ensures you’re working with accurate baseline measurements.
Shut Down the Pool Pump and Filter System
Keep your pool crystal clear with the KimFilter Pro Series 1000 GPH filter pump. It uses hydroaeration technology and an efficient Type A/C cartridge to powerfully circulate and filter your pool water, removing debris and maintaining a healthy pH balance.

Turn off your pool pump at the circuit breaker, not just the control panel switch. Wait 5 minutes for water circulation to completely stop before proceeding.
This prevents water from flowing through the system while you’re working, which could flood your equipment area or interfere with filter removal.
Gather Necessary Tools and Safety Equipment
Collect a filter wrench, garden hose, soft-bristled brush, and safety goggles before starting. You’ll also need rubber gloves to protect your hands from salt residue.
Having everything ready prevents mid-maintenance trips that could leave your system partially disassembled and vulnerable to debris contamination.
Check Water Chemistry Levels Before Starting
Test your pool’s salt levels, pH, and alkalinity using test strips or a digital meter. Record these numbers for comparison after maintenance.
Pre-maintenance readings help you identify whether filter performance issues stem from chemical imbalances or actual filter contamination requiring different cleaning approaches.
Step 2: Remove and Inspect the Filter Cartridge or Media
After shutting down your system, you’re ready to extract and examine your filter components. This inspection phase reveals critical information about your filter’s condition and helps you determine the appropriate cleaning approach.
Carefully Extract the Filter Components
Open your filter housing by unscrewing the top clamp or band assembly counterclockwise. Lift the filter cartridge straight up to avoid damaging the pleated material against the housing walls.
For sand or DE filters, remove the grids or manifold assembly according to your manufacturer’s specifications. Handle these components gently since saltwater pools accelerate wear on filter media connections.
Examine for Wear, Damage, and Buildup
Inspect cartridge pleats for tears, fraying, or collapsed sections that indicate replacement time. Look for calcium scale deposits appearing as white, chalky buildup along the filter material.
Check sand filters for channeling patterns and clumped media that prevents proper water flow. DE filters should show even coating distribution without bare spots or excessive buildup on individual grids.
Document Any Issues for Future Reference
Take photos of damage or unusual buildup patterns to track filter degradation over time. Record the date and operating hours since your last cleaning to establish maintenance intervals.
Note any correlation between water chemistry readings and filter condition. This documentation helps you identify whether frequent clogging stems from chemical imbalances or normal saltwater pool operation patterns.
Step 3: Rinse Away Loose Debris and Contaminants
After your thorough inspection, it’s time to remove the surface-level buildup that’s choking your filter’s performance. This initial rinse sets the stage for deeper cleaning by eliminating loose particles and salt residue.
Use a Garden Hose with Moderate Water Pressure
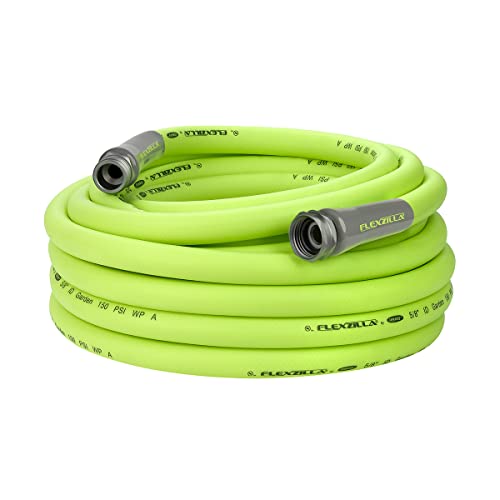
The Flexzilla garden hose offers extreme flexibility and durability for easy yard work. Its lightweight design coils easily, lays flat, and features abrasion-resistant construction with leak-free connections.
Start with gentle water pressure to avoid damaging delicate filter pleats. High pressure can force debris deeper into the media or tear cartridge materials. You’ll want steady, consistent flow that loosens buildup without creating structural damage to your filter components.
Work from Top to Bottom in Systematic Patterns
Begin rinsing at the filter’s top and work downward in overlapping sections. This prevents debris from resettling on already-cleaned areas. Move the hose in slow, deliberate patterns to ensure complete coverage while maintaining consistent distance from the filter surface.
Focus on Pleated Areas and Crevices
Direct water flow between each pleat fold where salt crystals and organic matter typically accumulate. These tight spaces trap the most contaminants and require extra attention. Angle your hose to flush out hidden debris that regular circulation can’t reach effectively.
Step 4: Apply Deep Cleaning Solutions for Stubborn Buildup
After basic rinsing, you’ll need specialized cleaning solutions to tackle the calcium scale and mineral deposits that basic water pressure can’t remove.
Choose Appropriate Cleaning Chemicals for Saltwater Systems
Convert your above-ground pool (up to 15,000 gallons) to saltwater for easier maintenance and sparkling clean water. The intuitive control panel allows for effortless scheduling and cleaning.

Select filter cleaners specifically formulated for saltwater pools to avoid damaging your filter media. Standard pool cleaners often contain harsh acids that break down cartridge materials faster in salt environments.
Muriatic acid solutions work best for calcium buildup, while enzyme-based cleaners target oils and organic matter that accumulate from sunscreen and body lotions.
Soak Filter Components in Cleaning Solution
Submerge your filter cartridge completely in the cleaning solution using a large bucket or plastic container. The solution should cover all pleated areas and end caps to ensure thorough penetration.
Position the cartridge vertically to prevent air pockets from forming in the pleats, which would leave untreated spots with stubborn deposits.
Allow Adequate Contact Time for Effectiveness
Let the filter soak for 8-12 hours depending on the severity of buildup and manufacturer recommendations. Overnight soaking works perfectly for most maintenance schedules and ensures maximum chemical penetration.
Check the solution periodically – if it turns cloudy or changes color significantly, the cleaning process is working and breaking down accumulated contaminants.
Step 5: Scrub and Remove Persistent Deposits
After the deep cleaning solution has loosened stubborn buildup, you’ll need to physically remove the deposits that remain bonded to your filter media.
Use Soft-Bristled Brushes for Gentle Cleaning
This soft-bristled cleaning brush makes scrubbing clothes, shoes, and surfaces easy. Its ergonomic, non-slip design provides a comfortable grip, while the durable bristles deliver gentle yet effective cleaning.

Soft-bristled brushes work best for scrubbing saltwater pool filters without causing damage. You’ll want to use gentle circular motions to dislodge calcium deposits while preserving the filter’s delicate pleated structure. Avoid wire brushes or abrasive scrubbers that can tear the filter media and create filtration gaps.
Target Calcium Scale and Organic Matter
Calcium scale appears as white, chalky deposits that form hard crusts on filter pleats. You’ll need to focus extra attention on these areas, as they’re the primary culprits behind reduced water flow. Organic matter typically shows up as dark, slimy buildup that requires persistent scrubbing to remove completely.
Avoid Damaging Filter Material During Scrubbing
Filter pleats are surprisingly fragile when wet, so you’ll need to support them with one hand while scrubbing with the other. Never pull or stretch the pleated material, as this can create permanent creases that reduce filtration efficiency. Work systematically across each pleat to ensure thorough cleaning without applying excessive pressure.
Step 6: Thoroughly Rinse and Inspect the Clean Filter
After scrubbing away persistent deposits, you’ll need to complete the cleaning process with a final rinse and thorough inspection. This critical step ensures your saltwater pool filter operates at peak efficiency once reinstalled.
Remove All Cleaning Chemical Residue
Rinse your filter cartridge thoroughly with clean water to eliminate all traces of cleaning chemicals. Use a steady stream from your garden hose, focusing on pleated areas where chemical residue accumulates most. Any remaining cleaning solution will neutralize your pool’s sanitizer and create water balance issues.
Check for Complete Debris Removal
Inspect every pleat and surface for remaining calcium deposits, algae, or organic matter that could restrict water flow. Hold your filter up to sunlight to identify any missed spots or stubborn buildup. Clean filters should appear uniformly white or off-white without dark stains or visible debris.
Ensure Filter Integrity Before Reinstallation
Examine the filter media for tears, frayed edges, or compressed pleats that indicate replacement time. Check end caps for cracks and ensure all structural components remain intact after cleaning. Damaged filters can’t maintain proper filtration and may allow debris to bypass into your pool system.
Step 7: Reinstall the Filter and Restart Your Pool System
Your clean filter needs careful reinstallation to ensure optimal performance. This final step requires attention to detail since improper installation can cause leaks and reduced filtration efficiency.
Properly Position Filter Components in Housing
Position your filter cartridge vertically in the housing with the wider end facing up. Ensure the cartridge sits flush against the bottom housing seal without tilting or binding. Double-check that pleated sections aren’t compressed or folded during installation.
Secure All Connections and Seals
Tighten the filter housing lid using the manufacturer’s specified torque to prevent over-tightening that can crack the housing. Replace worn O-rings and gaskets with pool-safe lubricant for proper sealing. Confirm all clamps and fittings are hand-tight plus a quarter turn.
Test System Operation and Monitor Performance
Start your pool pump and check for leaks around the filter housing within the first five minutes. Monitor pressure gauge readings which should be 8-10 PSI lower than before cleaning. Run the system for 30 minutes while observing water clarity and flow rate improvements.
Conclusion
Maintaining your saltwater pool filter doesn’t have to be overwhelming when you follow these seven systematic steps. Regular maintenance prevents costly repairs and keeps your water crystal clear throughout the swimming season.
Remember that saltwater systems require specialized care compared to traditional chlorine pools. The key is consistency – establishing a routine cleaning schedule and sticking to it will extend your filter’s lifespan significantly.
By taking the time to properly shut down your system inspect thoroughly and use appropriate cleaning solutions you’ll avoid the common mistakes that lead to premature filter replacement. Your investment in proper maintenance will pay off with better water quality and fewer headaches down the road.
Frequently Asked Questions
How often should I clean my saltwater pool filter?
Saltwater pool filters typically need cleaning every 2-4 weeks, depending on pool usage and environmental factors. Heavy bather loads, storms, or high debris levels may require more frequent cleaning. Monitor your pressure gauge – when it reads 8-10 PSI above the clean starting pressure, it’s time to clean your filter.
What makes saltwater pool filter maintenance different from regular pools?
Saltwater pools create unique challenges due to salt buildup and mineral deposits that accumulate on filter media. These deposits require specialized cleaning solutions and techniques that differ from standard chlorine pool maintenance. The salt generator also produces calcium scale that needs specific removal methods.
Can I use regular pool filter cleaners on my saltwater pool filter?
Keep your spa water clean with HTH Spa Filter Cleaner. This deep-cleaning formula extends filter life and improves performance for all spa types.

It’s best to use cleaners specifically formulated for saltwater systems to avoid damaging the filter media. Muriatic acid solutions work well for calcium buildup, while enzyme-based cleaners target oils and organic matter. Always check manufacturer recommendations before using any cleaning products.
Why is my saltwater pool filter getting dirty so quickly?
Rapid filter contamination often indicates water chemistry imbalances, inadequate circulation, or environmental factors like heavy debris loads. Check your salt levels, pH, and alkalinity first. Poor water balance can accelerate mineral buildup and reduce filter efficiency, requiring more frequent maintenance.
What tools do I need for saltwater pool filter maintenance?
Essential tools include a filter wrench, garden hose with moderate pressure, soft-bristled brush, safety goggles, and chemical-resistant gloves. You’ll also need appropriate cleaning solutions like muriatic acid for calcium deposits and enzyme-based cleaners for organic matter removal.
How long should I soak my saltwater pool filter in cleaning solution?
Allow 8-12 hours of contact time for effective deep cleaning. This extended soaking period ensures the cleaning solution penetrates all pleated areas and dissolves stubborn calcium scale and mineral deposits that basic rinsing cannot remove.
When should I replace my saltwater pool filter instead of cleaning it?
Replace your filter when you notice tears in the pleated material, permanent staining that won’t clean off, or when cleaning no longer restores proper water flow. Most cartridge filters last 6-12 months with proper maintenance, but saltwater systems may require more frequent replacements.
What pressure gauge reading indicates my saltwater pool filter needs cleaning?
Clean your filter when the pressure gauge reads 8-10 PSI above the clean starting pressure. For most residential pools, this typically means cleaning when pressure reaches 20-25 PSI, though your specific system may vary based on equipment specifications.