7 Nighttime Photography Tips for Pools and Beaches That Pros Swear By
Master stunning nighttime water photography with 7 expert tips covering camera settings, lighting techniques, timing, and composition for pools and beaches.
Why it matters: Nighttime photography at pools and beaches creates stunning visuals that most photographers miss, but the unique lighting challenges require specific techniques to capture those magical moments.
The challenge: Low light conditions, moving water, and reflective surfaces make these locations particularly tricky for evening shoots.
What you’ll learn: Master seven essential techniques that transform ordinary nighttime scenes into extraordinary photographs that showcase the beauty of water under moonlight and artificial illumination.
Disclosure: As an Amazon Associate, this site earns from qualifying purchases. Thank you!
Master Your Camera Settings for Low Light Conditions
Nighttime pool and beach photography demands precise camera control to capture those magical water moments. Your camera’s three core settings work together to gather light while maintaining image quality in challenging conditions.
Adjust ISO Settings for Optimal Image Quality
Start with ISO 800-1600 for most nighttime water scenes to balance light sensitivity with image quality. Modern cameras handle these ranges well without introducing excessive grain that’ll ruin your shots.
Push to ISO 3200-6400 only when absolutely necessary for handheld shots or fast-moving subjects. Higher ISOs create noise that’s particularly noticeable in smooth water surfaces and dark sky areas.
Set Wide Aperture for Maximum Light Capture
Open your aperture to f/1.4-f/2.8 to maximize light intake while creating beautiful background separation. Wide apertures excel at isolating illuminated pool areas or moonlit waves from darker surroundings.
Consider f/4-f/5.6 when you need greater depth of field for expansive beach scenes. You’ll sacrifice some light-gathering ability but gain sharpness across your entire frame from foreground to horizon.
Use Slow Shutter Speeds for Creative Effects
Experiment with 1-4 second exposures to transform moving water into silky, ethereal textures. These longer exposures smooth out choppy waves and create dreamy light trails from pool illumination.
Try 15-30 second exposures for dramatic cloud movement and star trails above water scenes. Use a sturdy tripod and remote shutter release to eliminate camera shake during these extended captures.
Utilize Artificial Lighting to Enhance Your Shots
Adding artificial lighting transforms your nighttime water photography from basic snapshots into professional-looking images. You’ll create depth, highlight textures, and establish the mood you want to capture.
Position LED Lights for Dramatic Pool Illumination
Control these 100ft RGB LED strip lights via Bluetooth app or remote to customize colors and brightness. Sync the lights to music for a dynamic party atmosphere and set timers for automatic on/off.

LED panels placed at 45-degree angles create stunning rim lighting that separates pool edges from dark backgrounds. Position waterproof LED strips along pool coping or behind waterfalls to add dramatic backlighting that makes water droplets sparkle like diamonds.
Create Mood with Underwater Pool Lights
Enjoy vibrant pool lighting with these solar-powered, floating lights. Featuring dynamic RGB modes, a convenient timer, and durable IPX7 waterproof construction, they're perfect for any pool or outdoor setting.

Underwater LED lights produce ethereal color washes that transform ordinary pools into magical scenes. Change colors throughout your shoot—cool blues for mysterious moods, warm ambers for romantic feels, or vibrant purples for dramatic contrast against dark skies.
Use Flash Techniques for Beach Photography
Off-camera flash positioned low illuminates foreground waves while preserving dark sky drama. Use diffused flash bounced off reflectors to softly light beach subjects without harsh shadows, or try rear-curtain sync to capture sharp subjects with beautiful motion blur trails.
Choose the Right Equipment for Nighttime Water Photography
Your camera gear becomes the foundation for capturing stunning nighttime water scenes. The right equipment transforms challenging low-light conditions into opportunities for extraordinary images.
Select Wide-Angle Lenses for Expansive Scenes
• ✔ COMPATIBLE WITH ALL SMARTPHONES, TABLETS, and LAPTOPS including ALL iPhone models, Samsung Galaxy and Note, Google Pixel, Huawei and more. CONTENTS INCLUDE: TruView 0.45x Wide Angle Lens, Clarus 15x Macro Lens, TruGrip Lens Clip, GlowClip Mini Rechargeable LED Light + Charging Cable, Quick-Release Lanyard, DuraCase, EasyClip, Cleaning Cloth and LIFETIME WARRANTY. • ✔ TRUVIEW 0.45x WIDE ANGLE LENS - CAPTURE 45% MORE PICTURE WITH EVERY SNAP: Shoot stunning photos of people, pets, travel scenery, landscapes, architecture, selfies and more. NO DARK CORNERS (vignetting) like cheaper lenses. Crafted from aircraft-grade aluminum and premium optical glass for durability and clarity. Multi-element, coated glass lenses minimize ghosting, reflections, lens flare, and other artifacts. Xenvo cell phone lens attachment is ideal for hobbyists and photography pros alike. • ✔ CLARUS 15x MACRO LENS - MARVEL YOUR SENSES. MAGNIFY NEARBY SUBJECTS FOR BREATHTAKING, SUPER CLOSE-UP PHOTOS: Capture all the intricacies and details with precision-focus for razor crisp macro photos every time. (For best results, position macro lens approximately 1/2 inch from subject. Not designed for zooming in on distant subjects.) THE TRUGRIP LENS CLIP offers SUPERIOR GRIPPING POWER to fasten your lenses to your cell phone when you're in action mode, framing your next perfect shot. • ✔ GLOWCLIP RECHARGEABLE LED FILL LIGHT - The GlowClip LED light clips ANYWHERE on your phone to instantly illuminate your subject and surroundings with warm continuous light. The warm and natural LED light is superior to your smartphone's built in flash—which can be blinding and unnatural—especially in darker settings and venues. FEATURES 3 BRIGHTNESS SETTINGS: Low, Medium and High. Say goodbye to frustrating photo "retakes" and hello to brilliant photos the first time. • ✔ QUICK-RELEASE LANYARD AND TRAVEL CASE - TRANSPORT AND PROTECT YOUR LENS KIT: Perfect for taking your Xenvo lenses with you on the fly. The travel case stores and protects all lens kit components snugly and safely while the quick-release lanyard is the perfect way to carry your lenses on your next outing. Just drape the lanyard and lens around your neck. The quick-release lanyard head makes it a cinch to access your Xenvo lenses in a flash so you never miss another photo moment.

Wide-angle lenses between 14-35mm capture the full scope of pools and beaches at night. You’ll frame both the illuminated water and dramatic sky elements like stars or city lights. These lenses also provide greater depth of field, keeping foreground water features and background elements sharp simultaneously.
Invest in a Sturdy Tripod for Sharp Images
Carbon fiber tripods handle wind gusts and wet conditions better than aluminum alternatives. You need legs that won’t shift during 30-second exposures of wave movements or star trails. Look for tripods with spike feet that grip sand effectively and can support twice your camera’s weight.
Consider Waterproof Gear for Close-Up Shots
Waterproof camera housings let you position your lens inches from pool surfaces or wade into shallow surf. You’ll capture unique perspectives of underwater lighting and surface reflections impossible from dry land. Rain covers and lens hoods protect your equipment from spray and unexpected weather changes during extended shooting sessions.
Time Your Shoot During the Golden Hour and Blue Hour
The magic happens when day transitions to night – those precious minutes when natural light transforms ordinary pool and beach scenes into extraordinary photographic opportunities.
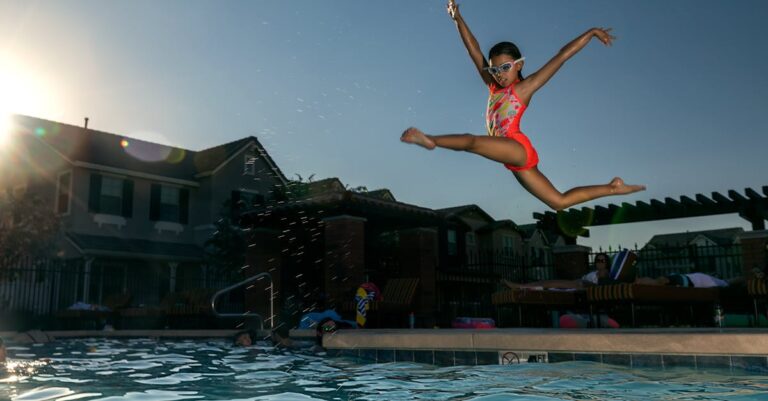
Capture the Magic of Sunset Transitions
Start shooting 30 minutes before sunset to capture the full spectrum of golden light changes. Position yourself so the setting sun backlights water spray and creates dramatic silhouettes against pools or waves. The warm light during this transition enhances water reflections and creates natural rim lighting on subjects.
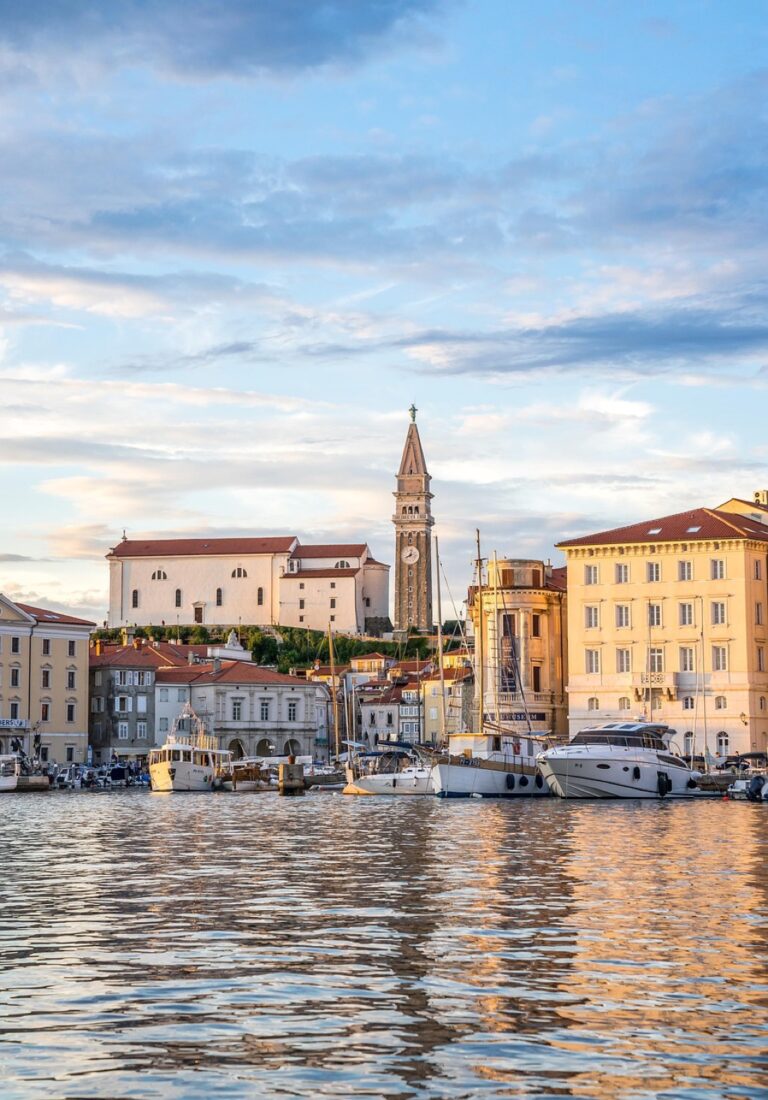
Maximize Blue Hour Lighting for Atmospheric Photos
Blue hour begins 20-30 minutes after sunset and provides the perfect balance between ambient sky light and artificial pool lighting. This soft, even illumination eliminates harsh shadows while maintaining detail in both water and sky. Your camera can capture rich blues and purples that create moody, professional-looking water photographs.
Plan Around Moon Phases for Natural Illumination
Full moon phases provide enough natural light to illuminate beach waves and pool surfaces without requiring high ISO settings. Schedule shoots 2-3 days before or after the full moon for optimal brightness while avoiding overexposure. New moon periods offer the darkest skies for capturing star reflections in still water surfaces.
Focus on Composition Techniques for Water Scenes
Strong composition transforms good nighttime water shots into exceptional ones. Your ability to arrange visual elements becomes even more critical when working with challenging lighting conditions.
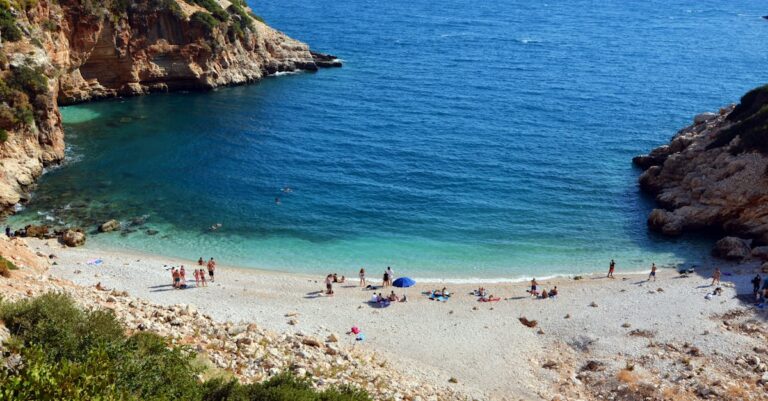
Use Leading Lines from Pool Edges and Shorelines
Pool coping and deck edges create natural leading lines that draw viewers into your frame. Position yourself to capture these geometric lines extending toward infinity pools or vanishing points.
Shoreline curves work similarly at beaches, guiding the eye from foreground waves to distant horizons. Use wet sand reflections as additional leading elements that amplify your composition’s depth and visual flow.
Frame Subjects with Natural and Artificial Elements
Overhanging palm fronds or poolside umbrellas create natural frames that add depth to your water scenes. Position these elements in your foreground to establish layers and context.
Architectural features like cabanas, pier posts, or pool waterfalls serve as framing devices too. These artificial elements help contain your composition while highlighting the illuminated water as your main subject.
Apply Rule of Thirds for Balanced Water Photography
Place your horizon line along the upper or lower third of your frame rather than dead center. This creates more dynamic compositions that emphasize either the dramatic sky or the illuminated water surface.
Position key focal points like moon reflections, lit fountains, or breaking waves at intersection points of your thirds grid. Your camera’s grid overlay helps visualize these placement options during nighttime shooting sessions.
Capture Reflections and Water Movement Effectively
Water’s dual nature as both mirror and motion creates your most compelling nighttime shots. Understanding how to control these elements separates amateur snapshots from professional-quality images.
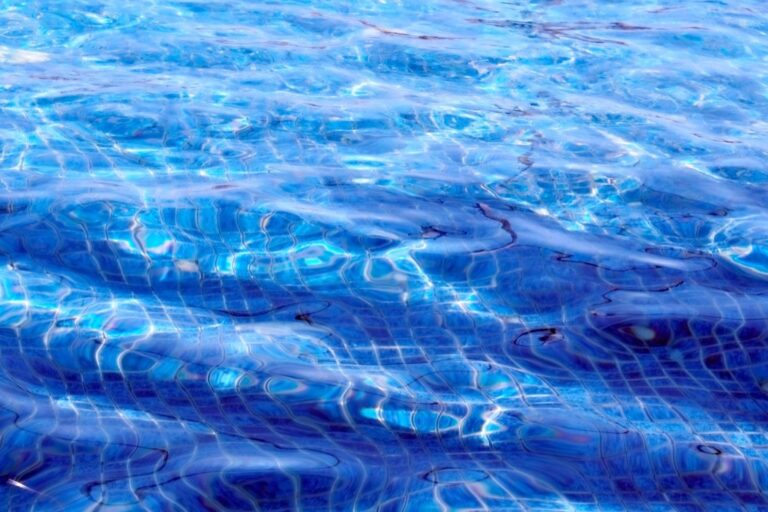
Master Mirror-Like Pool Reflections
Perfect pool reflections require absolutely still water and strategic lighting placement. Wait 5-10 minutes after swimmers exit before shooting – even tiny ripples destroy mirror effects. Position your lights to illuminate both the subject and its reflection equally. Use a polarizing filter to reduce glare while maintaining reflection clarity.
Freeze or Blur Wave Motion for Dynamic Effects
Shutter speed controls wave drama in your beach shots. Use 1/500th second or faster to freeze wave crests and capture spray detail. Switch to 1/4 to 2 seconds for silky wave movement that shows energy without chaos. Time your shots between wave sets for predictable patterns.
Use Long Exposures for Smooth Water Surfaces
Transform choppy water into glass-like surfaces with 30-second to 2-minute exposures. Use a 10-stop ND filter during twilight hours to achieve these times without overexposure. Wind creates texture even in long exposures, so shoot during calm conditions. Check your histogram frequently – smooth water can fool your camera’s meter.
Post-Processing Tips for Nighttime Water Images
Raw nighttime water shots capture the moment, but post-processing transforms them into stunning artistic statements. You’ll need specific editing techniques to maximize the potential of your low-light captures.
Enhance Colors and Contrast in Editing Software
Boost vibrance over saturation to intensify water reflections without oversaturating skin tones or artificial lights. Increase contrast selectively using luminosity masks to make pool lights pop against dark water surfaces.
Split-tone your highlights and shadows—warm highlights (amber/orange) paired with cool shadows (blue/teal) create that professional nighttime water aesthetic you see in resort photography.
Reduce Noise While Preserving Image Detail
Apply noise reduction before sharpening to avoid amplifying grain in your high-ISO shots. Use luminance noise reduction at 25-40% while keeping chrominance noise reduction minimal to preserve water texture details.
Target noise reduction to shadow areas only—your pool lights and moon reflections contain crucial detail that aggressive noise reduction will destroy completely.
Balance Highlights and Shadows for Professional Results
Recover blown highlights in pool lighting and moon reflections using highlight recovery tools, then lift shadows to reveal foreground details without creating an unnatural HDR look.
Use graduated filters to balance bright sky areas with darker water surfaces. This technique mimics what your eyes saw naturally and prevents that flat, overprocessed appearance common in nighttime water edits.
Conclusion
These seven nighttime photography techniques will transform your pool and beach shots from ordinary to extraordinary. You now have the knowledge to master low-light settings work with artificial lighting and capture stunning water movement that showcases the magic after dark.
Remember that great nighttime water photography combines technical skill with creative vision. Practice these methods during different moon phases and lighting conditions to develop your own unique style. The interplay between water artificial lights and natural darkness creates endless possibilities for breathtaking images.
Your camera is ready and you’ve got the tools – now it’s time to head out and start capturing those mesmerizing nighttime water scenes that’ll make your portfolio shine.
Frequently Asked Questions
What camera settings work best for nighttime pool and beach photography?
For nighttime water photography, use ISO 800-1600 to minimize noise while capturing enough light. Set your aperture to f/1.4-f/2.8 for pools to maximize light intake, or f/4-f/5.6 for beaches when you need greater depth of field. Experiment with slow shutter speeds (1-4 seconds) for ethereal water textures, or longer exposures (15-30 seconds) for dramatic effects like star trails.
How can I use artificial lighting to improve my nighttime water photos?
Position LED lights at 45-degree angles around pools for dramatic illumination and use waterproof LED strips for backlighting effects. Underwater LED lights create beautiful color washes in pools. For beach photography, try off-camera flash to illuminate waves and use diffused flash for soft lighting on subjects. Always experiment with light placement to create depth and highlight water textures.
What equipment is essential for nighttime water photography?
You’ll need a wide-angle lens (14-35mm) to capture expansive scenes, and a sturdy carbon fiber tripod for stability during long exposures. Waterproof gear is crucial – invest in camera housings and rain covers to protect your equipment. A remote shutter release prevents camera shake during long exposures, ensuring sharp images in challenging nighttime conditions.
When is the best time to shoot nighttime water photography?
Start shooting 30 minutes before sunset to capture golden hour warmth in water reflections. The blue hour (20-30 minutes after sunset) offers perfect balance between ambient and artificial light. Plan around moon phases – full moons provide natural light for beach waves and pool surfaces, while new moons create darker skies ideal for capturing star reflections in still water.
How do I capture perfect water reflections at night?
Wait for completely still water to achieve mirror-like reflections in pools. Position lights strategically to illuminate both your subject and their reflection equally. Use a polarizing filter to reduce unwanted glare while maintaining desired reflections. For the best results, shoot when there’s no wind and the water surface is perfectly calm, creating stunning symmetrical compositions.
What composition techniques work best for nighttime water scenes?
Use leading lines from pool edges, shorelines, or walkways to guide viewers into your frame. Apply the rule of thirds by placing horizon lines and key elements along the grid lines. Frame your subjects with natural elements like palm fronds or architectural features. Look for patterns in water movement and use them to create visual interest and dynamic compositions.
How should I edit my nighttime water photos?
Boost vibrance and selectively increase contrast using luminosity masks to enhance colors without overdoing it. Apply targeted noise reduction to shadow areas while preserving detail. Use graduated filters to balance bright artificial lighting with darker water surfaces. Recover highlights carefully to maintain natural-looking results, and avoid over-processing that can make images appear artificial or unrealistic.