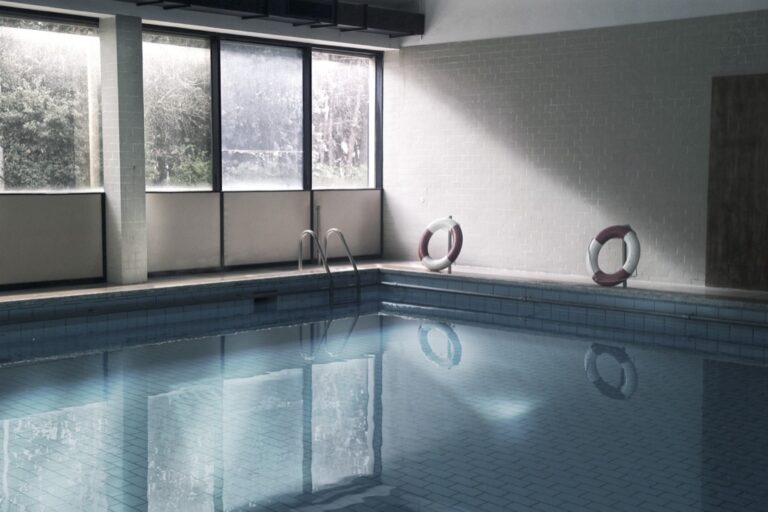
7 DIY Pool Maintenance Techniques That Save Thousands Every Summer
Discover 7 easy DIY pool maintenance techniques that save money and keep your pool sparkling clean all season. Learn essential routines for water balance, cleaning, and equipment care without professional help.
Owning a pool is a luxury, but maintaining it doesn’t have to drain your wallet. With just a few DIY techniques, you’ll save hundreds of dollars on professional services while keeping your pool crystal clear and ready for swimming.
Let’s dive into seven simple maintenance routines you can easily handle yourself, even if you’re a first-time pool owner. These time-tested methods will help extend your pool’s lifespan, reduce chemical usage, and ensure your backyard oasis remains the perfect spot for relaxation all season long.
Disclosure: As an Amazon Associate, this site earns from qualifying purchases. Thank you!
7 Essential DIY Pool Maintenance Techniques Every Owner Should Know
1. Regular Skimming and Cleaning
Skimming your pool’s surface daily removes leaves, insects, and debris before they sink. You’ll prevent clogging your filter system and reduce the amount of chlorine needed. Use a long-handled net skimmer to reach across the pool surface easily, focusing on areas where debris collects, such as corners and steps.
2. Vacuuming the Pool Floor
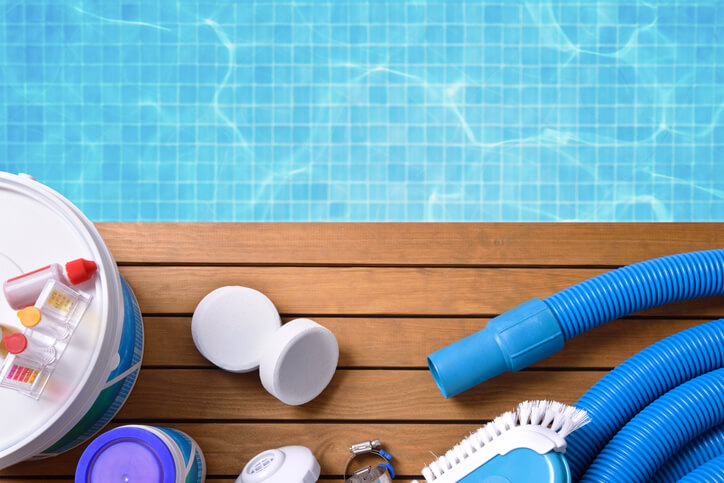
Vacuum your pool floor weekly to remove settled debris and prevent algae growth. You can use manual vacuum systems that attach to your skimmer or invest in automatic pool cleaners. Start from the shallow end and work methodically toward the deep end, overlapping your strokes to ensure complete coverage.
3. Brushing Walls and Tiles
Brush your pool walls, steps, and tiles weekly to prevent algae buildup and calcium deposits. You’ll need a pool brush with nylon bristles for vinyl or fiberglass pools or a wire brush for concrete pools. Pay special attention to corners and areas with poor circulation where algae often begins to form.
4. Maintaining Water Level
Keep your pool water at the proper level—typically halfway up the skimmer opening. Water levels drop due to evaporation and splashing, especially during hot weather or heavy use. Use a garden hose to add water when needed, but avoid overfilling which can compromise skimmer effectiveness.
5. Chemical Balance Testing
Test your pool water 2-3 times weekly using test strips or a digital tester. You’ll need to monitor pH (ideal range: 7.2-7.8), chlorine (1-3 ppm), alkalinity (80-120 ppm), and calcium hardness (200-400 ppm). Properly balanced water prevents equipment corrosion, extends your pool’s lifespan, and keeps swimmers comfortable.
6. Backwashing the Filter
Clean your filter regularly through backwashing (for sand or DE filters) or rinsing (for cartridge filters). You’ll know it’s time when the pressure gauge rises 8-10 psi above normal operating pressure. This maintenance prevents clogs, ensures efficient water flow, and extends the life of your filtration system.
7. Shocking the Pool
Shock your pool every 1-2 weeks to eliminate contaminants and maintain water clarity. You’ll need to add a large dose of chlorine (or non-chlorine shock) to quickly kill bacteria and algae. Always shock during evening hours and run the pump overnight to properly distribute the chemicals before swimming resumes.
1. Skimming and Brushing: Your Pool’s First Line of Defense
Weekly Skimming Schedule for Debris-Free Water
Daily skimming prevents debris from sinking and clogging your filter system. Use a long-handled net to remove leaves, bugs, and dirt every morning when debris sits on the surface. For optimal results, skim after storms and windy days when more debris accumulates. Set aside 5-10 minutes daily to maintain crystal-clear water with minimal effort.
Effective Brushing Techniques to Prevent Algae Growth
Brush your pool walls, steps, and ladder weekly with a stiff-bristled brush for concrete pools or a soft-bristled option for vinyl liners. Work from top to bottom in overlapping strokes to dislodge invisible algae spores before they take hold. Focus extra attention on shaded areas and corners where algae commonly develops. Always brush before vacuuming to maximize cleaning efficiency.
2. Balancing Chemical Levels: The Science of Crystal Clear Water
Maintaining proper chemical balance is the cornerstone of pool health and clarity. Without it, your crystal clear pool can quickly turn cloudy, green, or become a breeding ground for bacteria.
Testing pH, Chlorine, and Alkalinity Like a Pro
Testing your pool water isn’t just for professionals—you can master it in minutes. Purchase a reliable test kit with color-coded charts for easy interpretation. Test your water 2-3 times weekly, ideally at the same time of day for consistency. Focus on three critical measurements: pH (ideal range: 7.2-7.8), chlorine levels (1-3 ppm), and total alkalinity (80-120 ppm). Record your readings to track patterns and anticipate seasonal adjustments.
Adjusting Chemical Imbalances Without a Professional
Correcting chemical imbalances is simpler than you might think with the right approach. For high pH, add muriatic acid or sodium bisulfate, following package instructions and adding in small increments. Low pH requires sodium carbonate (soda ash) to raise levels safely. Maintain chlorine with tablets in your skimmer basket or a floating dispenser. Always add chemicals to water (never water to chemicals) and wait 4-6 hours between adjustments to allow for proper circulation and accurate follow-up testing.
3. Maintaining Proper Water Levels: The Overlooked Essential
Proper water level maintenance is often overlooked but critical for your pool’s health and equipment longevity. Incorrect water levels can damage your pump, reduce skimmer effectiveness, and create expensive problems.
Identifying the Ideal Water Line for Your Pool
The perfect water level sits halfway up your skimmer opening—typically 1/3 to 1/2 way up the skimmer box. This “Goldilocks zone” ensures optimal circulation and filtration while protecting your pump from running dry. Check your water level weekly with a quick visual inspection, especially during hot summer months when evaporation accelerates.
Handling Water Level Changes After Heavy Rain or Evaporation
After heavy rainfall, use your pool’s drain valve to remove excess water until it returns to mid-skimmer level. During drought or heat waves, connect a garden hose to refill gradually, checking every 20-30 minutes to prevent overfilling. Remember that dramatic water level changes require re-testing your chemical balance, as rainwater can dilute your carefully calibrated chemistry.
4. Cleaning and Backwashing Your Filter System
Your pool filter is the heart of your water circulation system, trapping debris and contaminants that your skimmer misses. Regular maintenance keeps water flowing efficiently and extends the life of your equipment.
When and How to Backwash Different Filter Types
For sand filters, backwash when pressure gauge reads 8-10 PSI above normal. Turn valve to “backwash,” run pump for 2-3 minutes until water runs clear, then rinse for 30 seconds. Cartridge filters require removal and hosing down when pressure increases by 8-10 PSI. DE filters need backwashing similar to sand filters, followed by adding fresh diatomaceous earth through the skimmer.
DIY Filter Cleaning Methods to Extend Equipment Life
Soak cartridge filters in trisodium phosphate solution overnight to dissolve oils and minerals. For sand filters, add filter cleaner through skimmer annually to break down collected oils. Clean DE filter grids with garden hose spray, avoiding high pressure that damages fabric. Always inspect O-rings and gaskets during cleaning, applying lubricant to prevent leaks and cracks.
5. Shocking Your Pool: Eliminating Contaminants and Bacteria
Step-by-Step Guide to Properly Shocking Your Pool
- Test your water first using a reliable test kit to determine the current chlorine level.
- Calculate the proper amount of shock needed based on your pool’s volume (typically 1 pound per 10,000 gallons).
- Mix the shock in a bucket of water if using granular shock—never add shock directly to the pool.
- Add the shock solution to your pool during evening hours to prevent UV degradation.
- Run your filter for at least 8 hours after shocking to properly distribute the chemicals.
- Wait to swim until chlorine levels return to 1-3 ppm (typically 24 hours).
Seasonal Shocking Schedule for Year-Round Clarity
Spring Opening: Shock your pool with a double dose when removing the cover to eliminate contaminants that accumulated during winter.
Summer Maintenance: Shock every 1-2 weeks during peak swimming season, increasing frequency during heat waves or after heavy pool use.
Fall Preparation: Apply a strong shock treatment before closing to ensure your pool remains clear throughout winter months.
After Heavy Use: Always shock following parties or when many swimmers have used the pool to eliminate body oils and contaminants.
6. Vacuuming Techniques for Different Pool Types
Manual vs. Automatic Vacuuming: Choosing the Right Method
Manual vacuuming gives you precise control over where you clean, making it ideal for spot-cleaning and smaller pools. You’ll need a vacuum head, telescopic pole, and hose connected to your skimmer or dedicated vacuum line. Automatic cleaners (suction-side, pressure-side, or robotic) offer convenience for regular maintenance but may miss corners and steps. Consider your pool size, debris type, and available time when selecting between these options.
Targeting Problem Areas for Maximum Efficiency
Focus your vacuuming efforts on areas where debris naturally collects—corners, steps, and around ladders. Vacuum in slow, overlapping strokes, moving from the shallow end toward the deep end to prevent stirring up settled debris. For vinyl pools, use brush-style vacuum heads to prevent tears, while concrete pools benefit from wheeled models that navigate over rough surfaces. Always vacuum after brushing to capture dislodged particles for cleaner results.
7. Winterizing Your Pool to Prevent Seasonal Damage
Complete Checklist for Proper Pool Closing
Winterizing your pool properly prevents costly damage from freezing temperatures. Start by deeply cleaning the pool, removing all debris and vacuuming thoroughly. Balance your water chemistry with winter-specific levels (pH: 7.2-7.6, alkalinity: 80-120 ppm). Lower the water level below skimmer openings but not below return jets. Remove, clean, and store all removable equipment including ladders, pumps, and filters. Finally, install a quality winter cover secured with water bags or weights.
DIY Winterization Supplies and Their Proper Use
Gather essential winterization supplies before temperatures drop: winter pool cover, water tubes or cover weights, winterization chemical kit, pool antifreeze (non-toxic), expansion plugs for return lines, and a skimmer plate or plug. Use antifreeze only in plumbing lines, never directly in pool water. Apply winter algaecide as directed on the package, typically adding it 24 hours before covering. Distribute winter chemicals throughout the pool using a pool brush to ensure even protection. Store unused chemicals in a dry, temperature-controlled environment for next season.
Conclusion: Mastering DIY Pool Maintenance for a Sparkling, Healthy Swimming Environment
Taking control of your pool maintenance isn’t just cost-effective—it’s empowering. With these seven DIY techniques you’ve got everything needed to keep your swimming oasis pristine all season long.
Remember that consistency is key. Implementing these practices regularly will prevent small issues from becoming expensive problems while ensuring your pool remains inviting and safe for everyone to enjoy.
You don’t need professional expertise to maintain a beautiful pool. Armed with the right knowledge and a few basic tools you can protect your investment and spend more time enjoying your backyard retreat than worrying about its upkeep.
Happy swimming in your crystal-clear waters!
Frequently Asked Questions
How often should I skim my pool?
Skimming should be done daily to remove floating debris like leaves, bugs, and hair. This quick 5-minute task prevents debris from sinking to the bottom and clogging your filter. Use a long-handled net skimmer to reach across the pool surface effectively. Regular skimming keeps your pool looking clean and reduces the burden on your filtration system.
What’s the proper water level for my pool?
The ideal water level is halfway up the skimmer opening. Too high, and the skimmer door won’t work effectively; too low, and you risk damaging your pump. Check levels weekly and after heavy rain or periods of high evaporation. Use a garden hose to add water or your pump to drain excess water as needed.
How often should I test my pool’s chemical balance?
Test your pool water 2-3 times per week during swimming season and once weekly during off-season. Focus on pH (ideal range: 7.2-7.8), chlorine (1-3 ppm), alkalinity (80-120 ppm), and calcium hardness (200-400 ppm). Consistent testing helps prevent algae growth, equipment corrosion, and skin/eye irritation from imbalanced chemicals.
When should I shock my pool?
Shock your pool every 1-2 weeks during swimming season and after heavy use, rainstorms, or when water appears cloudy. Apply shock in the evening to prevent UV degradation of the chemicals. Double the dose in spring opening, maintain regular shocking during summer, and apply a strong treatment before winter closing for year-round clarity.
How do I clean my pool filter?
Backwash sand or DE filters when pressure rises 8-10 PSI above normal. For cartridge filters, remove and hose them down every 2-4 weeks. Deep clean filters seasonally by soaking in a filter cleaning solution. Always inspect O-rings and gaskets during cleaning and replace damaged components to prevent leaks.
Manual vs. automatic vacuuming: which is better?
Both have advantages. Manual vacuuming provides precise control for spot-cleaning and is best for targeting problem areas like corners and steps. Automatic cleaners offer convenience and continuous cleaning but may miss certain spots. Choose based on your pool size, debris type, and available time. For best results, vacuum after brushing.
What are the essential steps for winterizing my pool?
Properly close your pool by deep cleaning, balancing water chemistry (pH: 7.2-7.6, alkalinity: 80-120 ppm), lowering water level below skimmers, blowing out pipes, adding winterization chemicals, and installing a secure winter cover. Use pool antifreeze in plumbing lines in freezing climates. Complete winterization prevents equipment damage and makes spring opening easier.