
7 Best Ways to Clean Pool Tile and Grout That Save You Hundreds
Discover 7 effective DIY methods to clean pool tiles and grout using household items like baking soda, vinegar, and pumice stones. Save money while restoring your pool’s sparkle without harsh chemicals or costly professional services.
Your pool’s sparkling water can’t hide those unsightly stains creeping across your tiles and grout lines. Those stubborn calcium deposits waterline rings and algae buildup don’t just look badâthey can actually damage your pool’s surface over time.
The good news? You don’t need expensive professional cleaning services to restore your pool’s pristine appearance. With the right techniques and common household items you can tackle even the toughest tile and grout stains yourself.
Ready to transform your pool from grimy to gorgeous? These seven proven methods will help you achieve professional-level results without breaking the bank.
Disclosure: As an Amazon Associate, this site earns from qualifying purchases. Thank you!
Baking Soda Paste Method for Gentle Pool Tile Cleaning
ARM & HAMMER Baking Soda ensures fluffier baked goods with its pure, fine-grade formula. Made in the USA, it's also a versatile solution for cleaning, deodorizing, and more around your home.

Baking soda offers one of the safest approaches for tackling stubborn calcium buildup without risking damage to your pool’s delicate tile surfaces. This natural abrasive works particularly well on lighter stains while being gentle enough for regular maintenance cleaning.
Creating the Perfect Baking Soda Mixture
Mix three parts baking soda with one part water to create a thick, spreadable paste. The consistency should resemble toothpaste – thick enough to cling to vertical surfaces but workable enough to spread evenly. Add water gradually since too much liquid creates a runny mixture that won’t adhere properly to your pool tiles.
Durable porcelain tiles resist water, stains, and fading, making them ideal for pools, kitchens, and bathrooms. Each box contains 20 blue glazed tiles (5.7" x 5.7") covering 5 sq ft.

Application Techniques for Maximum Effectiveness
Apply the paste using a soft-bristled brush or microfiber cloth, working in small 3-foot sections at a time. Let the mixture sit for 10-15 minutes to penetrate calcium deposits and algae stains. Focus on heavily stained areas by applying slightly thicker layers, ensuring complete coverage of discolored grout lines and tile surfaces.
Scrubbing and Rinsing Best Practices
Scrub gently using circular motions with a non-abrasive brush to avoid scratching tile surfaces. Work from top to bottom to prevent dirty water from running over clean areas. Rinse thoroughly with clean water immediately after scrubbing each section, as dried baking soda residue can leave white streaks on dark tiles.
Muriatic Acid Solution for Heavy Calcium Buildup
Etch and brighten concrete or masonry with Klean-Strip Green Muriatic Acid. This formula removes excess mortar and produces 90% less fumes than standard muriatic acid.
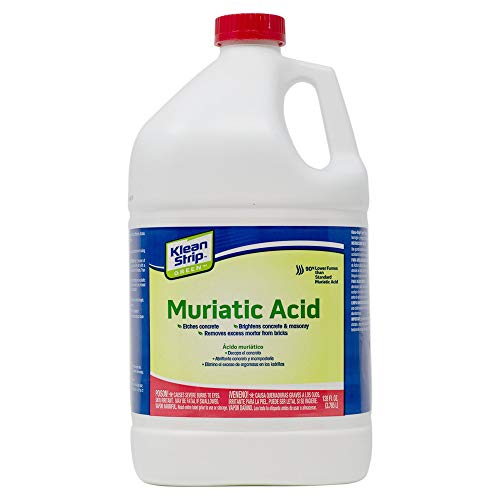
When baking soda won’t cut through severe calcium deposits, muriatic acid becomes your heavy-duty solution. This powerful cleaner dissolves stubborn mineral buildup that’s been accumulating for months or years.
Safety Precautions When Using Muriatic Acid
Always wear protective gear including rubber gloves, safety goggles, and long sleeves before handling muriatic acid. Work in well-ventilated areas to avoid inhaling dangerous fumes. Never mix muriatic acid with other chemicals, and keep children and pets away from the work area. Store acid in original containers away from metal surfaces.
Proper Dilution Ratios and Mixing Instructions
Mix one part muriatic acid with ten parts water for standard calcium removal. Always add acid to water, never water to acid, to prevent dangerous splashing and heat generation. Use a plastic bucket and stir gently with a plastic utensil. For lighter buildup, dilute further to a 1:20 ratio.
Step-by-Step Application Process
Apply the diluted solution using a plastic spray bottle or brush, working in small 3-foot sections. Let the acid sit for 30-60 seconds while monitoring the fizzing reaction. Scrub gently with a plastic brush, then rinse immediately with pool water. Neutralize any remaining acid residue with baking soda before moving to the next section.
Pumice Stone Scrubbing for Stubborn Waterline Stains
Remove rough skin and calluses with this natural pumice stone set. The ergonomic design ensures comfortable use, while the attached rope allows for easy drying and storage.
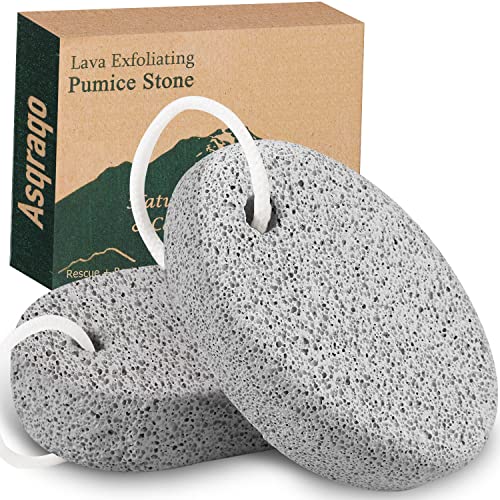
Pumice stone tackles the toughest waterline calcium deposits that resist other cleaning methods. This volcanic rock’s abrasive texture cuts through mineral buildup without harsh chemicals.
Selecting the Right Type of Pumice Stone
Choose a fine-grit pumice stone specifically designed for pools rather than foot care pumice. Pool-grade pumice stones feature consistent porosity that won’t scratch ceramic or porcelain tiles. Avoid coarse pumice stones used for concrete cleaning, as they’ll damage delicate pool surfaces permanently.
Wet Scrubbing Technique to Avoid Tile Damage
Keep both the pumice stone and tile surface completely wet throughout the cleaning process. Use gentle circular motions with light pressure, letting the stone’s texture do the work. Test on an inconspicuous area first to ensure your technique won’t scratch the tile finish.
Areas Where Pumice Works Most Effectively
Focus pumice stone cleaning on waterline areas where calcium deposits appear thickest and most stubborn. Target corners where circulation is poor and mineral buildup concentrates. Skip glass tiles entirely, as pumice will scratch them regardless of technique or pressure applied.
Commercial Pool Tile Cleaner Application
Easily clean pool tile, grout, and vinyl liners with this 2-pack of hand-held scrubbing sponge pads. These versatile scrubbers also work great on kitchen, bathroom, and shower surfaces.

Commercial pool tile cleaners offer powerful solutions when household methods aren’t enough for your toughest stains. These specialized products deliver consistent results with less physical effort than DIY alternatives.
Choosing the Best Commercial Cleaning Products
Look for cleaners specifically formulated for pool environments rather than general-purpose bathroom products. Pool-specific cleaners handle calcium, mineral deposits, and algae stains without affecting water chemistry.
Select enzyme-based cleaners for organic stains like algae and oil, while acid-based formulas work best for mineral deposits. Popular brands like CLR Pro and Tile & Grout cleaners provide targeted solutions for different stain types.
Following Manufacturer Instructions for Optimal Results
Always read dilution ratios carefully before applying any commercial cleaner to your pool tiles. Most products require specific mixing ratios – typically 1:4 or 1:8 with water – for safe and effective cleaning.
Apply cleaners to wet surfaces and allow recommended dwell times, usually 5-10 minutes. Test products on inconspicuous areas first, especially with natural stone or specialty tiles that may react differently.
Frequency Recommendations for Regular Maintenance
Use commercial cleaners monthly during peak swimming season and every 6-8 weeks during off-season periods. Regular applications prevent buildup that requires stronger concentrations later.
Schedule deep cleaning with commercial products at season opening and closing. This timing prevents stain accumulation and keeps your pool looking professional without excessive chemical exposure throughout the swimming season.
Pressure Washing Method for Large Pool Areas
Pressure washing transforms tedious tile cleaning into an efficient process for expansive pool surfaces. This method excels when you’re dealing with extensive waterline stains across large pool perimeters.
Equipment Selection and Pressure Settings
Choose a pressure washer rated between 1,500-2,500 PSI for pool tile cleaning without causing damage. Electric models offer better control than gas-powered units for delicate tile surfaces.
Set your pressure to 1,200-1,800 PSI initially and adjust based on stain severity. Use a 25-degree nozzle tip to balance cleaning power with surface protection across your pool’s tile line.
Proper Angle and Distance Techniques
Maintain a 45-degree angle when directing the spray at waterline stains for optimal cleaning effectiveness. Hold the nozzle 6-12 inches from the tile surface to prevent cracking or chipping.
Move the wand in consistent sweeping motions rather than concentrating on single spots. Work from top to bottom along the waterline to prevent dirty water from re-staining cleaned areas.
Pre-Treatment Steps for Enhanced Cleaning
Apply a pool-safe degreaser or specialized tile cleaner 10-15 minutes before pressure washing stubborn buildup areas. This pre-treatment softens calcium deposits and organic stains for easier removal.
Wet the entire tile surface with pool water before starting to prevent thermal shock from pressure washing. Lower your pool’s water level 2-3 inches below the tile line for complete access to stained areas.
Vinegar and Water Solution for Eco-Friendly Cleaning
White vinegar offers a natural alternative that effectively dissolves mineral deposits without harsh chemicals. This household staple combines cleaning power with environmental responsibility.
Creating the Ideal Vinegar-to-Water Ratio
Mix one part white vinegar with two parts water for optimal cleaning strength. This 1:2 ratio provides enough acidity to break down calcium buildup while remaining gentle on tile surfaces. Store the solution in a spray bottle for easy application across your pool’s waterline area.
Natural Scrubbing Tools That Work Best
Soft-bristled brushes and microfiber cloths work perfectly with vinegar solutions without scratching delicate tile surfaces. Natural sea sponges provide gentle abrasion for stubborn spots. Avoid steel wool or abrasive pads that can damage grout lines and create permanent scratches on ceramic tiles.
Environmental Benefits of This Cleaning Method
Vinegar breaks down naturally without harming pool water chemistry or surrounding landscaping. Unlike commercial cleaners containing phosphates or chlorinated compounds, this method won’t disrupt beneficial bacteria in nearby soil. You’ll reduce chemical runoff while maintaining effective cleaning power for regular maintenance sessions.
Professional Steam Cleaning for Deep Grout Restoration
Steam cleaning reaches those deep grout lines where calcium deposits and algae hide from traditional cleaning methods. This professional service uses high-temperature steam to break down years of accumulated grime without harsh chemicals.
When to Consider Professional Steam Treatment
You’ll need professional steam treatment when grout lines show persistent discoloration despite regular cleaning efforts. Steam cleaning becomes essential for pools over five years old with original grout that’s never received deep restoration. Consider this service when waterline stains extend deep into porous grout surfaces that resist DIY cleaning methods.
Cost-Benefit Analysis of Professional Services
Professional steam cleaning typically costs $300-600 for standard residential pools but eliminates years of embedded stains in one session. You’ll save money long-term by preventing grout replacement, which costs $800-1,500 for typical pool installations. The investment pays off through extended grout life and reduced need for harsh chemical cleaners throughout the season.
Maintenance Tips After Professional Cleaning
Schedule monthly tile cleaning using gentle vinegar solutions to preserve your professional steam cleaning results. Apply grout sealer within 48 hours of steam treatment to protect freshly cleaned surfaces from future staining. Brush grout lines weekly with soft-bristled tools to prevent calcium deposits from penetrating deep into the cleaned porous surfaces.
Conclusion
Maintaining pristine pool tiles and grout doesn’t have to drain your wallet or require professional intervention. With these seven proven methods at your disposal you can tackle everything from light calcium buildup to stubborn waterline stains using readily available household items and tools.
Remember that consistency is key to preventing major staining issues. Regular maintenance using gentle methods like vinegar solutions and baking soda paste will keep your pool looking its best while saving you from more intensive cleaning sessions down the road.
Whether you choose eco-friendly approaches or need the power of commercial cleaners the right technique for your specific situation is within reach. Your pool’s beauty and your family’s enjoyment depend on taking action before minor stains become major headaches.
Frequently Asked Questions
What is the best DIY method for removing calcium buildup from pool tiles?
The baking soda paste technique is highly effective for calcium deposits. Mix three parts baking soda with one part water to create a thick paste. Apply to affected areas, let sit for 10-15 minutes, then scrub gently and rinse thoroughly. This method is safe for delicate tiles and provides excellent results without harsh chemicals.
How do I safely use muriatic acid for severe calcium deposits?
Always wear protective gear and ensure proper ventilation. Dilute muriatic acid according to manufacturer instructions, typically 10:1 water to acid ratio. Apply in small sections, monitor the fizzing reaction, scrub gently with a non-abrasive brush, and rinse immediately with pool water. Never mix with other chemicals.
Can I use a pressure washer on pool tiles?
This electric pressure washer delivers powerful cleaning with a 2.5 GPM water flow. It includes four quick-connect nozzles and a foam cannon for versatile cleaning of cars, patios, and more.

Yes, but use caution. Select a pressure washer rated between 1,500-2,500 PSI with initial settings of 1,200-1,800 PSI. Use a 25-degree nozzle, maintain a 45-degree angle, and keep the nozzle 6-12 inches from tile surfaces. Pre-treat with pool-safe degreaser for better results.
Is vinegar safe for cleaning pool tiles?
Absolutely. Vinegar is an eco-friendly alternative that effectively dissolves mineral deposits. Mix one part white vinegar with two parts water in a spray bottle. Use soft-bristled brushes or microfiber cloths for scrubbing. Vinegar won’t disrupt pool chemistry or harm surrounding landscaping.
When should I consider professional steam cleaning?
Consider professional steam cleaning for deep grout restoration when regular cleaning methods fail, especially for older pools with persistent stains. While it costs $300-600, it extends grout life and reduces the need for harsh chemicals, making it cost-effective long-term.
How often should I use commercial pool tile cleaners?
Use commercial pool tile cleaners monthly during peak swimming season and every 6-8 weeks during off-season. Schedule deep cleaning at the beginning and end of each season. Choose enzyme-based cleaners for organic stains and acid-based formulas for mineral deposits.
What’s the proper technique for using pumice stone on pool tiles?
Use a fine-grit pumice stone specifically designed for pools. Keep both the stone and tile surface wet throughout cleaning. Work in small circular motions with gentle pressure, focusing on waterline stains. Rinse frequently to remove loosened debris and prevent scratching.
