7 How to Fit a Life Jacket Correctly Steps That Save Lives
Learn essential steps to properly fit your life jacket for maximum safety on the water. Expert tips on sizing, adjusting straps, and testing fit.
Why it matters: A poorly fitted life jacket can be the difference between life and death on the water – yet most people don’t know how to properly adjust one.
This clear storage bag contains four US Coast Guard-approved adult life jackets for convenient storage and boating safety. The Type II vests fit adults 90+ lbs with adjustable straps and provide essential flotation.

The big picture: Whether you’re kayaking calm lakes or navigating rough seas, your life jacket only works if it fits correctly and stays in place when you need it most.
What’s ahead: We’ll walk you through the essential steps to ensure your life jacket fits properly, stays secure, and gives you the best chance of survival in an emergency.
Disclosure: As an Amazon Associate, this site earns from qualifying purchases. Thank you!
Choose the Right Size Life Jacket for Your Body Type
Your body type directly impacts which life jacket will keep you safest on the water. The wrong size can slip off in an emergency or restrict your movement when you need it most.
Measure Your Chest Circumference Accurately
Wrap a measuring tape around the fullest part of your chest, keeping it level under your arms. Take this measurement over the clothes you’ll typically wear while boating. Most manufacturers size their jackets based on chest measurements rather than clothing sizes, so you’ll get a more accurate fit this way.
Get accurate measurements with this 2-pack of durable tape measures. Includes a 60-inch double-sided soft pink tape and a retractable black tape for easy use in sewing, crafting, and body measurements.

Check Weight Capacity Requirements
Life jackets list both chest size and weight ranges on their labels for good reason. Your weight affects how much buoyancy you need to stay afloat safely. If you’re between sizes, always choose the larger option – it’s better to have slightly loose straps than insufficient flotation when you need it most.
Consider Different Body Shapes and Proportions
Torso length matters as much as chest size when selecting your jacket. Shorter torsos need jackets that won’t ride up over your face, while longer torsos require adequate coverage without gaps at the waist. Women’s-specific designs account for different body proportions and provide better comfort and security than unisex models.
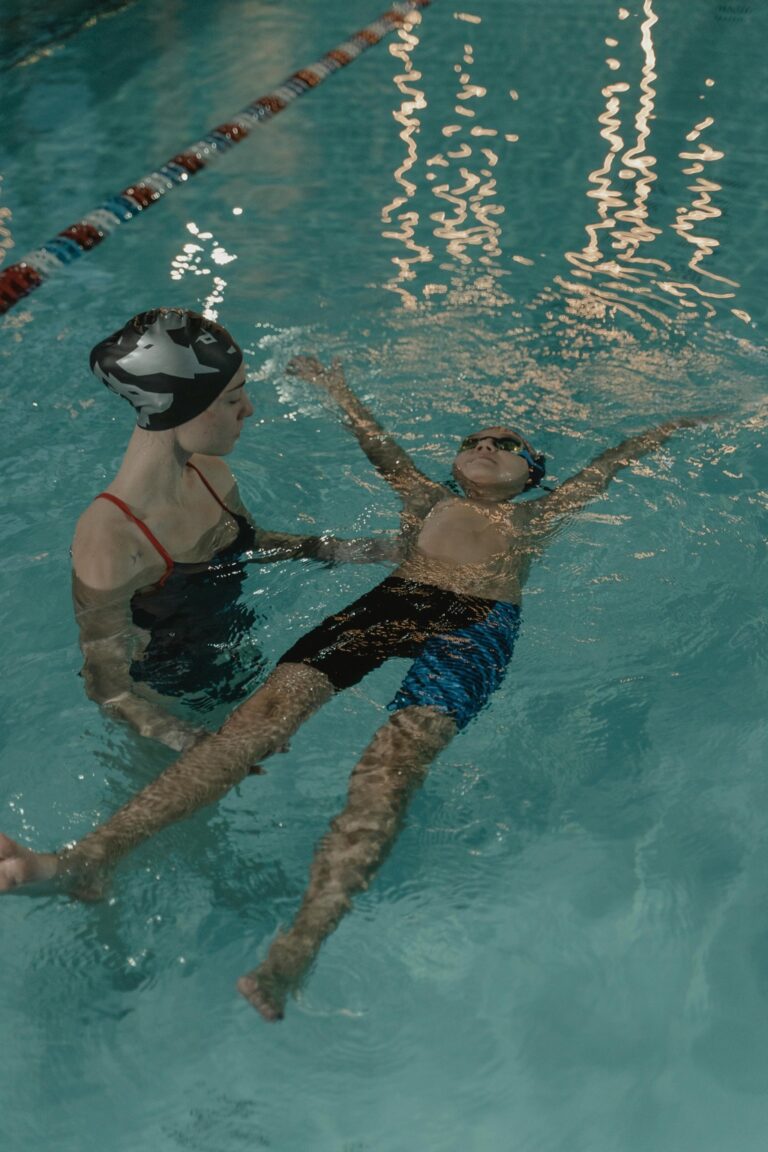
Put On the Life Jacket Using Proper Technique
Now that you’ve selected the right size, putting it on correctly becomes your next critical step for water safety.
Step Into or Slip Over Your Head Correctly
Front-entry life jackets should be unzipped completely before putting them on. Step into the armholes first, then pull the jacket up and over your shoulders like putting on a vest. Back-entry models require you to slip them over your head, ensuring the back panel sits flat against your spine without twisting or bunching.
Position the Jacket at the Right Height
The life jacket’s bottom edge should sit at your natural waistline, not riding up toward your ribs. If it sits too high, you’ll feel restricted when bending or paddling. Too low and the jacket won’t provide proper flotation around your chest cavity where you need it most during an emergency.
Ensure Even Distribution Across Your Torso
Check that both sides of the jacket hang evenly and the front panels align symmetrically. Adjust the shoulder straps so the jacket doesn’t pull to one side or create gaps under your arms. The fabric should lay flat against your torso without excess material bunching at the sides or back.
Secure All Straps and Buckles in the Correct Order
Securing your life jacket properly requires following a specific sequence that ensures maximum safety and comfort. The order matters because each strap affects how the others fit and function.
Fasten the Main Chest Straps First
Start with the primary chest buckle or zipper as your foundation. This central closure provides the jacket’s primary security and determines how all other straps will align. Pull the chest strap snug but not tight—you should fit one finger between the strap and your body. Check that the buckle lies flat against your chest without twisting.
Achieve a flawless, semi-matte complexion with e.l.f. Flawless Satin Foundation. This lightweight, vegan formula provides medium coverage that blends seamlessly to improve skin tone and texture.

Adjust Side Straps for Proper Fit
Tighten the side adjustment straps next to eliminate excess fabric and gaps. These straps prevent the jacket from riding up when you’re in the water. Pull each side strap evenly until the jacket hugs your torso without restricting arm movement. Test your range of motion by raising your arms overhead—the jacket shouldn’t shift or pull uncomfortably.
Tighten Waist and Crotch Straps as Needed
Secure the waist belt and crotch strap last to lock everything in place. The waist strap should sit at your natural waistline and feel snug without cutting into your body. If your jacket has a crotch strap, adjust it to prevent the jacket from riding up over your head in turbulent water. Leave enough slack for comfortable sitting and movement.
This 3-pack of XZQTIVE leather belts enhances any outfit. The 1.1-inch belts feature a shiny gold buckle with secure metal loops and come in multiple sizes and colors.

Test the Fit Using the Lift Test Method
After securing all straps and buckles, you’ll need to perform the crucial lift test to verify your life jacket won’t slip off in the water. This simple but essential test reveals whether your jacket is properly adjusted before you hit the water.
Have Someone Lift You by the Shoulders
Ask a partner to grasp your life jacket at both shoulder straps and lift straight up with steady pressure. Your jacket should stay firmly in place without riding up excessively on your torso. If the jacket shifts dramatically or pulls away from your body during this test, you’ll need to tighten the straps further before getting in the water.
Check for Proper Ride-Up Prevention
Monitor how much your life jacket moves upward during the shoulder lift test – it should rise no more than a few inches. Excessive ride-up indicates loose straps that could allow the jacket to slip over your head in an emergency. Properly adjusted side straps and waist belts prevent this dangerous upward movement while maintaining your mobility.
Ensure Your Chin and Ears Stay Clear
Your chin and ears must remain completely free during the lift test without any contact from the jacket’s collar or upper portions. If the jacket rises high enough to touch your chin or obstruct your ears, it’s too loose and poses a serious safety risk. Readjust all straps until you can perform the lift test with full head movement and clear airways.
Adjust for Comfort and Mobility
After securing all straps and passing the lift test, you’ll need to fine-tune your life jacket for optimal performance during water activities.
Fine-Tune Strap Tightness
Loosen straps slightly if you feel restricted breathing or arm movement. You should be able to slide one finger under each strap comfortably. The jacket needs to stay snug against your torso without creating pressure points that’ll become painful during extended wear on the water.
Test Range of Motion
Perform paddling motions, reaching overhead, and bending forward to ensure unrestricted movement. Swing your arms in full circles and twist your torso side to side. If any strap binds or pulls during these movements, adjust the corresponding buckle until you achieve smooth motion without compromising security.
Make Final Positioning Adjustments
Check that the jacket sits at your natural waistline and hasn’t shifted during your movement tests. The bottom edge should align with your hip bones, not ride up toward your ribs or slip down past your waist. Redistribute the jacket’s position if needed, then retighten straps to lock in the optimal fit.
Verify Safety Features Are Working Properly
Even a perfectly fitted life jacket won’t save you if its safety features fail when you need them most. These final checks ensure your jacket’s built-in safety systems work properly before you hit the water.
Check Whistle and Reflective Tape Visibility
Enhance safety with this high-visibility red and white reflective tape. Its strong adhesive ensures secure application to various surfaces, while the durable, weather-resistant design provides long-lasting conspicuity.

Blow your whistle hard to confirm it produces a sharp, clear sound that carries across water. Test it multiple times since salt water or debris can clog the mechanism.
Inspect reflective tape for peeling edges or faded strips that won’t catch light effectively. Replace jackets with damaged reflective materials since visibility could mean the difference between rescue and tragedy in low-light emergencies.
Ensure Proper Buoyancy Distribution
Press down on different foam sections to check for soft spots or compressed areas that indicate worn buoyancy material. The foam should spring back immediately and feel firm throughout.
Look for uneven wear patterns or bunched-up foam that creates dead zones. If one side feels significantly softer than the other, the jacket won’t keep you upright in the water properly.
Test Emergency Release Mechanisms
Practice releasing buckles and zippers quickly while wearing the jacket to ensure you can escape if it becomes entangled. Emergency releases should work smoothly with one hand even when wet.
Check that manual inflation mechanisms pull easily and CO2 cartridges show no signs of corrosion or damage. Test automatic inflation systems according to manufacturer guidelines since a failed inflator renders the entire system useless.
Power your air rifle or pistol with this 15-count box of 12-gram Crosman CO2 cartridges. They provide a snug fit and solid seal for consistent performance.

Maintain Proper Fit Throughout Your Activity
Your life jacket’s fit changes as you move through water activities. Straps loosen, clothing shifts, and your body position adapts to different movements throughout the day.
Recheck Straps Periodically
Check your life jacket straps every 30-45 minutes during extended water activities. Vigorous paddling, swimming movements, and getting in and out of boats naturally loosens chest and side straps over time.
Pull each strap snug again, ensuring you can still slide one finger underneath. Quick periodic checks prevent dangerous loosening that could compromise your safety.
Adjust for Clothing Changes
Add or remove layers as temperature changes require immediate life jacket adjustments. Adding a fleece or rain jacket means loosening all straps to maintain proper fit and mobility.
When you shed layers, retighten straps to eliminate gaps that could allow the jacket to ride up. Your life jacket should maintain the same snug fit regardless of clothing underneath.
Monitor for Loosening During Use
Watch for telltale signs that your life jacket is shifting during activity. The jacket riding higher on your torso, increased movement around your sides, or feeling less secure indicates loosened straps.
Stop immediately to readjust when you notice these changes. A loose life jacket won’t provide proper buoyancy positioning in an emergency situation.
Conclusion
Your safety on the water depends entirely on how well your life jacket fits and functions. Remember that proper fitting isn’t a one-time task – you’ll need to make ongoing adjustments as conditions change throughout your water activities.
Take the time to perform regular checks and don’t hesitate to readjust when something feels off. A loose or improperly positioned life jacket won’t provide the protection you’re counting on during an emergency.
The few extra minutes you spend ensuring your life jacket fits correctly could make all the difference when it matters most. Your preparation today determines your safety tomorrow.
Frequently Asked Questions
How do I determine the correct size life jacket for my body?
Measure your chest circumference over typical boating clothing and check the manufacturer’s weight capacity requirements. Consider your torso length and body shape when selecting size. Women should look for women’s-specific designs for better fit and comfort. Both chest size and weight must fall within the jacket’s specifications for proper safety.
What is the proper way to put on a life jacket?
Position the jacket at your natural waistline with even distribution across your torso. For front-entry models, slip arms through and zip/buckle the front. For back-entry jackets, put arms through first, then secure the back closure. Ensure both sides hang evenly and shoulder straps don’t create gaps or pulling.
In what order should I secure the straps and buckles?
Start with the main chest strap, making it snug but not restrictive. Next, adjust side straps to eliminate excess fabric while maintaining full range of motion. Finally, tighten waist and crotch straps to lock everything in place. This sequence ensures maximum safety and comfort while preventing the jacket from shifting.
How do I perform the lift test to check proper fit?
Have a partner lift you by the shoulder straps while you relax your arms at your sides. The jacket should not ride up excessively, and your chin and ears must remain clear. If the jacket shifts significantly or touches your chin during the test, you need to readjust the straps for a more secure fit.
How often should I check my life jacket fit during water activities?
Recheck your straps every 30-45 minutes during extended activities, as they can loosen with movement and changing conditions. Monitor for signs like the jacket riding higher on your torso or feeling less secure. Always readjust immediately if you notice any loosening, and make adjustments when adding or removing clothing layers.
What safety features should I verify before using my life jacket?
Test the whistle for a clear, loud sound and inspect reflective tape for visibility. Check foam sections for firmness and proper buoyancy distribution. Verify that emergency release mechanisms work smoothly for quick access. If your jacket has manual inflation systems, ensure they function properly. These checks confirm all safety systems are reliable.