7 Best Pool Liner Repair Options For Unexpected Tears That Save Thousands
Discover 7 effective DIY pool liner repair options that save money and time. Fix tears without draining your pool using patches, adhesives, and sealants for quick, lasting results.
Discovering a tear in your swimming pool liner can quickly turn a relaxing summer day into a stressful situation. Even small rips can lead to significant water loss and potential damage to your pool’s structure if not addressed promptly.
You don’t need to drain your entire pool or call in expensive professionals for every minor tear, as there are several effective DIY repair options that can save you time and money. These seven proven repair methods range from simple patch kits to underwater adhesives that work while your pool remains filled.
Disclosure: As an Amazon Associate, this site earns from qualifying purchases. Thank you!
Understanding Pool Liner Damage: Types of Tears and When to Repair
Common Types of Pool Liner Tears
Pool liner tears typically fall into several categories based on their cause and appearance. Puncture tears are small holes caused by sharp objects like tree branches or pool accessories. Seam separations occur where liner sections join together, often due to age or water pressure. Split tears are longer rips that may result from shifting ground or improper installation. Corner tears frequently appear at stress points where the liner meets steps or corners. Stress tears develop gradually in areas where the liner stretches over time, particularly around fittings or where the floor meets the wall.
Signs Your Liner Needs Attention
You’ll know your pool liner needs repair when you notice water levels dropping faster than normal evaporation would cause. Check for wet spots around your pool’s exterior, which indicate water escaping through tears. Visible wrinkles, bubbles, or sagging in the liner suggest it’s pulling away from the wall or floor. Discoloration or brittleness points to chemical damage that weakens the material. If you can physically see tears, holes, or separated seams while inspecting the liner, immediate action is necessary to prevent further damage.
When DIY Repair Makes Sense
DIY repairs are most appropriate for small punctures under 2 inches in diameter. Fresh tears with clean edges typically respond well to patching solutions. Tears located above the water line are easier to access and repair yourself. Slow leaks that haven’t caused structural issues are good candidates for DIY fixes. Single tears rather than multiple damage points make self-repairs more manageable. If your liner is relatively new (less than 5 years old) and otherwise in good condition, patching makes economic sense versus replacement.
When to Call a Professional
Call professionals when tears exceed 6 inches in length or when you’re dealing with multiple large tears throughout the liner. Complex damage at seams or corners often requires specialized skills to repair properly. If the tear is causing significant water loss (more than 2 inches per day), expert intervention is warranted. Structural damage to the pool wall or floor beneath the liner demands professional assessment. Older liners (7+ years) with tears might be better candidates for complete replacement rather than repair. When tears appear near critical components like skimmers, returns, or main drains, professional repair reduces risks of further complications.
1. Waterproof Vinyl Repair Kits: The All-Purpose Solution
Waterproof vinyl repair kits stand as the most versatile and reliable solution for fixing unexpected pool liner tears without draining your pool.
What’s Included in Quality Vinyl Repair Kits
Quality vinyl repair kits typically contain large vinyl patches, specialized adhesive, and application tools designed to work both above and below water. You’ll find various patch sizes to accommodate tears ranging from tiny punctures to larger 8-inch rips. Most comprehensive kits also include cleaning supplies like soft cloths or sponges and detailed application instructions to ensure successful repairs.
Step-by-Step Application Process
- Identify and Clean the Area: Locate the tear and thoroughly clean the surrounding area using the provided cleaning solution and cloth.
- Prepare the Patch: Select a patch slightly larger than the tear, ensuring it’s suitable for underwater application if needed.
- Apply Adhesive: Follow manufacturer instructions to apply adhesive evenly to both the patch and liner surface.
- Stick the Patch: Press firmly to eliminate air bubbles, then apply weight for 24 hours if possible.
- Inspect Regularly: Monitor the repair during the first few days to ensure proper adhesion and longevity.
2. Underwater Adhesive Patches: No Need to Drain Your Pool
Quickly repair pool liners and inflatables with these strong, no-mess peel and stick patches. Apply underwater for fast, easy repairs without draining your pool.
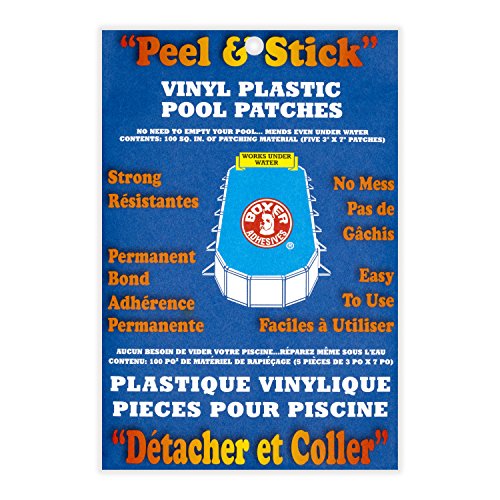
Underwater adhesive patches let you repair liner tears while your pool remains filled with water, saving you time and preventing potential damage that can occur when draining your pool.
Top Underwater Patch Brands for Emergency Repairs
For quick underwater repairs, look for premium vinyl patch kits that specifically mention underwater adhesive capability. Brands that include pre-cut patches in various sizes, clear application instructions, and specialized underwater adhesives deliver the most reliable results. Choose patches with UV-resistant properties to prevent degradation from sun exposure and chlorine.
Application Tips for Lasting Underwater Repairs
Clean the damaged area thoroughly with a soft cloth to remove algae and debris before applying the patch. Cut your patch at least 2 inches larger than the tear on all sides for maximum adhesion. Apply adhesive according to manufacturer instructions, then press the patch firmly over the tear while underwater, working from center outward to eliminate air bubbles. Allow a full 24-hour curing time before resuming normal pool use.
3. Vinyl Liner Tape: The Quick Temporary Fix
Quickly repair vinyl liners and inflatables with this self-adhesive, clear tape. Its stretchable design conforms to tears for a no-mess, underwater fix.

Vinyl liner tape serves as your first line of defense when you discover an unexpected tear in your pool liner. This specialized tape is designed specifically for underwater use, offering a quick solution when you need to stop water loss immediately.
When to Use Vinyl Liner Tape vs. Other Solutions
Vinyl liner tape is ideal for emergency situations when you need an immediate fix to prevent further water loss. Unlike standard duct tape, it’s specially formulated to be clear, UV resistant, and adhere underwater. Use this option for small tears (less than 1 inch) as a temporary solution until you can implement a more permanent repair method.
Application and Removal Techniques
Start by cutting a piece of tape slightly larger than the tear to ensure complete coverage. Apply the tape directly over the damage while underwater, pressing firmly to remove any air bubbles. For best results, clean the area around the tear before application. Remember that vinyl liner tape typically needs replacement every few weeks, as chlorine and sunlight will eventually affect its adhesion.
4. Professional-Grade Peel-and-Stick Patches: DIY Made Easy
Repair damaged leather quickly and easily with MATCH 'N PATCH tape. This durable, adhesive tape seamlessly covers rips, tears, and blemishes on furniture, car seats, and more; simply cut to size for a perfect match.

Professional-grade peel-and-stick patches offer a convenient solution for vinyl pool liner tears without requiring specialized skills or tools. These ready-to-use patches combine durability with ease of application, making them perfect for DIY repairs.
How to Choose the Right Size and Shape for Your Tear
Select a patch that extends at least 1-2 inches beyond all sides of the tear for proper sealing. Round patches are superior to square or rectangular ones as they resist edge lifting and peeling. For irregular tears, choose an oversized circular patch that completely covers the damaged area plus margin. Premium patches with color-matching options blend seamlessly with your existing liner.
Application Best Practices for Long-Lasting Results
Clean the damaged area thoroughly with a mild, non-abrasive cleaner to remove dirt, algae, and oils. Dry completely if working above water level. Remove the backing carefully without touching the adhesive surface. Apply firm, even pressure from the center outward to eliminate air bubbles. For underwater applications, hold the patch in place for 60-90 seconds. Allow 24 hours of curing time before subjecting the repair to full water pressure.
5. Two-Part Epoxy Compounds: The Heavy-Duty Solution
Loctite LocWeld™ is a strong, two-part epoxy adhesive that eliminates the need for welding or brazing. It sets in 15 minutes and resists most automotive fluids, withstanding temperatures up to 300°F.

When standard patches aren’t enough for your vinyl pool liner tears, two-part epoxy compounds offer a professional-grade solution that delivers exceptional durability and strength. These specialized adhesives create a chemical bond that’s particularly effective for challenging repair scenarios.
Mixing and Application Guidelines for Epoxy Repairs
Two-part epoxy requires careful preparation for successful application. Start by thoroughly cleaning and drying the damaged area. Mix equal parts of the resin and hardener according to manufacturer instructions until completely blended. Apply the mixture directly to the tear, ensuring it extends at least 1 inch beyond the damage in all directions. For underwater repairs, use epoxy specifically formulated for wet conditions and allow 24 hours for complete curing.
When to Choose Epoxy Over Other Repair Options
Epoxy is your best choice for tears located in high-stress areas of your pool liner where standard patches might fail. It excels at repairing larger tears (3+ inches) or complex damage that other methods can’t adequately address. Choose epoxy when you need a permanent solution rather than a temporary fix, especially for older liners that may be more vulnerable to future damage. For tears near corners, seams, or areas with irregular surfaces, epoxy provides superior conformability and adhesion.
6. Vinyl Liner Liquid Sealants: For Small Punctures and Leaks
Quickly repair tears and leaks in vinyl and rubberized items with this heavy-duty liquid vinyl repair. It creates a durable, waterproof, and flexible seal that withstands UV rays and extreme temperatures.

Vinyl liner liquid sealants provide an effective solution for minor pool liner issues like small punctures and slow leaks. These specialized formulations create a waterproof barrier that bonds directly with vinyl material to stop water loss without requiring patches.
Application Process for Different Pool Surfaces
To apply vinyl liner liquid sealants, first clean and thoroughly dry the damaged area using a mild cleaner. Apply the sealant directly to the puncture according to the manufacturer’s specific guidelines. For textured surfaces, work the sealant into crevices using a small brush. Most products come with precision applicator tips that allow for targeted application without draining your pool.
Drying Time and Post-Application Care
Drying times vary by product but typically range from 2-24 hours before the pool is safe to use again. Check the manufacturer’s instructions for the exact curing period required for your specific sealant. After application, regularly inspect the repaired area during routine pool maintenance to ensure the sealant remains intact. These liquid repairs generally last 1-2 seasons before potentially needing reapplication, especially in areas experiencing extreme temperature fluctuations.
7. Professional Pool Liner Replacement: When DIY Won’t Cut It
Signs It’s Time to Call in the Professionals
Sometimes DIY repairs simply aren’t enough for your vinyl pool liner. Call professionals when you notice multiple tears throughout the liner, significant water loss despite repairs, or if your liner is over 5-9 years old. Large tears (exceeding 6 inches), damage in hard-to-reach areas, and visible stretching or fading also indicate replacement is necessary. Don’t ignore these warning signsâdelaying replacement can lead to structural damage.
Cost Comparison: Repair vs. Replacement
Professional pool liner replacement typically costs between $1,000-$4,500, with the national average around $4,500 including labor and materials. While this exceeds DIY repair costs ($20-$100), replacement provides 5-9 years of worry-free swimming compared to temporary fixes. Factor in the cumulative expense of multiple repairs, potential water damage, and chemical imbalances when deciding. For older liners, replacement often becomes more economical than ongoing repair attempts.
Preventing Future Tears: Maintenance Tips to Extend Your Pool Liner’s Life
Armed with these seven repair options you can confidently tackle unexpected pool liner tears without draining your pool or breaking the bank. From vinyl patch kits to liquid sealants these DIY solutions provide effective temporary or permanent fixes depending on your specific situation.
Remember that proper maintenance is your best defense against future tears. Maintain proper water chemistry maintain consistent water levels and remove sharp objects from your pool area. For tears less than 2 inches your DIY skills will serve you well while larger or multiple tears signal it’s time for professional help.
With these repair methods in your homeowner toolkit you’ll enjoy uninterrupted swimming seasons and extend your liner’s lifespan saving thousands in potential replacement costs.
Frequently Asked Questions
How can I tell if my pool liner has a tear?
Look for abnormal water level drops, wet spots around the pool exterior, visible wrinkles in the liner, or discoloration. These are common signs indicating your liner may have a tear. Pool chemicals becoming less effective or requiring frequent addition can also suggest water loss through a tear.
Do I need to drain my pool to fix a liner tear?
No, you don’t need to drain your pool. Most liner tears can be repaired while the pool remains filled using underwater repair methods such as vinyl patch kits, underwater adhesives, vinyl liner tape, or liquid sealants. Draining can actually cause additional damage to the liner.
What types of pool liner tears are most common?
The most common types include puncture tears (small holes from sharp objects), seam separations (where liner sections join), split tears (larger straight-line damage), corner tears (at wall/floor junctions), and stress tears (from pressure or age). Each has distinct causes and repair requirements.
What’s the best DIY repair method for a small tear?
Waterproof vinyl repair kits are the most versatile and reliable solution for small tears under 2 inches. These kits include vinyl patches and specialized adhesive that works underwater. For even smaller punctures (less than 1 inch), vinyl liner tape can provide a quick temporary fix.
When should I call a professional instead of attempting DIY repairs?
Call professionals for tears larger than 6 inches, complex damage in multiple areas, significant water loss despite repairs, damage in hard-to-reach areas, or if your liner is over 5-9 years old. Multiple tears or visible stretching/fading also indicate potential replacement needs rather than repairs.
How long do DIY pool liner repairs typically last?
The durability varies by method. Properly applied vinyl patches and two-part epoxy repairs can last several years. Peel-and-stick patches typically last 1-3 seasons. Vinyl liner tape is temporary and needs replacement every few weeks. Liquid sealants generally last 1-2 seasons before requiring reapplication.
What supplies do I need for underwater pool liner repairs?
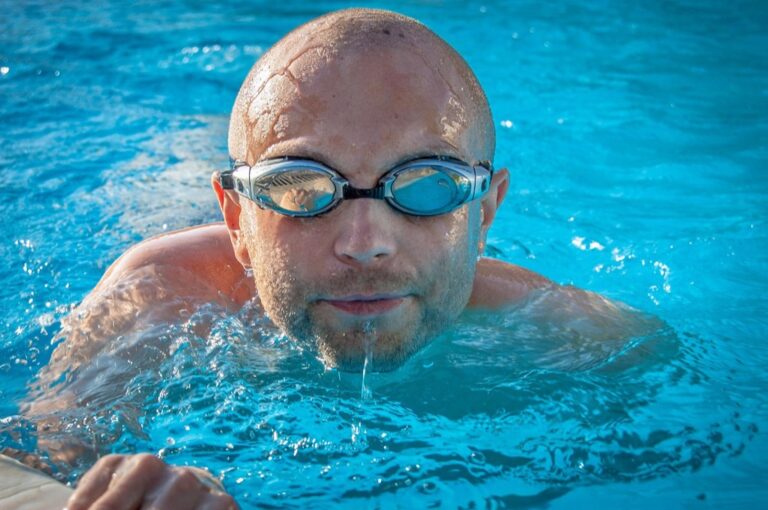
Basic supplies include a waterproof vinyl repair kit (with patches and adhesive), scissors, measuring tape, and clean rags. For underwater repairs, you’ll need goggles and possibly weights to hold patches in place. Some repairs might require additional items like two-part epoxy or specialized underwater tape.
Get accurate measurements quickly with this CRAFTSMAN tape measure. Features include easy-to-read fraction markings and a comfortable, secure rubber grip.

How much can I save by repairing my pool liner myself?
DIY repairs typically cost between $20-$75 for materials, while professional liner replacement ranges from $1,000 to $4,500 depending on pool size and liner quality. Even professional repair services cost $200-$500 per visit, making DIY solutions significantly more economical for minor damage.